In this section:
Introduction
Run configurations specify details about how tests are executed. The Selenic run configurations panel enables you to configure which functionalities should be enabled during execution. Refer to Usage for additional information on executing the run configurations you create. The following video tutorial describes how to configure Selenic run configurations.
Creating a Run Configuration with Default Settings
The recommended workflow is to select a test, package, or project and run it as a JUnit test, which creates a configuration with default settings that you can modify.
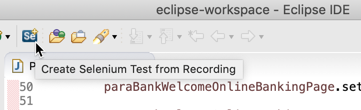
- Select a test, package, or project and choose Run> Run with Selenic> JUnit Test from the Eclipse menu. You can also click the Create Selenium Test from Recording button in the Selenic toolbar.
If the necessary WebDriver(s) are configured in the Parasoft Preferences page, then the test will start running (see Installing WebDrivers). - When the test execution completes, choose Run> Selenic Configurations...
- Click on the auto-generated run configuration under JUnit in the sidebar menu.
Click the Selenic tab and update the run configuration settings accordingly. See Selenic Run Configuration Settings.

- Click Apply to save the configuration.
Manually Creating Run Configurations
You can manually create run configurations
- Choose Run> Selenic Configurations...
- Click the New launch configuration button and click the Test tab.
- Choose JUnit 4 from the Test runner drop-down menu.
- Enable either the Run a single test or Run all test in the selected project, package or source folder option.
- If you want to use the configuration to run a single test, specify the project, test class, and test method in the appropriate fields.
- If you want to use the configuration to run a group of tests, specify the project, package, or source folder.
- Click the Selenic tab and enable your options. See Selenic Run Configuration Settings.
- Click Apply to save the configuration.
Selenic Run Configuration Settings
The following table describes Selenic run configuration settings:
| Generate recommendations | Enabling this option generates element locator recommendations. Selenic analyzes previous test runs to generate recommendations. The test must be successfully executed with Selenic at least once for Selenic to generate recommendations. The following options are available:
|
|---|---|
| Open HTML report after execution | Automatically opens the report when Selenic finishes running. The report will open either in an internal or external browser. You can configure how the report opens in the General> Web Browser screen of the IDE preference settings. |
| Self-healing | Self-healing allows test execution to continue when changes to the application may otherwise halt testing activities. Self-healing is typically enabled when executing tests from the command line. Enable this option and configure the following self-healing settings. Locators Enable this option and Selenic will automatically attempt to update broken element locators during execution. Selenic uses historical data about successful test executions to determine the best possible locator to replace a broken locator. Healed locators are flagged and included in the report for further investigation. Wait conditions Enable this option and specify by how much Selenic should extend Selenium wait conditions to prevent a timeout. You can specify a percentage of the original value that should be added when a wait condition is identified. For example, if a wait condition is configured for You can also specify a minimum number of seconds to add for all wait conditions identified by Selenic in the Minimum additional time (seconds) field. |
| Take screenshots on failures | Enabling this option enables the test machine to take a screenshot of the browser at the point at which a failure occurred. |
| Create API tests with Parasoft SOAtest | Enable this option if you want to create tests for REST APIs called by the application under test during test execution. API tests will be added to the workspace of the SOAtest server specified in the API Test Creation Options. A separate license feature for API test creation is required for the SOAtest server. See Parasoft Recorder for details about API test creation.
|