A filter represents a set of run configurations that enable custom views of the data stored in DTP (see DTP Concepts). Filters show a subset of data that is associated with projects in the database. Many DTP REST API services require the filter ID to be specified when calling an endpoint.
In this section:
Creating a Basic Filter
A filter is automatically created when a new project is added to DTP, but you can create additional filters to facilitate custom views of the data associated with the project.
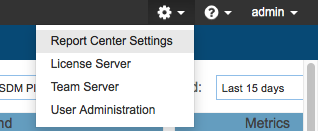
- Choose Report Center Settings from the settings menu (cog icon).
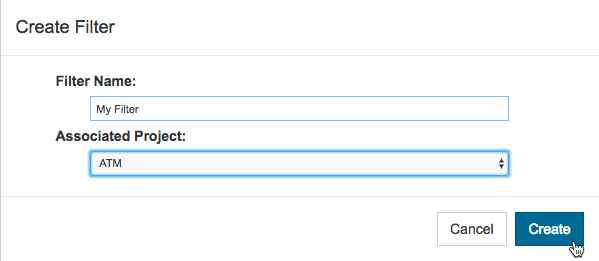
- Choose Filter from the Administration menu and click Create Filter.
- Enter a name for the filter and choose a project from the Associated Project drop-down menu.
- Click Create to add the filter.
You can still change the filter settings when the Create Filter dialog closes.
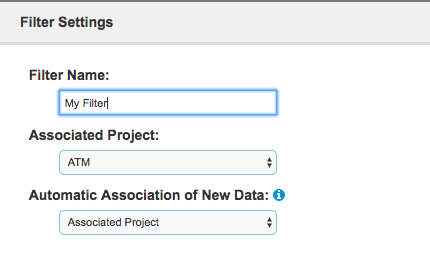
You can configure how coverage images and run configurations are added by choosing a setting from the Automatic Association of New Data drop-down menu.
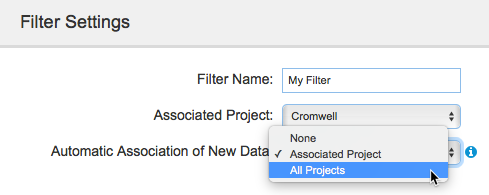
- Choose Associated Projects to automatically associate data from the associated project with the filter.
- Choose All Projects to automatically associate data from all projects with the filter.
- Choose None to disable the automatic association of data.
Changes are saved automatically. The new filter will be available in the Report Center dashboard filter drop-down menu.
Configuring Filters
After creating the filter, you can configure additional settings in the Filters Settings page. See the following sections for details about additional project configuration:
- Adding Run Configurations to Filters
- Associating Coverage Images with Filters
- Associating Resource Groups With Filters
- Setting Priorities in Filters
Editing Filters
- Choose Report Center Settings from the settings menu (cog icon).
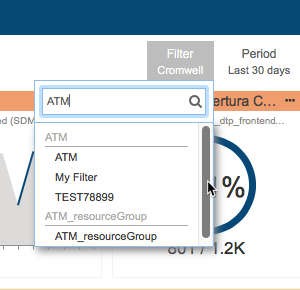
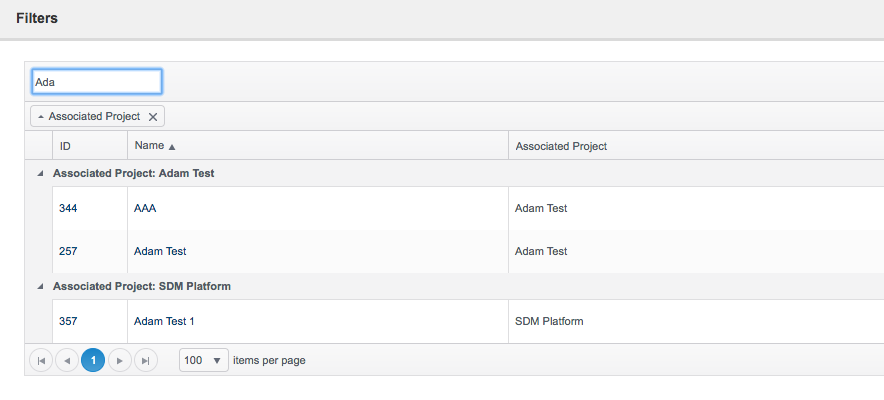
- Click on a filter name to view its settings. You can begin typing in the search bar to quickly locate your filter.
- Make changes (see Adding Run Configurations to Filters for filter configuration options) fit and click Save.
Deleting Filters
- Choose Report Center Settings from the settings menu (cog icon).
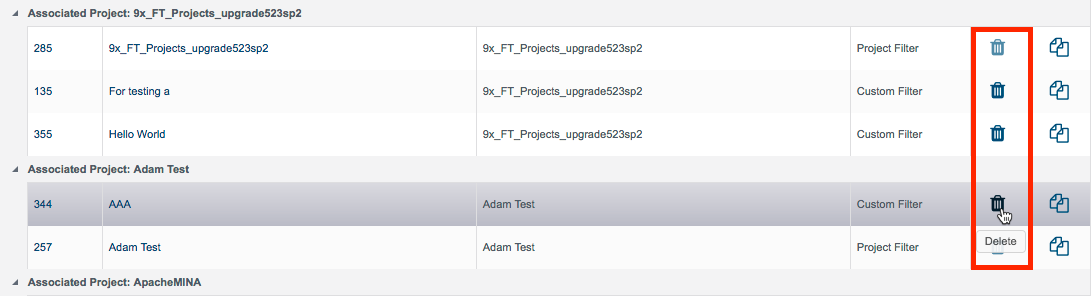
- You can begin typing in the search bar to quickly locate the filter you want to delete.
- Click the delete button (trash icon) and confirm that you want to delete the filter when prompted.
Duplicating Filters
- Choose Report Center Settings from the settings menu (cog icon).
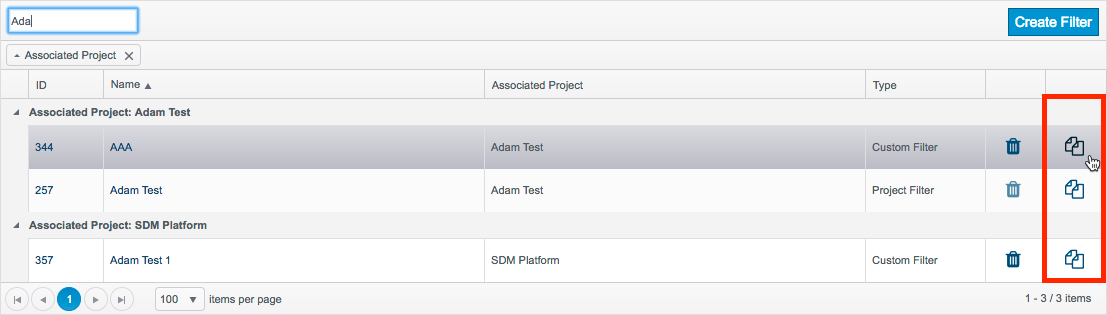
- You can begin typing in the search bar to quickly locate the filter you want to duplicate.
- Click duplicate button and enter a name for the copied filter.
- Click Create and make any adjustments when the dialog closes.