...
You can accomplish this with the JSON List Processor. The following workflow demonstrates how:
Create a new .pva and add a JSON Responder to the suite.
- In the JSON Responder, go to Options > Request Template and add the sample request payload above.
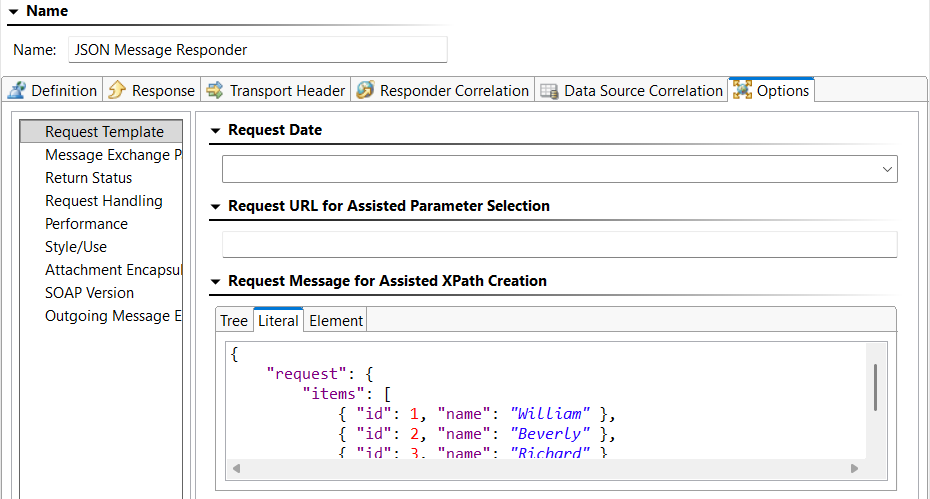
- In the Response tab, add the following literal payload:
Note: TheCode Block { "response" : { "itemResponses" : [ ${Outgoing List} ] } }${Outgoing List}variable will be resolved at runtime with the aggregated responses for each item processed by the JSON List Processor.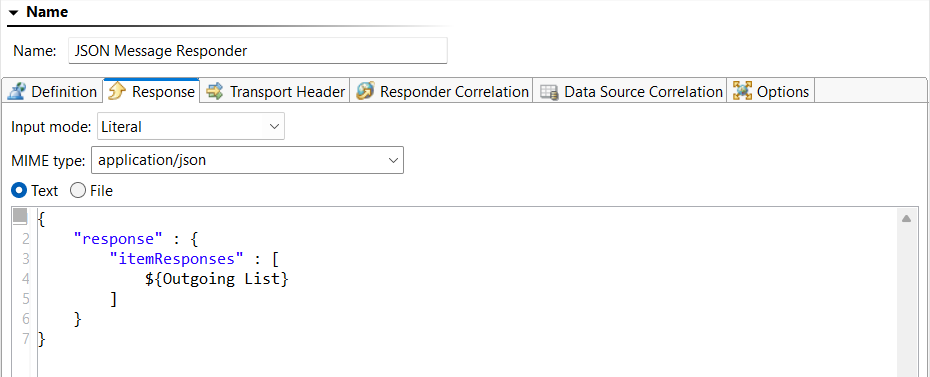
- Save your changes.
- Chain a JSON List Processor to the Incoming Request output of the responder (right-click > Add Output > Payload > JSON List Processor).

- Configure the JSON List Processor to extract the “item” object node. The generated XPath will automatically select all items under the “items” array.
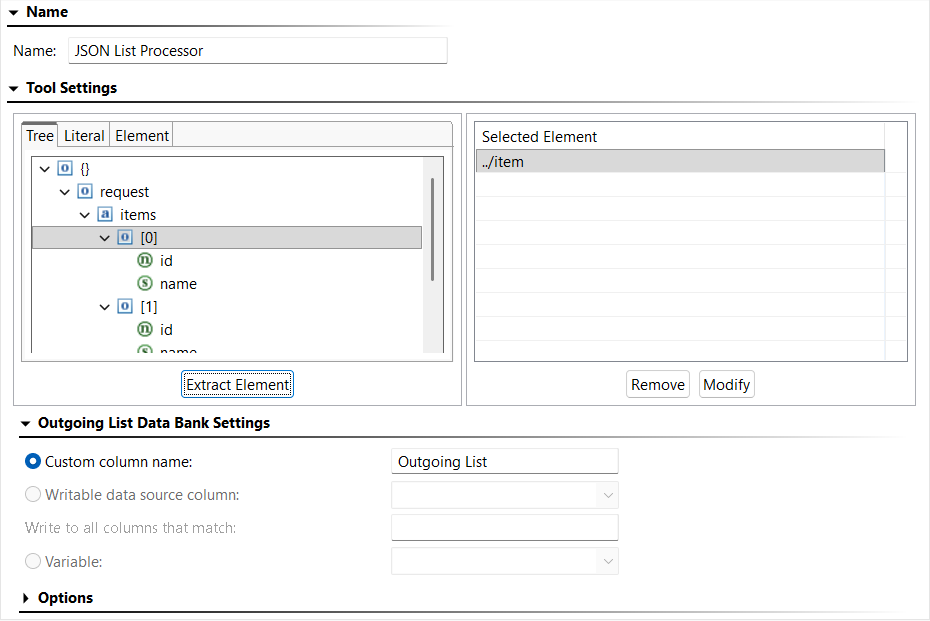
- Save your changes.
- (Optional) For runtime visibility, you can use an Extension Tool to print each processed item to the console:
- Chain an Extension Tool to the JSON List Processor (right-click > Add Output… > Incoming Item > Extension Tool).
- Add the following Groovy script in the Extension Tool.
Code Block language groovy import com.parasoft.api.Application def showMessage(input, context) { Application.showMessage("Extension Tool Output - Incoming Item:\n" + input + "\n") - Save your changes.
- Add a Table data source to the suite to perform data source correlation (right-click > Add New > Data Source > Table).
- Enable First row specifies column names.
- Add the following data:
id name balance 1 William 72500.13 2 Beverly 33000.99 3 Richard 42010.75 
- Save your changes.
- Chain a JSON Message Responder to the JSON List Processor (right-click >Add Responder > JSON Message Responder). Name the responder “Success Responder”.
- Go to Options > Request Template and add the following payload:
Code Block { "id": 1, "name": "William" }
- Go to Data Source Correlation > Request Body and configure correlation for the
idfield and use the data source column “id”.
- Click the Response tab and add the following literal payload:
Code Block { "id" : ${id}, "name" : "${name}", "balance" : ${balance} }
- Save your changes.
- Send a POST request to the Virtual Asset using a .tst or .pvn file and confirm the expected response.
...
- Chain a JSON Message Responder to the JSON List Processor (right-click > Add Responder… > JSON Message Responder).
- Name the responder “Error Responder – Return error for invalid id”.
- Click the Response tab and add the following literal payload:
Code Block { "id" : “${{=/root/id/text()}}”, "error" : { "code" : "NOT_FOUND", "message" : "No active account found for id '${{=/root/id/text()}}'." } }This payload uses inline expressions to extract values from the incoming JSON directly. Alternatively, you could use a JSON Data Bank to extract values.
- Send a POST request to the Virtual Asset with the following payload and confirm the error message is included in the response.
Code Block { "request": { "items": [ { "id": 1, "name": "William" }, { "id": 13, "name": "George" }, { "id": 2, "name": "Beverly" }, { "id": 3, "name": "Richard" } ] }
...