...
- Log into your Azure DevOps account and click Create project.
- Enter Parabank as the project name and click Advanced.
- Verify that Git is selected as the version control system and that Agile is selected as the Work item process.

- Click Create.
...
Building the Parabank Project in Azure DevOps
- Choose Repo from the project sidebar and click Import.
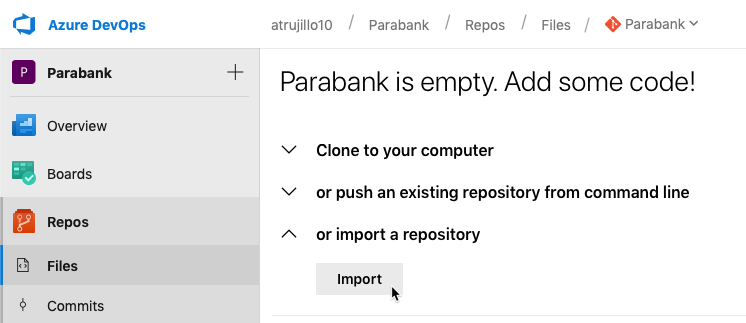
- Choose Git as the Source type and enter http://github.com/parasoft/parabank.git in the Clone URL.
- Click Import to finish cloning the Parabank code to your project. You will be redirected to the code editor view when the import is complete.
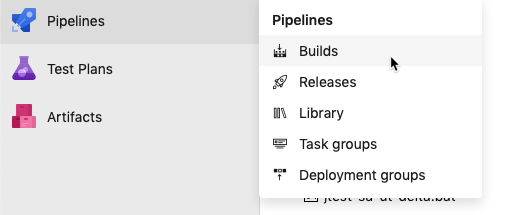
- Choose Pipeline> Builds from the project sidebar and click New Pipeline.
- Choose Azure Repos Git and verify that the Parabank project, Parabank repository, and master branch are selected.
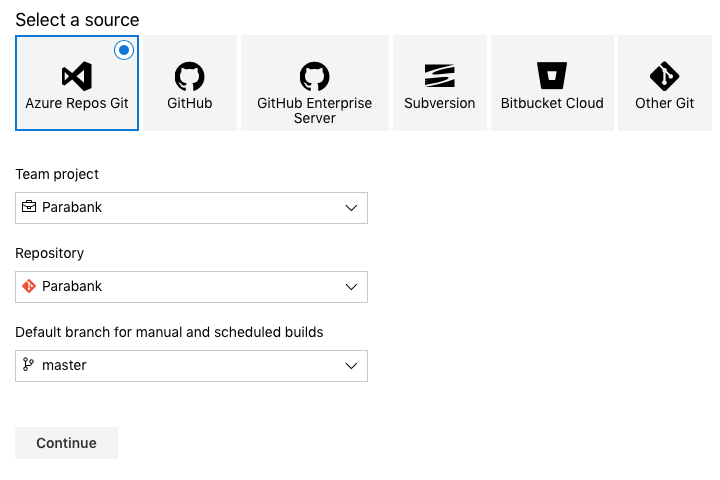
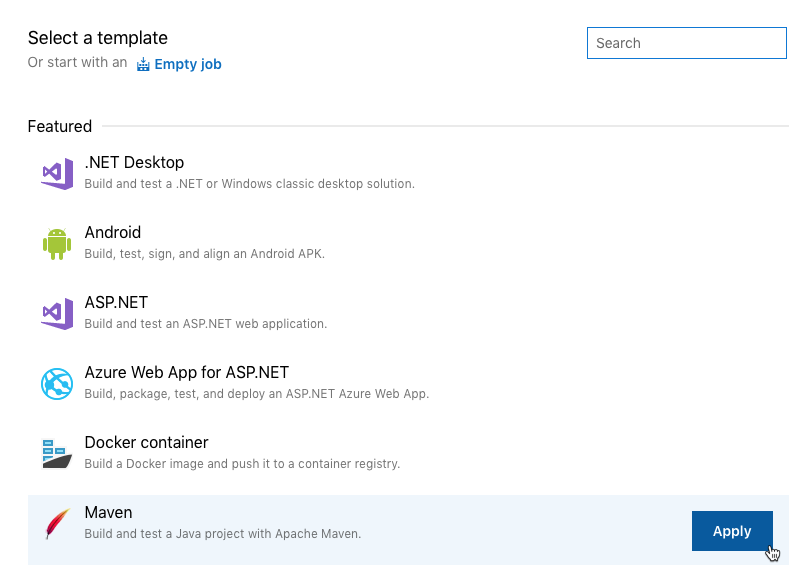
- Click Continue and apply the Maven template. The Azure DevOps Maven template adds a Pipeline task, Get sources task, and an Agent job task.
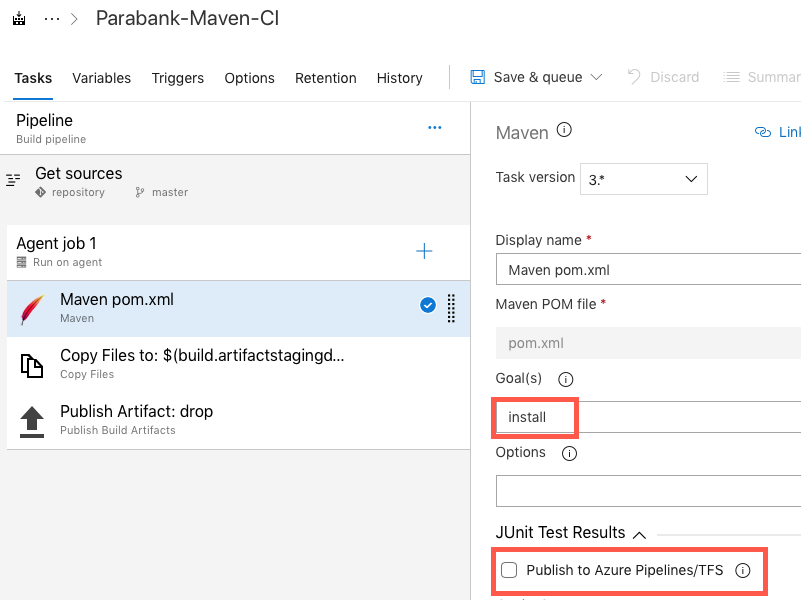
- Click the Maven pom.xml subtask under the Agent job task and change the value of the Goal(s) field to install.
- Disable the Publish to Azure Pipelines/TFS option under the JUnit Test Results section.
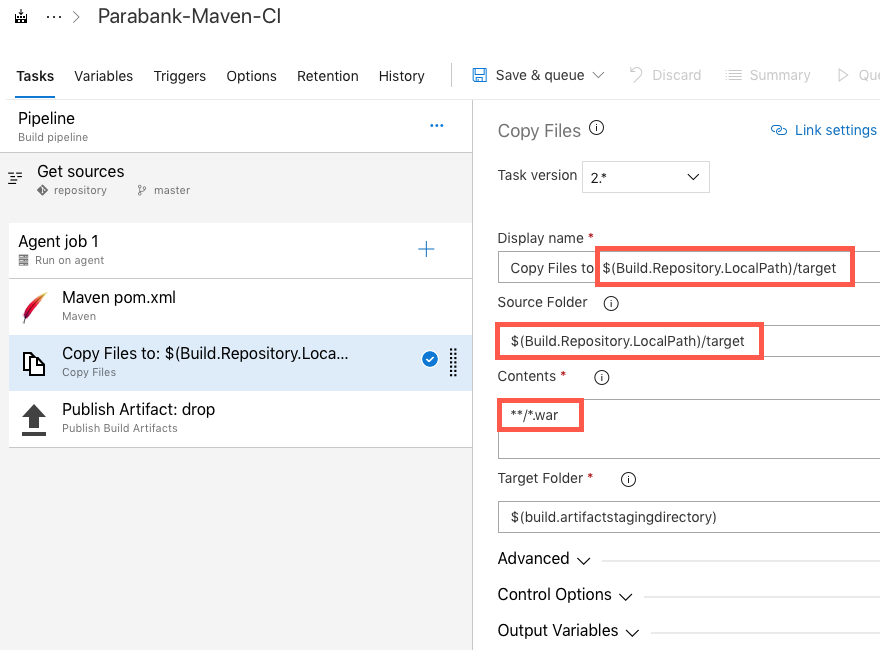
- Click the Copy Files to subtask and change the value of the Source Folder $(Build.Repository.LocalPath)/target. You should also update the Display name for consistency.
- Change the value in the Contents field to */.war.
- Choose Save & queue from the Save & queue drop-down menu.
- Choose Hosted from the Agent pool drop-down.
- (Optional) Add commit comments to document your process.
- Click Save & queue when ready.
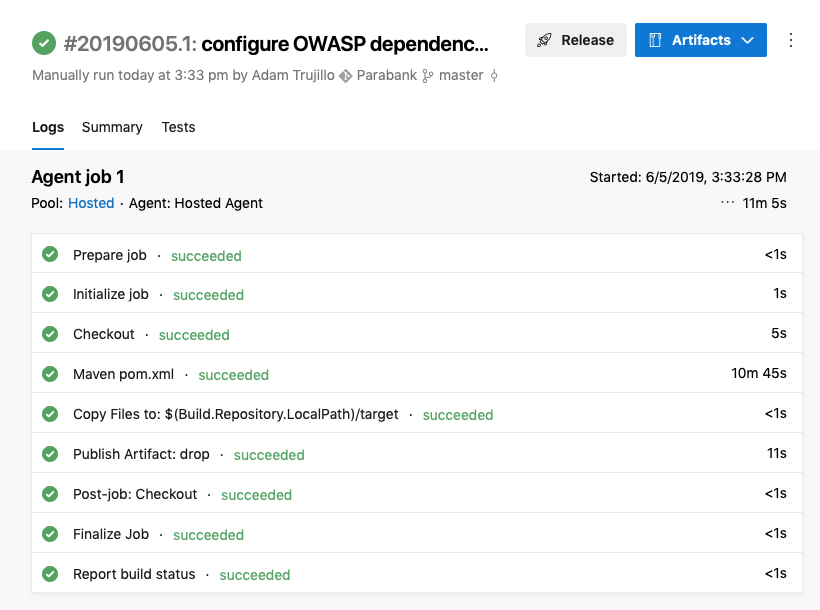
- Click on the link in the confirmation bar to monitor the build, which will take five to 10 minutes to complete.
...
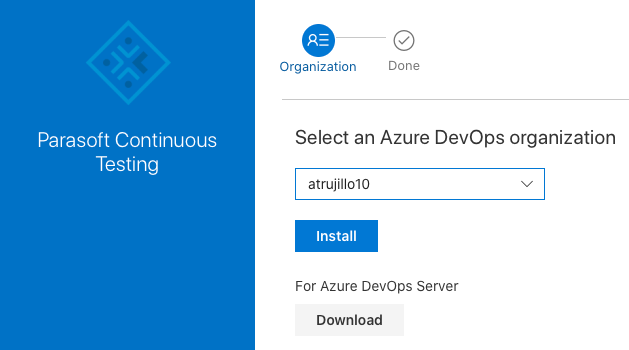
- Choose Browse Marketplace from the marketplace menu in Azure DevOps.
- Search for Parasoft Service Virtualization and click to install.
- Return to the marketplace and repeat the process to install the Apache Tomcat Deployment artifact.
...
In this guide, we will use SSH to connect to the server. You can also click Connect on the VM home page in Azure and click the RDP tab to access a remote desktop configuration.
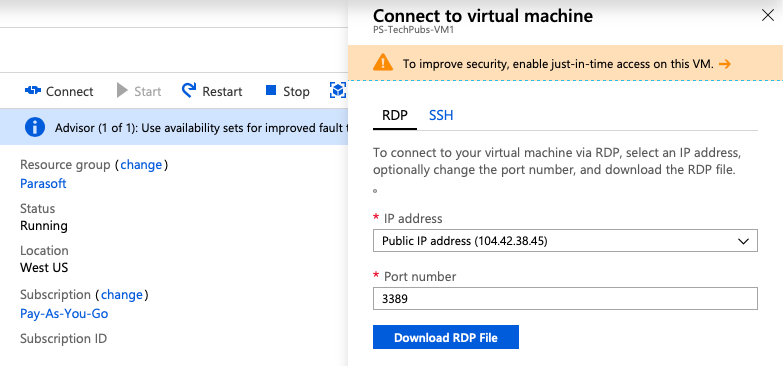
- Open a command prompt and connect to the VM:
ssh <VM_USER_ID>@<VM_IP> - Navigate to the /usr/local/tomcat/webapps/manager/META-INF directory
cd /usr/local/tomcat/webapps/manager/META-INF - You may not have permissions to the subdirectories under tomcat and may need to add read, write, execute access. You can change the permissions as you move through each subdirectory or recursively change the permissions.
sudo chmod -R 777 webapps
- Edit the context.xml file with a command line editor.
Vim context.xml Comment out the following element to enable remote access to the manager application:
No Format <Context antiResourceLocking="false" privileged="true" >
...
<!-- <Valve className="org.apache.catalina.valves.RemoteAddrValve"
...
allow="127\.\d+\.\d+\.\d+|::1|0:0:0:0:0:0:0:1" /> - ->
...
</Context>
- Write the changes and close the file.
You will also need to enable the user and role for scripting access to the manager application.
Navigate to the /usr/local/tomcat/conf directory. You may need to change the permissions to enable access to the applicable subdirectories.
- Edit the tomcat-users.xml file with a command line editor
Vim tomcat-users.xml
Add the following user and role configuration to the <tomcat-users> element:
No Format <role rolename="manager-script"/>
...
<role rolename="manager-gui"/>
...
<user username="tomcat" password="tomcat" roles="manager-script,manager-gui"/>
The username and password must both be"tomcat".
- Write the changes and close the file.
- You will need to restart the tomcat server. Navigate to the usr/local/tomcat/bin directory. You may need to change the permissions to enable access to the applicable subdirectories.I added this section to try to prevent the error during the Tomcat deployment build step per these resources:
https://www.digitalocean.com/community/questions/how-to-access-tomcat-8-admin-gui-from-different-host
https://github.com/Microsoft/vsts-tomcat/blob/master/src/tasks/tomcatDeployment/README.md
It didn't seem to helpAnchor _GoBack _GoBack
...
Configuring Release Settings
...
- After installing the plugins, return to the Parabank project and click Project settings.
- Click Service connections in the Pipelines section and choose Parasoft CTP from the New service connection drop-down menu.
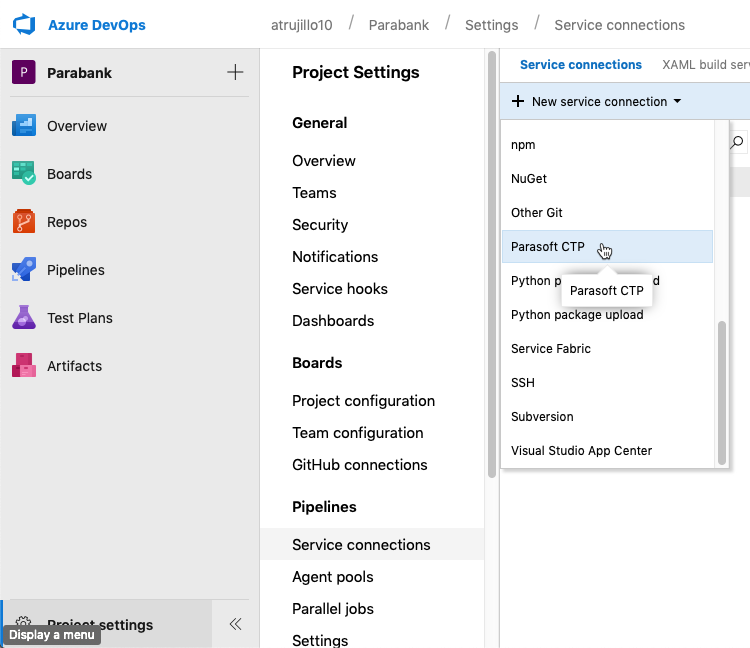
- Configure the following settings when prompted:
- Connection name: Specify a name for the connection (e.g., ParasoftEM).
- Server URL: Enter the URL of your instance of CTP on Azure (see Opening CTP).
- Username/Password: The default username and password is admin/admin.
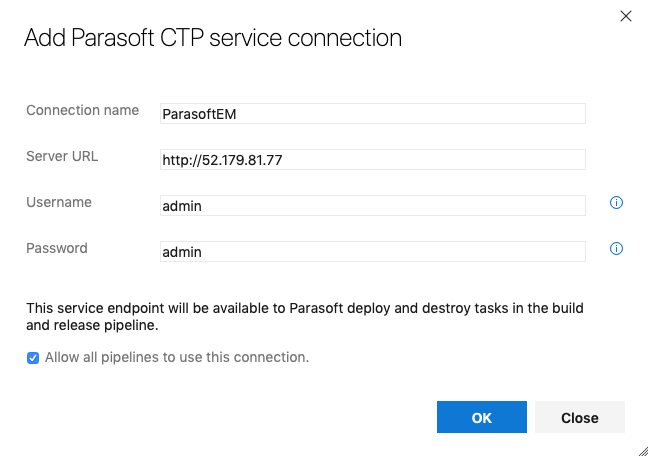
- Click OK when finished. The connection will appear in your Service connections.
...
- Choose Pipelines> Builds from the sidebar and click on the build created in the Building the Parabank Project in Azure DevOps section.
- Click the Release button and choose Empty job when prompted.
- (Optional) Rename the job and close the panel.
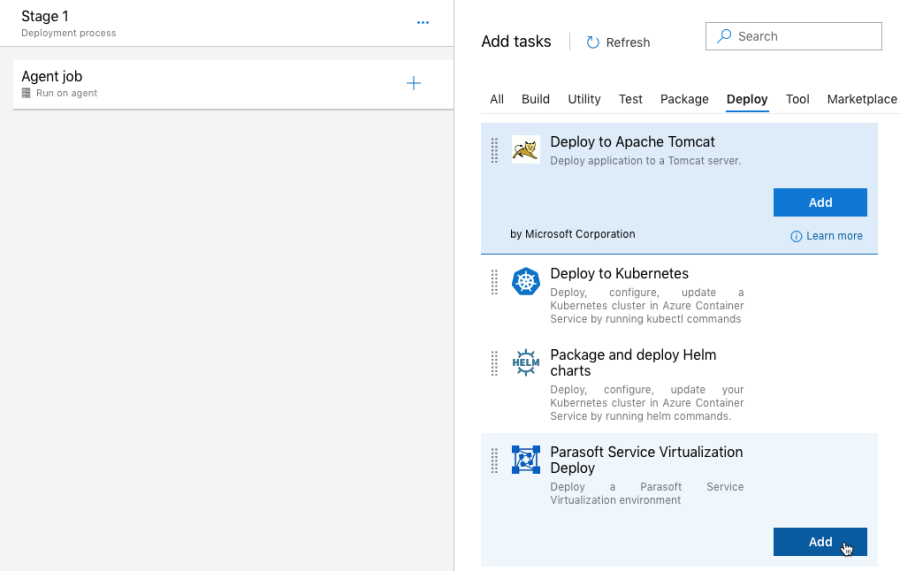
- Click the Tasks tab and click the add button (+) to add a task to the agent.
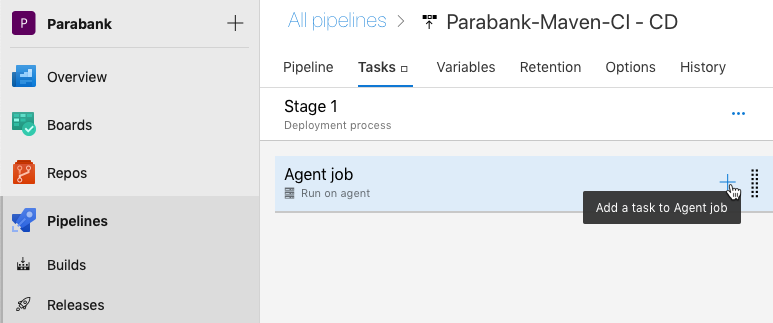
- Click the Deploy tab and add the Deploy to Apache Tomcat Server and Parasoft Service Virtualization Deploy tasks.
- Click on the Deploy to Apache Tomcat Server task and configure the following settings:
- Tomcat Server URL: <AZURE_VM_IP_ADDRESS>. Do not include the port number.
- Tomcat Manager Username: tomcat
- Password: tomcat
- WAR file: Browse for the location of the parabank.war file.
- Application Context: /
- Click on the Parasoft Service Virtualization Deploy task and configure the following settings:
- Parasoft CTP Endpoint: Choose the ParasoftEM service endpoint created in the Configuring Release Settings section.
- System: ParaBank (the name of the system deployed to CTP in the Creating a Virtual Machine in Azure section).
- Environment: Golden
- Instance: Negative
- Click Save.
- (Optional) By default, the configuration will be saved to the All Pipelines directory, but you can specify a subdirectory, as well as add a comment.
- Click OK.
...