This guide describes how to deploy complete test environments to Microsoft Azure using the Parasoft service virtualization assets available in the Azure marketplace.
In this guide:
Overview
Parasoft enables you to instantly provision dynamic test environments from a golden template in Microsoft Azure. The test environments deployed to the cloud are disposable, so you can readily destroy them after exercising a your test scenarios. There is no need to share test environments or resources across teams or test phases: the exact environment you need is instantly spun up whenever you want it, then destroyed as soon as you're done with it. Dynamic infrastructures provide advanced flexibility for extreme automation. When you need to scale the environment for performance testing or other use cases, you can do so on demand.
Requirements
- An Azure subscription that will allow you to create a deploy a virtual machine from the Azure Marketplace.
- Access to http://portal.azure.com and a compatible web browser.
- Your own Azure DevOps account with Administrative privileges.
- A copy of the ParaBank environment configuration.
- Repository server must be running
Licensing
Parasoft offers two licensing options:
- Bring your own license (BYOL): Unlock Parasoft Service Virtualization with the license purchased directly from Parasoft.
- On-demand: Immediately start using Parasoft Service Virtualization on an hourly basis.
About Parasoft Artifacts
The following Parasoft artifacts enable you to deploy a Parasoft Service Virtualization VM on Azure and are available from the Azure Marketplace.
Virtualize Server
Parasoft Virtualize Server hosts virtual assets and proxies, which drive Parasoft's service virtualization solution. Virtual assets deployed to the Virtualize server can respond to requests from the application under test. Proxies allow you to dynamically control the configuration of the application environment, such as whether requests from the application under test are being forwarded to a virtual service or real endpoint, without making changes to the application under test.
Continuous Testing Platform (CTP)
CTP is a browser-based interface that enables you to leverage functionality in the Parasoft Virtualize Server. CTP for Azure includes the following modules:
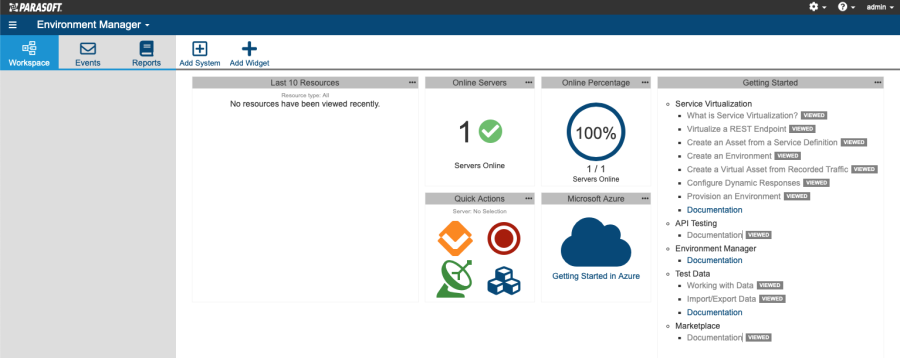
Environment Manager
The Environment Manager module enables team members to build, select, and provision environments. An environment contains representations of the AUT's dependent components set to specific states. For example, an environment may contain a virtual API that simulates network congestion and error responses, a real database, and a virtual mainframe that returns positive responses.
Service Virtualization
The Service Virtualization module is an interface for creating, configuring, and deploying virtual assets to the Virtualize server. Virtual assets send specific responses to requests that meet a set of correlation criteria.
Data Repository Server
The Data Repository Server captures and stores data associated with requests and responses when a virtual asset is created from traffic. When the virtual asset is invoked, it will pull data from the data repository server to construct a response.
Azure DevOps Tasks
Azure DevOps (formerly Visual Studio Team Services) allows you to create projects, manage code, and set up a continuous build and release process. Plugins expand Azure DevOps functionality by integrating with third-party platforms, including Parasoft Service Virtualization.
Installing the Parasoft Continuous Testing Extension for Azure DevOps makes several Parasoft tasks available to add to your pipelines. The Parasoft Deploy Environment task creates a simulated test environment so that the correct data, endpoints, and functionality are always available during a build/release process. The Parasoft Destroy Environment task instantly cleans up the simulated test environment once the build/release process has completed. Both of these steps are available as release tasks in Azure DevOps.
Other tasks include the Execute Job task for running test jobs hosted on the Virtualize server, as well as the Disconnect task for ending the pipeline session with Parasoft CTP. Refer to the Continuous Testing Extension for Azure DevOps documentation for details about configuring and using the tasks included with the extension.
Refer to the Using Parasoft in Azure DevOps section for details on how to configure Azure DevOps to grab the source code for a demo web application ("Parabank") from the Parabank GitHub repository, build the code on a hosted build machine, and release the resulting .war file to a dedicated Azure VM. It also demonstrates how to use the Parasoft "Deploy" task to provision a simulated test environment needed to test the Parabank application.
Using Parasoft in Azure DevOps
In this section, we'll create a complete continuous delivery pipeline for Parasoft's demo application, Parabank.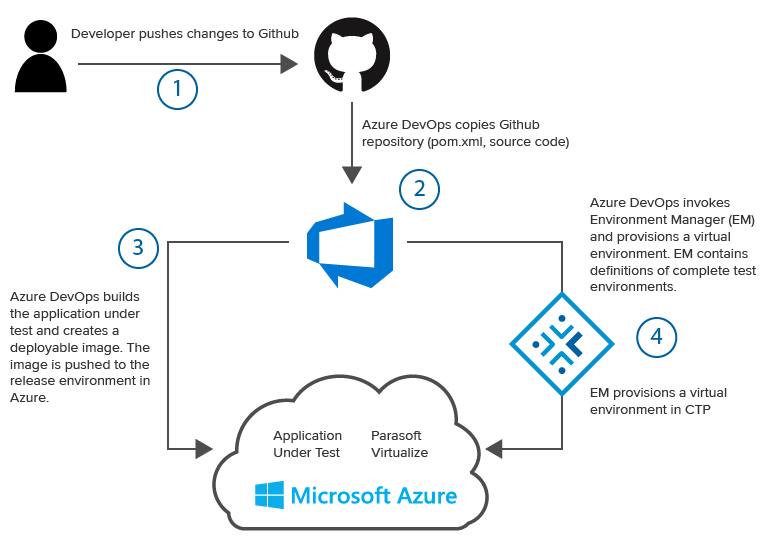
- A developer checks code into the Github repository.
- Azure pulls the Parabank code from GitHub.
- Azure DevOps builds Parabank.
- Azure DevOps deploys a "release" of Parabank onto a VM in Azure. Simultaneously, we'll call the Environment Manager (EM) module of CTP to provision a virtual environment so that you can run functional tests on Parabank.
Creating a Virtual Machine in Azure
Before we create a project in Azure DevOps, we need to deploy an Azure virtual machine. The machine will serve as the host for CTP and the Parabank demo application. We'll define virtual environments in CTP and deploy them as part of the release process in Azure DevOps.
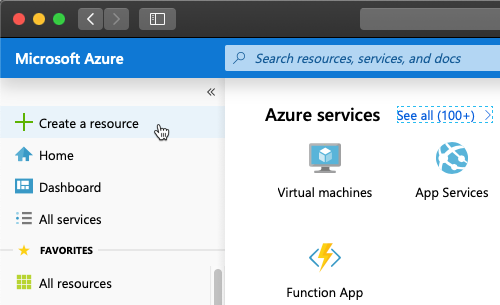
- Log into Azure and click Create a resource to access the Marketplace.
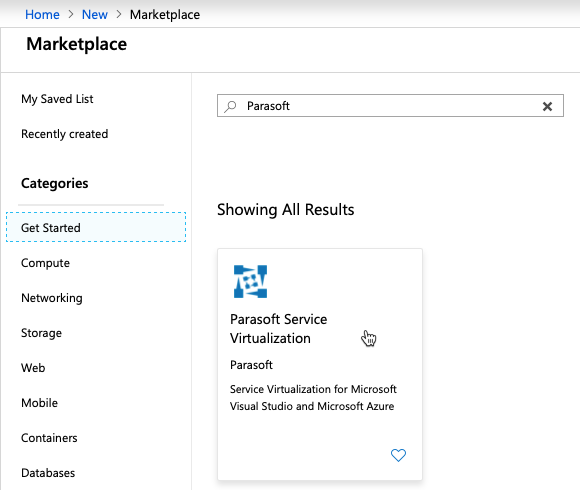
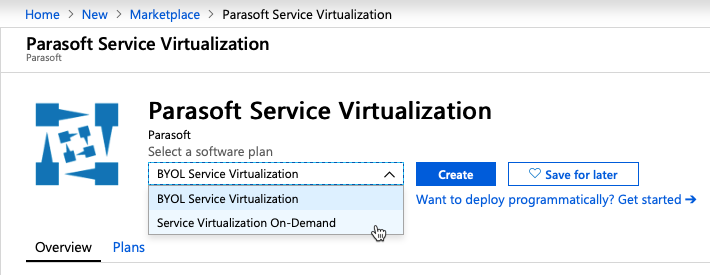
- Search for "Parasoft" and click Parasoft Service Virtualization in the search results.
- Choose a licensing plan service. In this guide, we'll select Service Virtualization On-Demand, but you can choose the BYOL Service Virtualization option if you already have the applicable license from Parasoft.
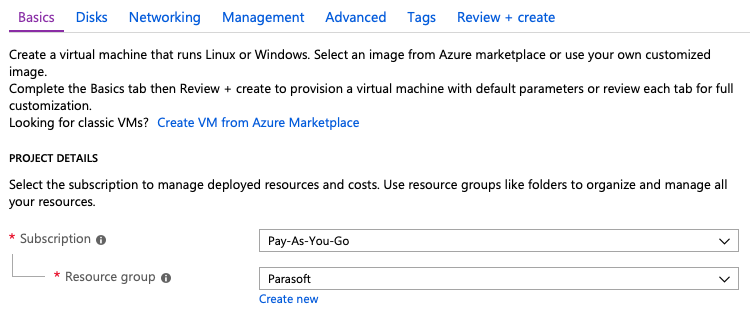
- Click Create and click the Basics tab.
- Choose your subscription option and either create a new resource group or add the new VM to an existing group.
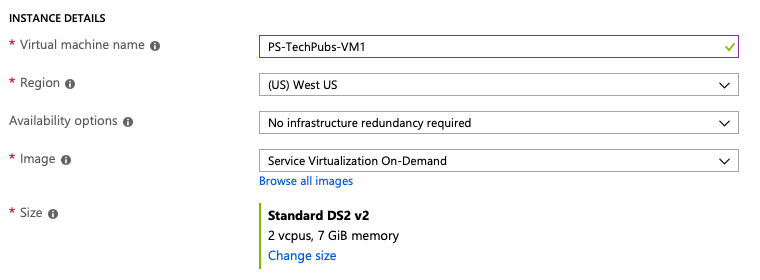
- In the Instance Details section, provide a name for the VM and choose a size (DS2_V2 or better is recommended). You can leave the default settings for the rest of the instance details.
- Choose your authentication type and provide the necessary authentication details.
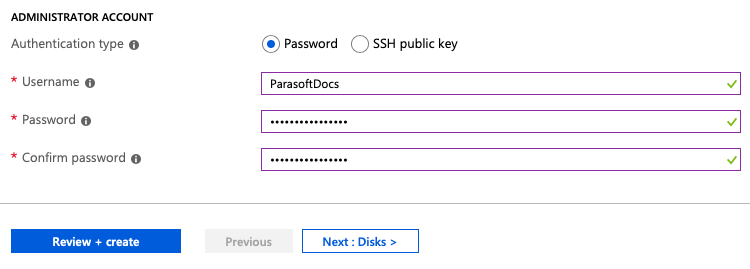
- Click Review + Create. For this guide, we are going to use the default settings, but you can click Next and make any additional adjustments to the VM.
- Review the configuration and click Create when ready. Click on a tab and make any changes if additional adjustments are required.
Opening CTP
Once created, click on the VM to view its details page. Click the on the VM and note the IP address.

Open the IP address in a browser to access CTP. You will be prompted to provide an email address the first time you open the application.
Importing Data into Environment Manager
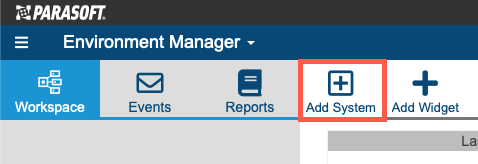
- Click Add System in the Environment Manager toolbar.
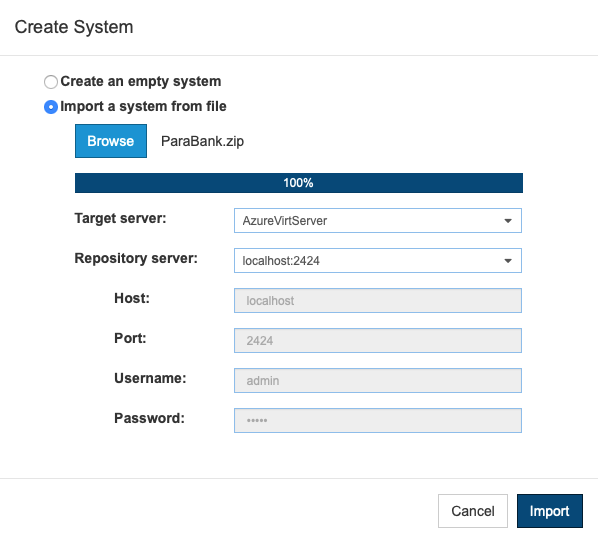
- Choose Import and browse for the ParaBank.zip file.
- Choose AzureServer from the Target server drop-down menu.
- Choose localhost:2424 from the Repository server drop-down menu.
- Click Import.
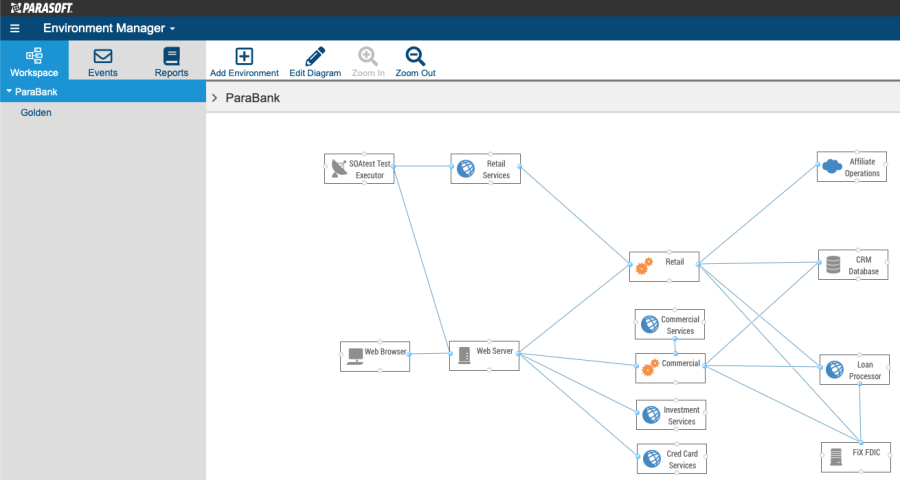
When the system is imported, it will be represented as a diagram in the EM workspace.
Creating the ParaBank Project in Azure DevOps
- Log into your Azure DevOps account and click Create project.
- Enter Parabank as the project name and click Advanced.
- Verify that Git is selected as the version control system and that Agile is selected as the Work item process.

- Click Create.
Building the Parabank Project in Azure DevOps
- Choose Repo from the project sidebar and click Import.
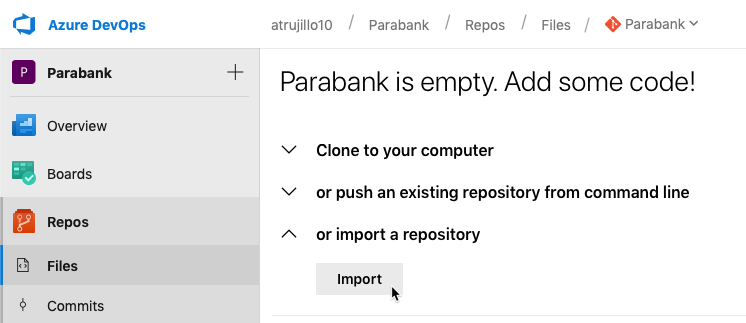
- Choose Git as the Source type and enter http://github.com/parasoft/parabank.git in the Clone URL.
- Click Import to finish cloning the Parabank code to your project. You will be redirected to the code editor view when the import is complete.
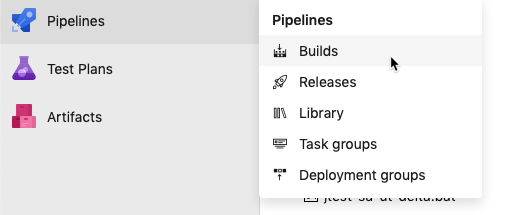
- Choose Pipeline> Builds from the project sidebar and click New Pipeline.
- Choose Azure Repos Git and verify that the Parabank project, Parabank repository, and master branch are selected.
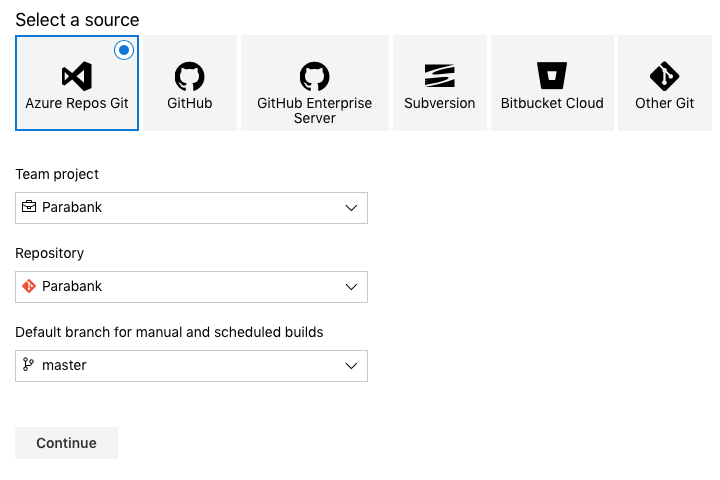
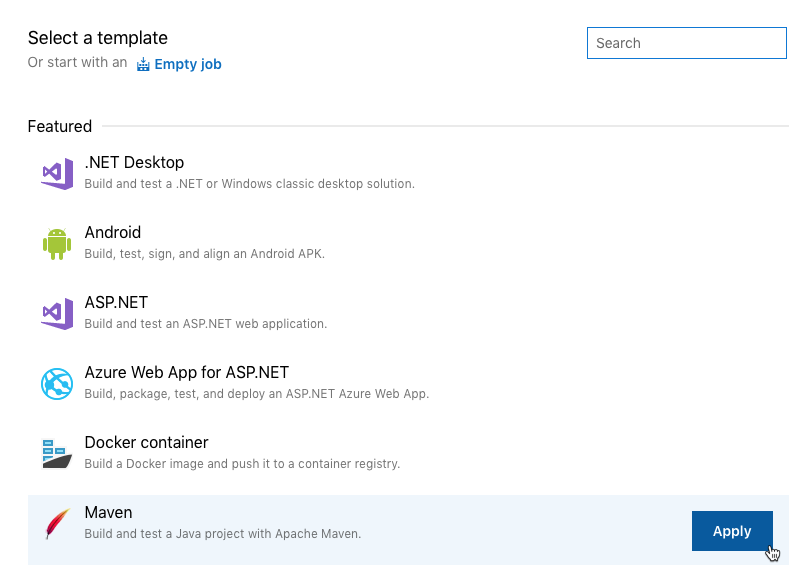
- Click Continue and apply the Maven template. The Azure DevOps Maven template adds a Pipeline task, Get sources task, and an Agent job task.
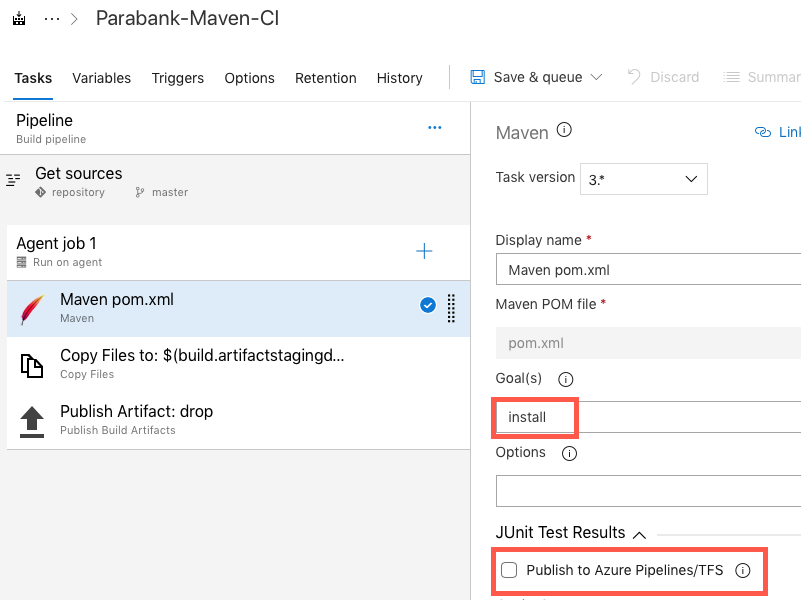
- Click the Maven pom.xml subtask under the Agent job task and change the value of the Goal(s) field to install.
- Disable the Publish to Azure Pipelines/TFS option under the JUnit Test Results section.
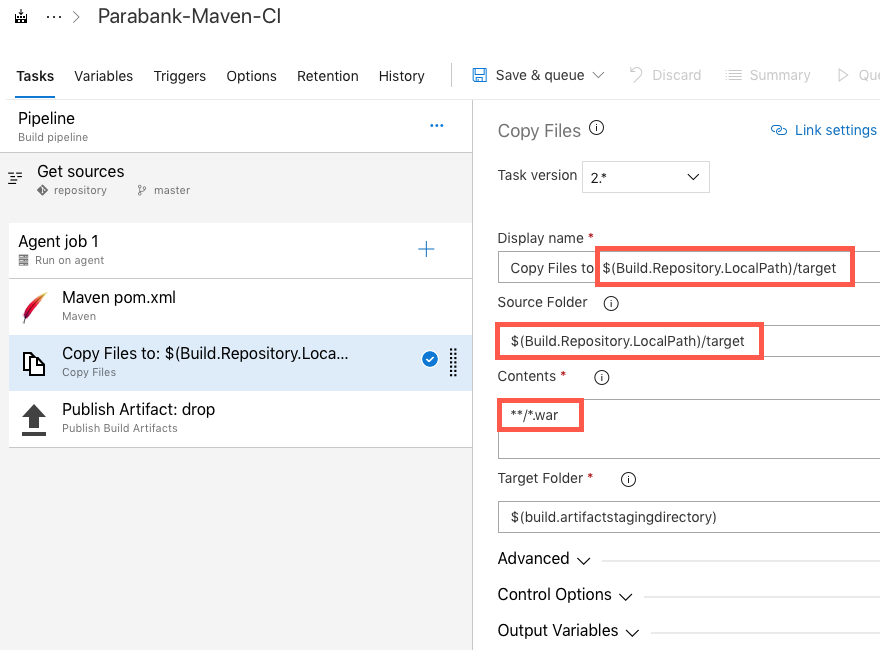
- Click the Copy Files to subtask and change the value of the Source Folder $(Build.Repository.LocalPath)/target. You should also update the Display name for consistency.
- Change the value in the Contents field to */.war.
- Choose Save & queue from the Save & queue drop-down menu.
- Choose Hosted from the Agent pool drop-down.
- (Optional) Add commit comments to document your process.
- Click Save & queue when ready.
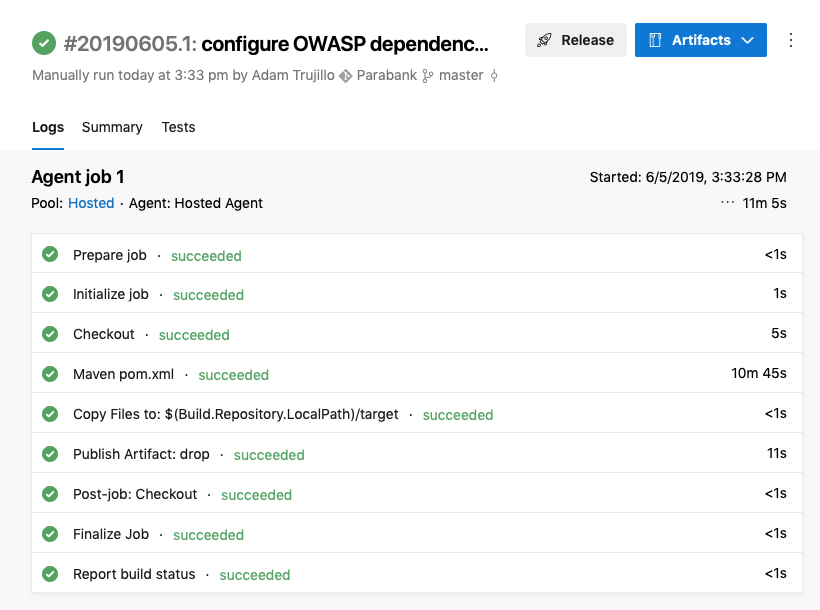
- Click on the link in the confirmation bar to monitor the build, which will take five to 10 minutes to complete.
A .war file will be produced as a result of the build process.
Releasing Parabank
The next step is to release the artifact by deploying it onto a Tomcat server hosted on the Azure machine we created in the Creating a Virtual Machine in Azure section.
Installing Tomcat and Parasoft Continuous Testing Plug-ins
Before releasing, we need to install the Apache Tomcat Deployment and Installing Tomcat and Service Virtualization plug-ins.
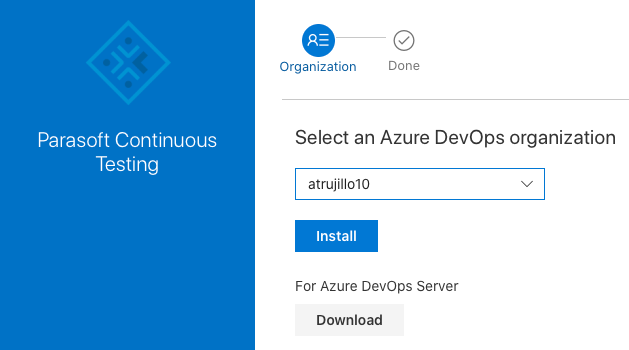
- Choose Browse Marketplace from the marketplace menu in Azure DevOps.
- Search for Parasoft Continuous Testing and click to install.
- Return to the marketplace and repeat the process to install the Apache Tomcat Deployment artifact.
Configuring Tomcat for Deployment
The Apache Tomcat Deployment artifact has requirements that require additional configuration on the VM.
- A user with the Tomcat manager-script role should be enabled.
- The webapps context.xml file must be modified to enable remote access to the manager application.
In this guide, we will use SSH to connect to the server. You can also click Connect on the VM home page in Azure and click the RDP tab to access a remote desktop configuration.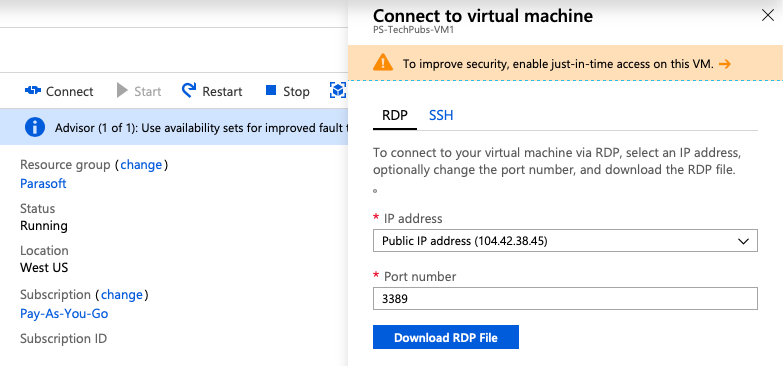
Open a command prompt and connect to the VM:
ssh <VM_USER_ID>@<VM_IP>
Navigate to the /usr/local/tomcat/webapps/manager/META-INF directory
cd /usr/local/tomcat/webapps/manager/META-INF
You may not have permissions to the subdirectories under tomcat and may need to add read, write, execute access. You can change the permissions as you move through each subdirectory or recursively change the permissions.
sudo chmod -R 777 webapps
Edit the context.xml file with a command line editor.
Vim context.xml
Comment out the following element to enable remote access to the manager application:
<Context antiResourceLocking="false" privileged="true" >
<!-- <Valve className="org.apache.catalina.valves.RemoteAddrValve"
allow="127\.\d+\.\d+\.\d+|::1|0:0:0:0:0:0:0:1" /> - ->
</Context>
- Write the changes and close the file.
You will also need to enable the user and role for scripting access to the manager application.
Navigate to the /usr/local/tomcat/conf directory. You may need to change the permissions to enable access to the applicable subdirectories.
Edit the tomcat-users.xml file with a command line editor
Vim tomcat-users.xml
Add the following user and role configuration to the <tomcat-users> element:
<role rolename="manager-script"/>
<role rolename="manager-gui"/>
<user username="tomcat" password="tomcat" roles="manager-script,manager-gui"/>
The username and password must both be"tomcat".
- Write the changes and close the file.
- You will need to restart the tomcat server. Navigate to the usr/local/tomcat/bin directory. You may need to change the permissions to enable access to the applicable subdirectories.
Configuring Release Settings
- After installing the plugins, return to the Parabank project and click Project settings.
- Click Service connections in the Pipelines section and choose Parasoft CTP from the New service connection drop-down menu.

- Configure the following settings when prompted:
- Server URL: Enter the URL of your instance of CTP on Azure (see Opening CTP). The /
empath segment is required. - Username/Password: The default username and password is admin/admin.
- Connection name: Specify a name for the connection (e.g., ParasoftCTP).

- Server URL: Enter the URL of your instance of CTP on Azure (see Opening CTP). The /
- Click OK when finished. The connection will appear in your Service connections.
- Repeat the process and configure a connection for Parasoft DTP if you intend to send Parasoft test execution results to DTP. DTP must be deployed to a publicly-available IP address.
Configuring the Release Pipeline
- Choose Pipelines> Builds from the sidebar and click on the build created in the Building the Parabank Project in Azure DevOps section.
- Click the Release button and choose Empty job when prompted.
- (Optional) Rename the job and close the panel.
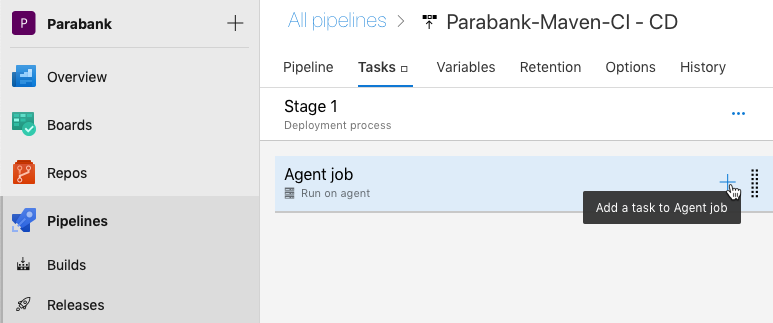
- Click the Tasks tab and click the add button (+) to add a task to the agent.
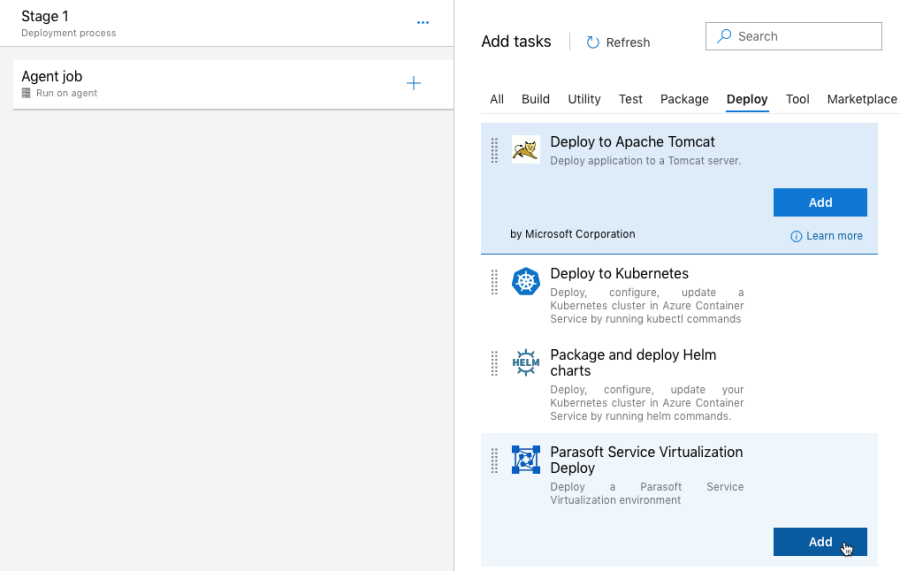
- Click the Deploy tab and add the Deploy to Apache Tomcat Server and Parasoft Service Virtualization Deploy tasks.
- Click on the Deploy to Apache Tomcat Server task and configure the following settings:
- Tomcat Server URL: <AZURE_VM_IP_ADDRESS>. Do not include the port number.
- Tomcat Manager Username: tomcat
- Password: tomcat
- WAR file: Browse for the location of the parabank.war file.
- Application Context: /
- Click on the Parasoft Service Virtualization Deploy task and configure the following settings:
- Parasoft CTP Endpoint: Choose the ParasoftEM service endpoint created in the Configuring Release Settings section.
- System: ParaBank (the name of the system deployed to CTP in the Creating a Virtual Machine in Azure section).
- Environment: Golden
- Instance: Negative
- Click Save.
- (Optional) By default, the configuration will be saved to the All Pipelines directory, but you can specify a subdirectory, as well as add a comment.
- Click OK.
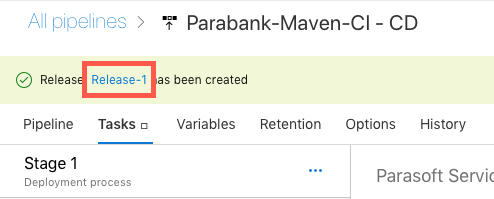
Creating a Release
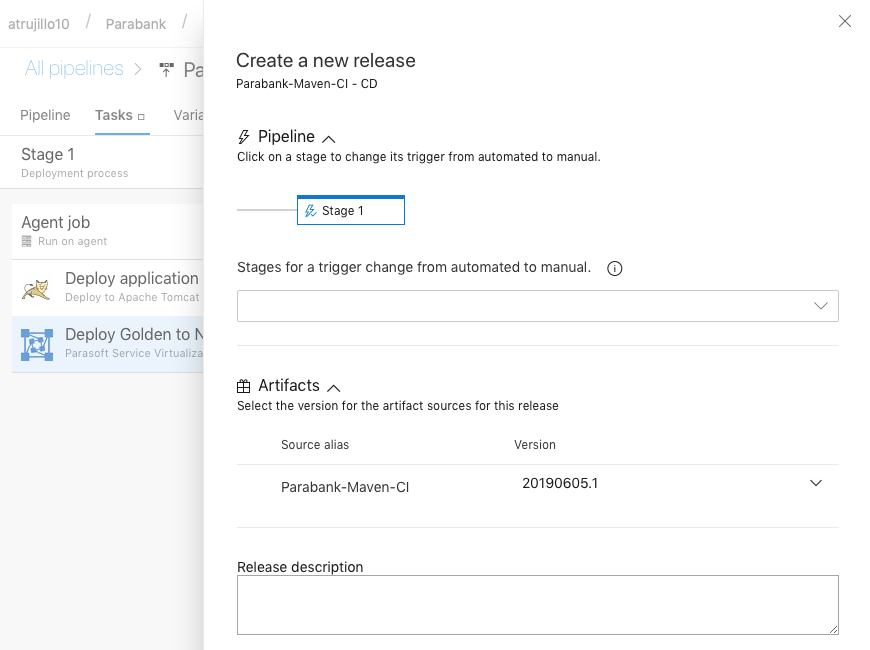
- Click Create release.
- Verify that the correct artifact is selected and click Create.
The release will take a few minutes to complete. - Click on the link to your release in the confirmation dialog to view the pipeline.
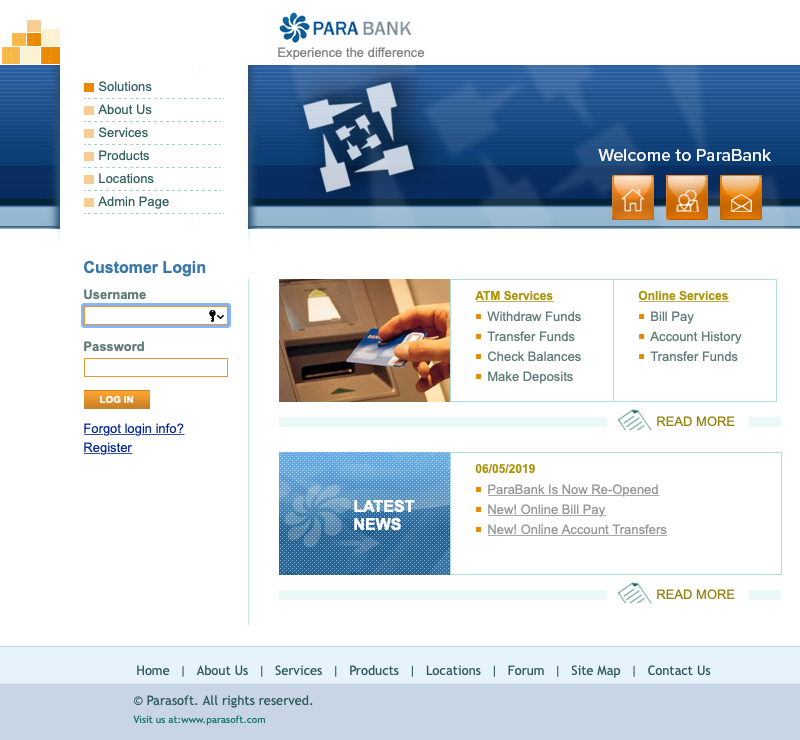
Once the release has completed and is successful (this may take a few minutes), navigate to http://<VM_IP_ADDRESS>/parabank in your browser. The Parabank application should load
.
Configuring ParaBank to Use Virtualize Proxies
Now that we've provisioned our virtual environment, we must reconfigure the Parabank application to use our proxies, which are endpoints that sit between Parabank and the virtual services it will consume. Proxies can redirect traffic between the AUT and virtual components, including web services, databases, mainframes, and other endpoints. The proxies we configure in this section will redirect Parabank's requests to our virtual services.
- Open the ParaBank in your browser http://<VM_IP_ADDRESS>/parabank and click the Admin page link

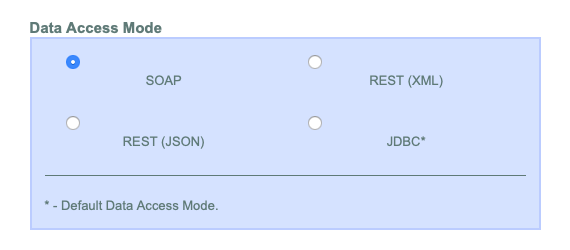
- Enable the SOAP option in the Data Access Mode section
- In the Web Service section, enter http://<VM_IP_ADDRESS>:9080/ParabankProxy in the SOAP Endpoint field and http:// <VM_IP_ADDRESS>:9080/LoanProcessorProxy in the Loan Processor Service Endpoint field.
- Click Submit.
Verify that ParaBank is using the proxies:
- Log into ParaBank with username john and password demo.
- Click Request Loan and specify any values for the Loan Amount and Down Payment fields.
- Click Apply Now.
The following message indicates that we've successfully configured the correct environment during our release and we have received a response from the virtual environment instance we provisioned.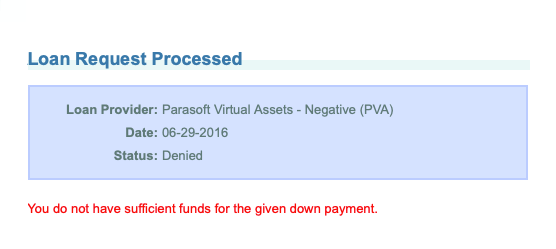
Provisioning Other Instances
The Golden ParaBank environment includes several environment instances.
- Return to Environment Manager and open ParaBank> Golden environment.
- Open the instances drop-down menu to view the available instances.
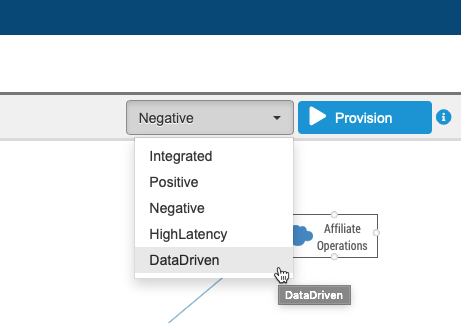
- Note the instance you want to provision and return to the release definition.
- Edit the Deploy task with the name of the instance you want to deploy.
- Remove the initial Deploy to Apache Tomcat step. This saves time and prevents you from having to reconfigure Parabank's endpoints each time Parabank redeploys.
Using the Parasoft Deploy Task in a Real Workflow
In this guide, we've executed the Deploy Parasoft task during separate release executions. This made it possible for the user to manually go into Parabank and witness the change in behavior after we deployed a certain virtual environment.
In a real use case, it's likely that a Deploy task would be utilized to create an appropriate environment for an automated test to execute. We'd then execute a Destroy task during the same workflow in order to "clean-up" the service virtualization engine after test execution. It's possible that we may iteratively provision and destroy several virtual environments in a release as we execute different categories of tests.
Creating Virtual Assets in Azure
In this section, we'll go through the process of creating a simple virtual service (also called a PVA or Parasoft Virtual Asset) from a sample response using Parasoft and Microsoft Azure. We'll then consume the virtual response through the Parabank demo application.
If you have not already done so, follow the instructions in the Creating a Virtual Machine in Azure chapter to create the virtual machine on Azure before proceeding.
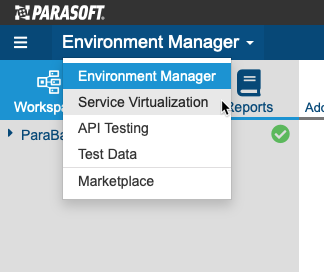
- Open CTP in your browser and choose Service Virtualization from the applications drop-down menu.
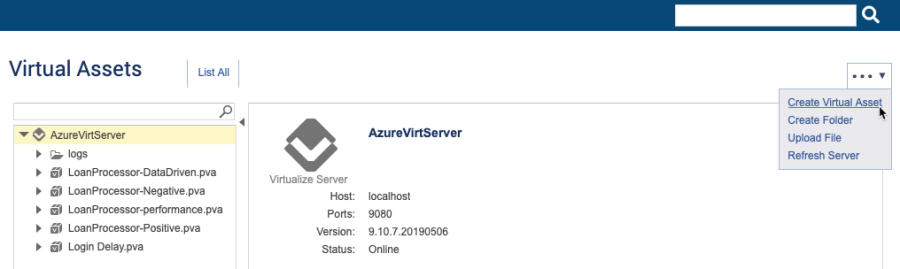
- Choose Create Virtual Asset from the actions menu.
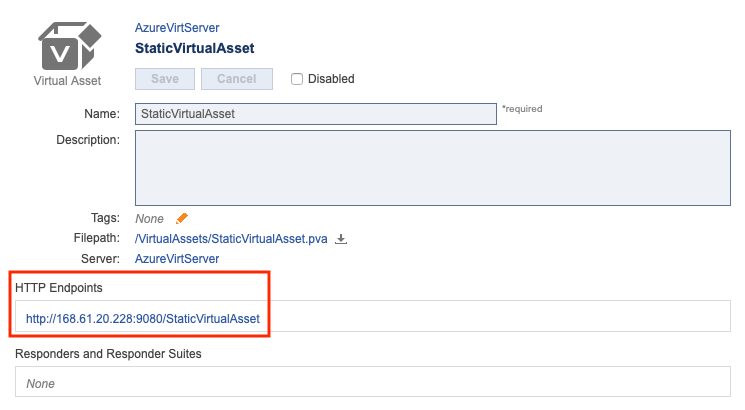
- Rename the asset to StaticVirtualAsset and verify that Empty is selected from the Create drop-down menu.
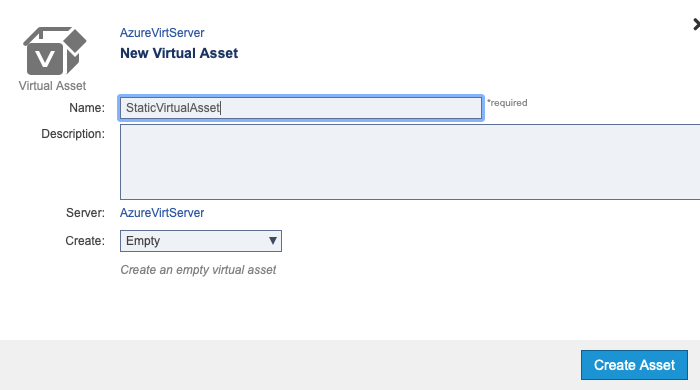
- Click Create Asset. The asset is just a node on the Virtualize server at this point. We'll need to add a message responder, which is a component that analyzes an incoming request and provides a response if the incoming message matches a set of criteria. Make a note of the HTTP Endpoint address.
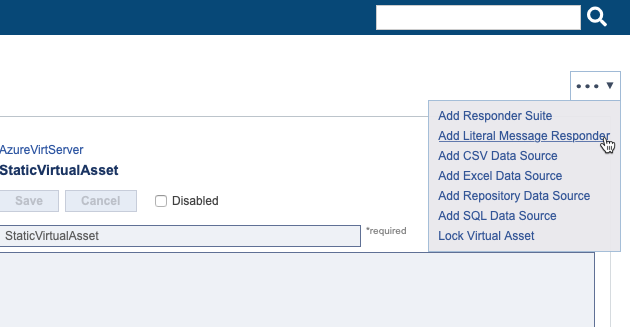
- Choose Add Literal Message Responder from the actions drop-down menu.
- Rename the responder to SimpleResponder and choose XML from the format drop-down menu.
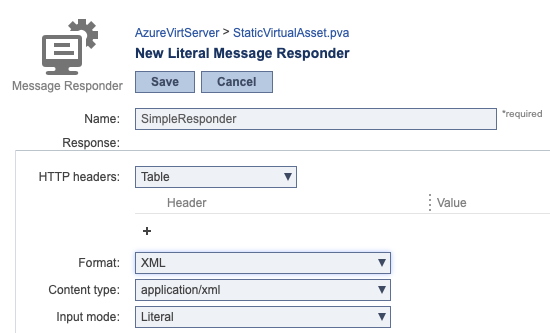
Copy and paste the following SOAP response into the input field.
<?xml version="1.0" encoding="UTF-8"?>
 <soap:Envelope
 xmlns:soap="http://schemas.xmlsoap.org/soap/envelope/">
 <soap:Body>
 <ns2:requestLoanResponse xmlns:ns2="http://service.parabank.parasoft.com/">
 <ns2:loanResponse>
 <responseDate>2019-01-01T12:33:47.076-07:00</responseDate>
 <loanProviderName>Wealth Securities Dynamic Loans (WSDL)</loanProviderName>
 <approved>false</approved>
 <message>error.insufficient.funds.for.down.payment</message>
 </ns2:loanResponse>
 </ns2:requestLoanResponse>
 </soap:Body>
 </soap:Envelope>
- Click Save. This response will be sent for all requests because we have not configured the criteria for correlating specific responses to specific requests.
Configuring the AUT to Use the Virtual Asset
We built ParaBank with an administration page to more easily facilitate demonstrations. In a real-world scenario, you may need to edit one or more configuration files associated with your application under test.
- Open ParaBank (http://<VM_IP_ADDRESS>/parabank) and click Admin Page.
- In the Web Service section, enter http://<VM_IP_ADDRESS>:9080/StaticVirtualAsset into the Loan Processor Service Endpoint field.
- Click Submit.
Invoking the Virtual Asset
- Log into ParaBank and choose Request Loan.
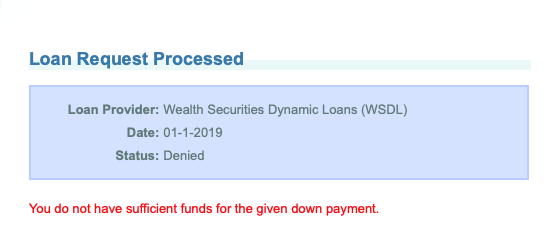
- Enter any amount for the loan and down payments.
- Click Apply Now. The response we just created will appear.
Reconfiguring the Virtual Asset
- Return to CTP and open the SimpleResponse virtual responder.
- Edit the SOAP response and click Save. For example, you could change the <approved> element to true or change the name of the loan provider.
- Request a loan in Parabank again. Your loan will now be approved.

Learning More
For additional details about building virtual assets, see the "Service Virtualization" section in the CTP user guide. The online documentation, as well as API reference, is available from help menu ![]() .
.