In this section:
Introduction
You can use TDA to extend and reshape the data you’ve captured and masked. This enables you to generate data realistic data for testing corner cases, positive and negative scenarios, and other instances that require data beyond what you initially captured.
In this section, we’ll use masked data to create additional accounts in ParaBank. The accounts will have a range of values suitable for different types of testing. The data for the new accounts, furthermore, will conform to the model TDA built based on its analysis of the data.
Prerequisites
You should have completed the following chapters of this tutorial before beginning this section:
You can alternatively follow this tutorial using an existing data repository.
Configuration Generation Setttings
The first step is to configure how TDA should generate new data.
- In TDA, click on the repository containing the masked data (ParabankDB_masked) and click the Models tab.
- Search for the customer_id key column.

- Click on the customer_id key column to view its relationships. Notice that the data model shows that when the customer ID is queried, only one result set is returned. When we inferred the constraints, the model determined that the minimum and maximum number of accounts (result sets) to be returned should be 1.

- Click on the ellipses menu for the Result Set element and choose Mask and Generate Settings.

- Change the Min occurrences and Max occurrences fields to
100when prompted and click Save.
- Generating new data based on the current settings would result in 200 new accounts with the same exact data. Click on the ResultSet4 link to review the constraints settings for the members of that set. The members should be BALANCE, TYPE, ID, CUSTOMER_ID.

- The constraint settings for BALANCE, for example, is limited to one value. This is acceptable for current data set, but we will need to set a new range of possible balances for the 100 new accounts we want to generate. Click the ellipses menu for the BALANCE member and choose Mask and Generate Settings.
- Configure the following settings when prompted and click Save:
- Mode: Random
- Type: Number
- Minimum:
-1000.00 - Maximum:
10000.00 - Decimals:
2 - Separator: . (dot)
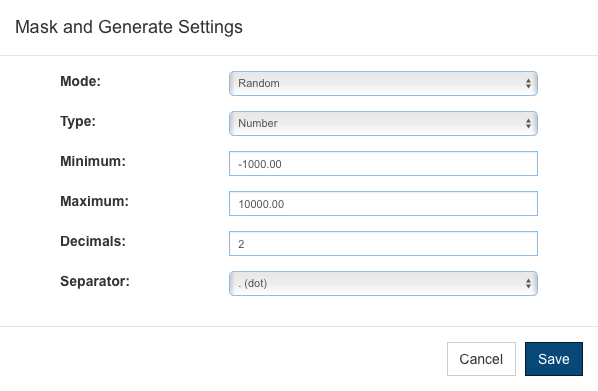
These settings will generate a realistic range of balances for the accounts we are generating. Notice that a gear icon is placed on the BALANCE member to indicate that the Mask and Generate Settings have been configured.
Generating Data with Formulas
The Formula Mask and Generate Settings mode enables you to programmatically configure a value to dynamically populate the records you are generating.
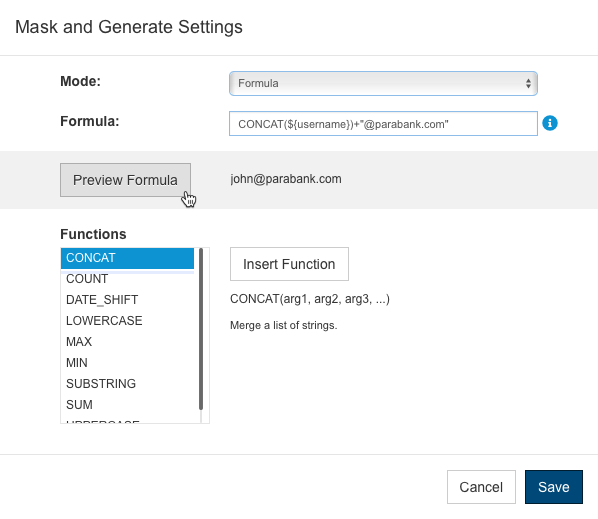
Formulas use JavaScript syntax, but TDA includes some ready-made functions that you can easily use in your formulas. You can also use variables to access the data. See Consuming the Data in Tools for information on how to insert parameterized values. Refer to the Working with Data Models> Formula documentation for additional information about formulas.
- In addition to setting a range of balances, we will need to set a range of account IDs associated with the new accounts. Click the ellipses menu for the ID member and choose Mask and Generate Settings.

- Set the Mode to Ranged and choose a value for the Maximum field that is at least 100 more than the minimum.

- Do not change the values TDA detected for the Decimals or Increment settings. This configuration indicates that at least 100 new whole number IDs will be generated in increments of 1. Click Save.
Feel free to configure the Mask and Generate Settings for the CUSTOMER_ID in order to spread the new accounts across new customers, as well as configure the TYPE member to randomly set the new accounts to saving or checking. These configurations are optional for this tutorial.
Generating and Reviewing Data
With the generation settings configured, we are ready to generate and review the new data.
- Click Generate Data in the TDA toolbar.
- By default, the generated repository will have the name of the source repository (ParabankDB_masked) appended with “_generated”.
The preview indicates the number of records to generate. You could make adjustments if you do not wish to generate some of the records or if you wish to include the data from the source repository. In this tutorial, we want to replicate the masked data repository, but include the additional account data we configured.
- Click Generate when ready and click on the new (ParabankDB_masked_generated) repository when the generation is finished.
- Search for the customer_id key column and click the link to view the data.

- Expand the table to view the generated data.

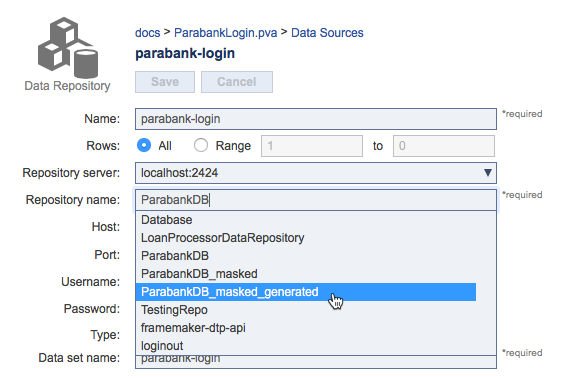
- Open the Service Virtualization model from the CTP applications menu and click on the parabank-login virtual asset.

- Choose the ParabankDB_masked_generated repository from the Repository name drop-down menu and click Save.
You may see a warning message in the Data set name field. This is because we are using an SQL data set. This warning has no impact on the virtual asset. - Return to the Environment Manager module and verify that the virtual instance of the database is provisioned.

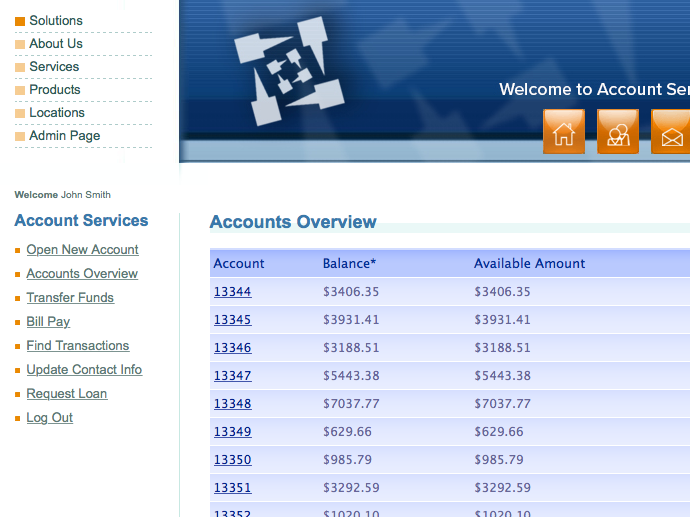
Return to ParaBank and log in or refresh the accounts page if already logged in. You will see that the virtual asset is providing the data we generated.