If you do not want to deploy message proxies (the recommended approach; discussed in Recording Traffic from Message Proxies), you can record HTTP, JMS, and MQ traffic "on the fly" with the recording proxy. Like message proxies, these proxies can concurrently capture live HTTP, JMS, and MQ traffic that passes through multiple endpoints.
The recording proxy can monitor traffic over the specified transport(s) as an application is exercised. Virtualize "listens" to traffic requests and responses, then builds a traffic file of legitimate request/response pairs. This traffic is then used to generate and deploy a virtual asset that virtualizes the captured behavior (returning virtualized responses that correlate to the incoming request messages based on the traffic captured).
JMS, MQ, HTTP, HTTPS (SSL), Basic, Digest, and Kerberos authentication are supported; NTLM is not.
HTTP chunking and continue headers are not supported.
There are three main steps involved in virtualizing this application behavior:
- Capturing traffic in a file. You tell Virtualize how to connect and what you want it to monitor. With monitoring enabled, Virtualize builds a traffic file from the captured requests and responses.
- Creating Message Responders from that traffic file.
- Verifying that those Message Responders were automatically deployed as a virtual asset.
Recording Traffic
To simultaneously capture live traffic across one or more endpoints:
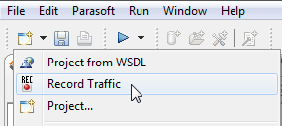
- Open the Record Traffic wizard (you can access this in a number of ways: from File> New Record Traffic, from the New> Other> Virtualize> Traffic> Record Traffic, or from the New button’s drop-down menu).
- For each endpoint where you want to record traffic, do the following:
- In the Configure Proxies for Recording Traffic dialog, click Add. The wizard that opens will be pre-populated with any connections you have already configured.
- Under Proxy Type, select the desired transport (HTTP, JMS, MQ).
- Complete the proxy settings for the selected transport.
- JMS and MQ settings are the same as those used in message proxies; for details, see JMS Configuration and MQ Configuration.
- HTTP settings are different than those used in message proxies; for details, see Configuring Recording Proxies for HTTP.
- In the Traffic file field, specify where you want to save the traffic file that will be created to capture this traffic. You can later use this traffic file to generate virtual assets that represent the live traffic captured. When specifying the file name, you can use variables such as %d (for current date) and %t (for the current time).
- Specify how you want traffic data recorded in traffic files:
- Append new session data adds new traffic data to an existing traffic file (the one specified in the Traffic file field). If the specified file does not already exist, a new file will be created.
Overwrite session data overwrites the traffic data in an existing traffic file (the one specified in the Traffic file field). If the specified file does not already exist, a new file will be created.
- Click OK.
- From the application under test, generate the traffic that you want to record.
- Click Finish.
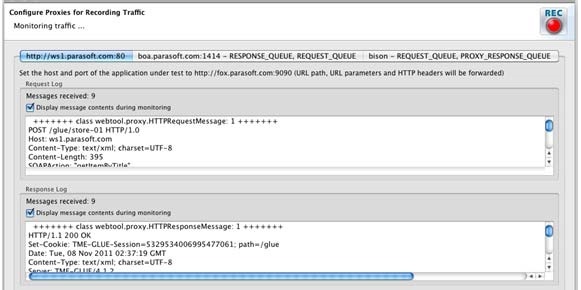
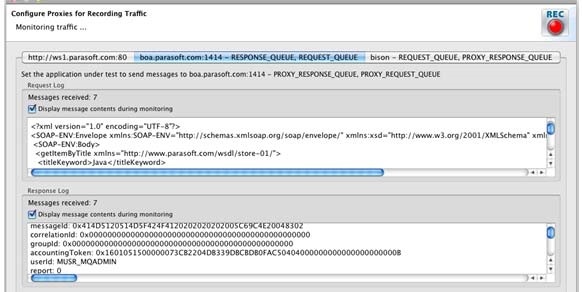
When live traffic is being captured, you can switch between the available tabs to view the requests and responses at each endpoint. The following screenshots show traffic being concurrently captured at 3 different endpoints.
Virtualizing the Recorded Traffic
Once you have recorded traffic, you can create and deploy virtual assets as follows:
- Create Message Responders from the traffic files created—see Creating Message Responders from Traffic Files - Overview.
- Verifying that those Message Responders were automatically deployed as virtual assets—see Deploying Virtual Assets.
Configuring Recording Proxies for HTTP
This section explains how to configure recording proxies for HTTP. This is different than the HTTP con-figuration for deployable message proxies (which is discussed in HTTP Configuration). It covers:
Note that HTTP, HTTPS (SSL), Basic, Digest, and Kerberos authentication are supported; NTLM is not.
Specifying HTTP Settings for the Recording Proxy
In the recording proxy wizard (as opposed to deployed message proxies), you specify your HTTP settings as follows:
- In the Proxy Connection Settings dialog, choose HTTP for ProxyType.
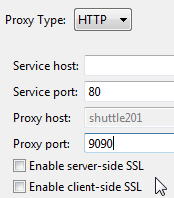
- Complete the appropriate HTTP settings.
- For server-side SSL, be sure to check Enable server side SSL.
- For two-way SSL, be sure to check Enable client side SSL and complete the Certificate and Private Key settings. Enabling client-side SSL will enable server-side SSL by default.
Server-Side SSL Setup
Due to the nature of SSL, Virtualize's proxy for HTTP recording generates a dynamic server certificate signed by its own certificate authority. In order to accept this dynamic server certificate, the client generating the requests over HTTPS will need to be set up to trust all certificates. To do this:
- Ensure that the Server Certificate setting for Virtualize is set with Trust all certificates enabled (in Parasoft> Preferences> Security) or that the service's Server Certificate is properly added to the Virtualize cacerts file (see Configuring for Services Deployed Over HTTPS for more details).
Two-Way SSL Setup
Due to the nature of SSL, Virtualize's proxy for HTTP recording generates a dynamic server certificate signed by its own certificate authority. In order to accept this dynamic server certificate, the client generating the requests over HTTPS will need to be set up to trust all certificates. To do this:
- Ensure that the Server Certificate setting for Virtualize is set with Trust all certificates enabled (in Parasoft> Preferences> Security) or that the service's Server Certificate is properly added to the Virtualize cacerts file (see Configuring for Services Deployed Over HTTPS for more details).
- Make sure you have the client certificate keystore file (and— if the client certificate and private key are stored in different keystores—the private key keystore file) as well as relevant keystore passwords, keystore type information, private key password, and the name of the alias being used for the certificate/private key.
Capturing the Traffic
To generate a traffic file that captures HTTPS traffic from a service that uses server-side or two-way SSL, complete the wizard as described in Capturing the Traffic (above).
In the HTTP wizard page, be sure to enable the appropriate SSL option:
- For server-side SSL, be sure to check Enable server-side SSL.
- For two-way SSL, be sure to check Enable client-side SSL and complete the Certificate and Private Key settings. Enabling client-side SSL will enable server-side SSL by default.
Configuring the AUT
To configure your application under test to access the virtual asset that will represent this recorded traffic:
- If the Client App is NOT a Browser: Modify your client application to point to the host and port where the Virtualize recording proxy is running. For example, assume your app runs at realapp.parasoft.com:80 and your proxy is running on mymachine.parasoft.com:44 (as specified in the wizard). You would point your client app at mymachine.parasoft.com:44 instead of realapp.parasoft.com:80, thus forcing the traffic to go through the proxy.
- If you are using a browser to generate traffic against the web application:
- If the app does not require authentication—or uses basic or Kerberos authentication, set mymachine.parasoft.com:44 as the proxy in the browser. This will redirect the traffic to the recording wizard proxy, and the traffic will get recorded.
If the app requires digest authentication, do not set the proxy in the browser; instead, modify the URL that the browser is pointing to. In other words, instead of using http://realapp.parasoft.com/mypage.html, use http://mymachine.parasoft.com:44/mypage.html. This will cause the traffic to get routed through the recording proxy.


