As a greater number of Service Oriented Architectures (SOA) are deployed throughout the industry, the need arises to enforce policies and best practices on all components of the SOA. Policy enforcement over these components will help to ensure interoperability, consistency, and re-usability throughout the life cycle of the SOA.
SOAtest provides SOA architects the ability to create and manage design-time SOA policies. A SOAtest “policy” now combines both static analysis policy configurations for XML artifacts (WSDLs, schemas and SOAP) as well as semantic and schema validation tests.
SOAtest allows an architect to create a policy configuration which combines Coding Standard tool rule assertions with test assertions such as Schema validity and WS-I interoperability. The new SOA policy configuration interface is very similar to rule configurations in Parasoft's language products (Jtest for Java, C++test for C and C++, dotTEST for .NET languages). SOAtest saves and loads policies in an XML format which extends on WS-Policy.
When you complete this section of the tutorial, your test suite should resemble the test suite entitled "Design and Development" in the SOAtestTutorial.tst file.
Enforcing Design-Time SOA Policies
For this example we will create policy enforcement tests for a book store service with the WSDL located at http://localhost:8080/parabank/services/store-01?wsdl.
- Right-click the project from the previous exercises, then choose Add New> Test (.tst) File from the shortcut menu.
- Enter a name for the file (e.g.,
Policy Enforcement), then click Next. - Select SOA> WSDL, and click Next to advance to the WSDL dialog.
- Select
http://localhost:8080/parabank/services/store-01?wsdlfrom the WSDL URL field. - Check the Create Tests to Validate and Enforce Policies on the WSDL check box and make sure the Create Functional Tests from the WSDL check box is also checked.

- Click Next until you advance to the Policy Enforcement dialog.
- Select the Apply Policy Configuration check box. This will create WSDL and functional tests that will enforce the assertions defined in the specified policy configuration.
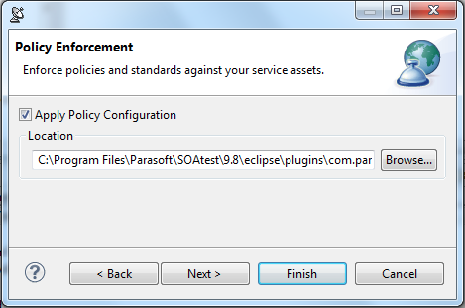
The default policy configuration,soa.policy, is a collection of industry-wide best practices. To use a custom policy configuration, you can either use the Browse button to select a policy configuration or the policy configuration's path can be entered in the text field. For details on policy enforcement, see SOA Policy Enforcement: Overview.
- Select the Apply Policy Configuration check box. This will create WSDL and functional tests that will enforce the assertions defined in the specified policy configuration.
- Click the Finish button.
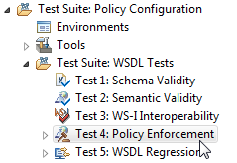
- Double-click the new Test Suite: Test Suite node added to the test case tree, enter
Policy Configurationin the Name field in the test configuration panel, and click the Save toolbar button. - Expand Test Suite: Policy Configuration then Test Suite: WSDL Tests. Notice that Test 4: Policy Enforcement has been added to Test Suite: WSDL Tests.
- Expand the Test 4: Policy Enforcement test to view its chained tools. You will see two Coding Standards tools, one for enforcing rules on the WSDLs and one for enforcing rules on the schemas
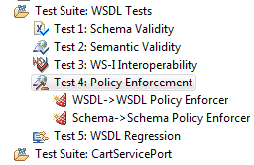
- The first tool, WSDL> WSDL Policy Enforcer, is chained to the WSDL Output of the Test 4: Policy Enforcement test and thus is passed the base WSDL and all imported WSDLs for rule enforcement.
- The second Coding Standards tool titled Schema> Schema Enforcer is chained to Test 4: Policy Enforcement's Schema Output and thus is passed all schema files referenced in the WSDL for rule enforcement.
- Expand one of the tests in the Test Suite: CartServicePort node and notice that a referenced Coding Standards tool titled Response SOAP Envelope> SOAP Policy Enforcer has been chained to the Test.
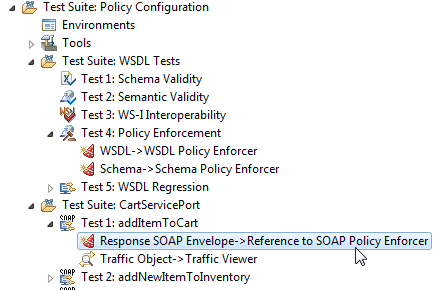
This tool will apply its contained policy configuration on the messages received by this test client. The tool is a reference to a Global Tool in the Tools Test Suite under the root Test Suite.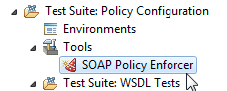
For more information on Global Tools see Global Tools. - Select the Test 4: Policy Enforcement Test and click the Test toolbar button. This will run policy enforcement tests on the WSDL and schema files. If any errors occur, they will be reported in the Quality Tasks view.
Defining Custom SOA Policies
In the previous exercise, we enforced policies using a default policy configuration. For this example, we will define a custom SOA policy.
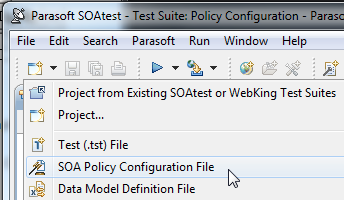
- Open the pull-down menu for the New toolbar button (top left) then choose SOA Policy Configuration File.
- Enter a name for the policy in the Policy name field, then click the Finish button. The Policy Configuration panel displays in the right GUI pane of SOAtest and lists assertions that correspond to policy enforcement rules and WSDL tests.

- From the Policy Configuration panel, you can:
- Enable/disable individual assertions by selecting or unselecting corresponding check boxes.
- Access help documentation for assertions by right-clicking and selecting View Rule Documentation from the shortcut menu.
- Import custom rules designed using SOAtest’s RuleWizard feature by clicking Add.
- Click Save to save the custom policy to the default SOAtest rules folder. The policy configuration you define can be used later to automatically create tests to enforce policies.