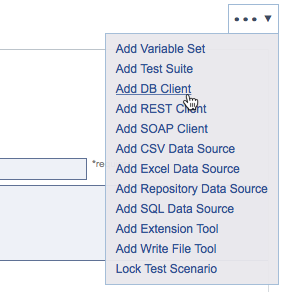
The DB Client tool enables you to query databases to validate statements. This tool is also available in the desktop product. See DB.
In this section:
Connecting the Tool
- Click on a test or scenario and choose Add DB Client from the actions drop-down menu.
- In the Connection field, enter the database driver class name, URL, and connection credentials (if required).
Enable the Close connection option if you want the tool to close the connection to the database after the test executes. This option is recommended when you plan to use the DB tool once. Do not enable this option if multiple DB tools will connect to the same DB. This enables you preserve resources by allowing all of the DB tools to share a connection.
Configuring the Database Query
- Specify the query statement in the Query field.
- Choose Semicolon or Magic token (typically used for stored procedures) from the Separator drop-down menu.
The tool will divide the contents of the SQL query editor by semicolon if the semicolon option is selected. If the magic token option is selected, the Magic token field becomes active so that you can specify a string for dividing the contents of the SQL query editor. A magic token is a string that starts at the beginning of a line and contains only the magic token (with optional white space after the token). - You can specify an OUT parameter to invoke stored procedures and functions that take OUT parameters or return a value. You can leave this field empty if you are executing a regular SQL query or a stored procedures that does not have any OUT parameters. For each DB tool, the same JDBC OUT parameters are sent to each callable statement. To use different out parameters, create a separate DB tool.
Configuring Runtime Settings
- Enable the Fail on SQL Exception option if the tool should fail when a SQL Exception is encountered. If a validation tool is chained as an output to this DB tool, the outcome of that validation will determine this tool’s success or failure, and this setting is not applicable.
- Choose a post query option from the drop-down menu:
- Auto-commit: Specifies whether you want to use auto-commit mode. In auto-commit mode (the default), the SQL query automatically commits changes to the database. Otherwise, changes will be visible only for the duration of the connection.
- Rollback: When this is enabled, the changes will be immediately reverted.
- No action: No action is taken.
Configuring XML Output
The following options are available for outputting the XML response:
- Encode XML characters: Specifies whether XML characters are encoded in the tool’s results. Enable this option if you want to ensure that the XML output of the tool is well-formed and that the values do not break the XML.
- Separate column names from values: Determines whether column names should be separated from their values.
- Use single result format if only one result: If this option is enabled, the results will not be nested in a
<results>element if possible. If there are multiple results, then the multi-output format will be used even if this option is enabled.


