This topic explains how to create JMS, XPath, SOAP Header, and Database properties that can be shared and referenced globally, as well as global authentications, key stores, tools, and WS-policy banks. In this section:
Global JMS Connection Properties
When creating a large test suite with multiple tools, there may be instances where some tools (SOAP Client, Messaging Client, and Call Back Tool) will use the same JMS Connection Properties.Rather than manually entering the same information into each tool or copying and pasting settings between tools, it may be easier to create JMS settings that each tool can reference. In this case, you can create global JMS Connection Properties at the test or action suite level. To create global JMS Properties, complete the following:
Select the desired node and click Add Property
 on the tool bar.
- In the Add Global wizard, choose Global Property > JMS Connection Properties and click Finish. A Properties node opens and the JMS Connection Properties panel displays in the right side of the GUI.
- Specify the settings in the JMS Connection Properties panel:
- (Optional) Enter the new name in the Name field. The name will appear in the tools that reference these properties. You can create more than one global reference for JMS Connection Properties, so the names you specify should be intuitive to how it's used.
Click Add Property to All Tests (if you don’t, the global properties you add will be ignored by the tools in the suite). If Use Shared Property Only is selected in the corresponding the dropdown, the corresponding tools in the suite will be able to only use the global property you added.
- In the Provider URL field, specify the location of the JMS Administered Objects.
- In the Initial Context field, specify the Java class that contains all the JMS properties mappings.
- In the Connection Factory field, specify the key used to look up the MOM-specific factory from the initial context. This can be either a Queue Connection Factory or a Topic Connection Factory.
- In the Authentication area, enable Perform Authentication and enter the Username and Password to authenticate the request. If the correct username and password are not used, the request will not be authenticated.
Only the SOAP Client, Messaging Client, and Call Back Tools can reference global JMS Connection Properties
After specifying the global JMS Connection Properties, you can share these properties across multiple instances of these SOAtest tools.
Global Ignored XPath Properties
As with global JMS properties, there may be instances when you have multiple Diff tools that use the same XPath settings.Rather than manually entering the same information into each Diff tool or copying and pasting settings between Diff tools, it may be easier to create XPath settings that each Diff tool can reference. In this case, you can create global XPath Properties at the action or test suite level.
To create a global list of ignored XPaths, complete the following:
Select the desired suite node and click Add Property
on the tool bar.- In the Add Global wizard, choose Global Property > Ignored XPaths and click Finish. A Properties node opens and the Ignored XPaths panel displays in the right side of the GUI.
- Specify the settings in the Ignored XPaths panel as follows:
- If you want to change the default name, enter the new name in the Name. This will be the name that appears in the Diff tools from which you will reference these XPaths. Because you can create more than one global reference list for XPaths, the name you enter should be intuitive to its use.
Click Add Property to All Tests (if you don’t, the global properties you add will be ignored by the tools in the suite) and choose an option from the corresponding dropdown:
Use Shared Property Only: when selected, the corresponding tools in the suite will be able to only use the global property you added.
Use Local and Shared Properties when selected, the corresponding tools in the suite will be able to use the global property you added and any properties configured within the individual tool itself.
- Click Add. An empty field appears in the XPath column of the Ignored XPaths List. By default, the Settings column is automatically filled in with all XPath operations specified, meaning that the entire XPath you add will be ignored.
Double-click in the XPath column. The Ignored XPath Settings dialog opens. Specify an XPath position. The XPath you enter can be shared by multiple diff tools within the suite. If you want to ignore more than one attribute at an element’s XPath location, leave the attribute name empty or use the wild card * (for example, myAttribute*).
Global SOAP Header Properties
When creating a large test suite with multiple tools, there may be instances where SOAP Client tests will use the same SOAP Header Properties.Rather than manually entering the same information into each tool or copying and pasting settings between tools, it may be easier to create SOAP Headers that each tool can reference. In this case, you can create global SOAP Header Properties at the test or action suite level.
To create a global SOAP Header, complete the following:
Select the desired suite node and click Add Property
on the tool bar.- In the Add Global wizard, choose Global Property > SOAP Headers and click Finish. A Properties node opens and the SOAP Headers panel displays in the right side of the GUI.
- Specify the settings in the SOAP Headers panel as follows:
- If you want to change the default name, enter the new name in the Name field.
Click Add Property to All Tests (if you don’t, the global properties you add will be ignored by the tools in the suite) and choose an option from the corresponding dropdown:
Use Shared Property Only: when selected, the corresponding tools in the suite will only be able to use the global property you added.
Use Local and Shared Properties: when selected, the corresponding tools in the suite set will be able to use the global property you added and any properties configured within the individual tool itself.
Click Add. The Choose Header Type dialog opens.

- Select a SOAP Header type from the Available Header types list and click OK.
Configure the SOAP Header parameters as needed. For more information on each SOAP Header, see Adding SOAP Headers in SOAtest.
Global Database Account Properties
When creating a large test suite with multiple tools, there may be instances where DB tools will use the same Database Properties.Rather than manually entering the same information into each tool or copying and pasting settings between tools, it may be easier to create a Database Account that each tool can reference. In this case, you can create global Database Account Properties at the suite level.
To create a global Database Account, complete the following:
Select the desired suite and click Add Property
on the tool bar.- In the Add Global wizard, choose Global Property > Database Account and click Finish. A Properties node opens and the Database Account panel displays in the right side of the GUI.
- Specify the settings in the Database Account panel as follows:
- If you want to change the default name, enter the new name in the Name field.
Click Add Property to All (if you don’t, the global properties you add will be ignored by the tools in the suite) and choose an option from the corresponding dropdown:
Use Shared Property Only: when selected, the corresponding tools in the suite will be able to only use the global property you added.
- Configure the rest of the Database Account settings as needed.
- If the account settings are stored in a file, enable File and specify the path to that file.
- To refresh/reload the file (for example, if you edited it externally), click Refresh Configuration Settings.
If you want to specify the settings in this panel, enable Local and specify the driver settings. See
Database Configuration Parameters for additional information.
To export these values to a file, click Export Configuration Settings. Once the values are exported to a file, you can import the file through the File > Input File control (described above). This way, you won’t have to reenter the same values if you want to add this same account to a different suite.
Note that exported properties files contain the following properties:
- driver
- url
- username
- password
- close.connection
For example:
version=1driver=org.hsqldb.jdbcDriverurl=jdbc:hsqldb:hsql://localhost/parabank username=sapassword=dGVzdA==close.connection=true
- If the account settings are stored in a file, enable File and specify the path to that file.
Global Authentications
You can add authentication methods to your test suite so they can be shared among your tests without needing to define authentication settings for each test. A default authentication method can be set for the test suite that will be automatically applied to every test, though individual tests can be configured to use alternative authentication methods, as needed. Multiple authentication methods can be created for the test suite, but only one can be set as the default.
To add a shared authentication method:
- Right-click on a test suite and choose Add New > Global Property...
- Expand the Authentication list and choose an authentication method.

- If you have selected OAuth 2.0, click Next and choose a Grant Type, then click Finish. For all other types, just click Finish. The authentication method is added to the test suite's Authentications node. If this is the first shared authentication created for this test suite, the Authentications node is created automatically.
- A configuration tab opens in the workspace. How you complete the configuration depends on which authentication method you selected:
- Basic
- Enter an easily identifiable name in the Name field.
- Enter the Username and Password to be used for this authentication.
- Digest
- Enter an easily identifiable name in the Name field.
- Enter the Username and Password to be used for this authentication.
- Kerberos
- Enter an easily identifiable name in the Name field.
- Enter the Service Principal to be used to authenticate.
- For more information about Kerberos authentication, see "Security Settings" on the Additional Preference Settings page.
- NTLM
- Enter an easily identifiable name in the Name field.
- Enter the Username and Password to be used for this authentication.
- OAuth 1.0
- Enter an easily identifiable name in the Name field.
- Enter the Customer Key and Customer Secret to be used for this authentication.
- Select the authentication mode from the Mode dropdown. The other fields you will need to complete depend on your selection:
- Obtain Request Token (requests the Request Token from the server using the Consumer Key and Secret)
- Scope: Restricts what information may be accessed. This information in embedded into the Consumer Key.
- Exchange Request Token for Access Token (exchanges the Request Token plus the verification code for the Access Token)
- Request Token: Specifies Temporary Request Token credentials obtained from the server (used to exchange for the Access Token).
- Request Token Secret: Specifies Temporary Request Token credentials obtained from the server (used to exchange for the Access Token).
- Verification Code: Specifies the verification code provided by the server; this confirms that the resource owner will grant permission.
- Sign Request for OAuth Authentication (uses the specified Access Token and Access Token Secret to give the client access to the user's private resources)
- Access Token: Specifies the Access Token used to give the client access to the user's private resources.
- Access Token Secret: Specifies the Access Token Secret used to give the client access to the user's private resources.
- Obtain Request Token (requests the Request Token from the server using the Consumer Key and Secret)
Add any additional OAuth parameters (for example, the timestamp and nonce) under Parameters.
- OAuth 2.0
- Enter an easily identifiable name in the Name field.
- Select a Grant Type. The other fields you will need to complete depend on your selection:
- Login Suite: Identifies a test that you have configured to retrieve an OAuth 2.0 authorization code. This test should be configured to accept OAuth settings from this configuration, including Redirect URI, Client ID, Scope, and/or Audience, as needed. After executing the test, the authorization code is automatically exchanged for an access token to be used in subsequent API tests. This field only appears when the selected Grant Type is
Authorization CodeorAuthorization Code with PKCE. - Redirect URI: Specifies the URI of the OAuth 2.0 secured application, which might be required by the OAuth server to get an authorization code and exchange it for a token. SOAtest does not actually send requests to this URI. This field only appears when the selected Grant Type is
Authorization CodeorAuthorization Code with PKCE. - Token URI: Identifies the access token endpoint on the OAuth 2.0 authorization server.
- Client ID: Along with Client Secret, these parameters provide credentials for authenticating with the authorization server.
- Client Secret: Along with Client ID, these parameters provide credentials for authenticating with the authorization server.
- Scope: This parameter is used by the client to request limited access to the application. A comma-separated list of values specific to the authorization server may be entered. If no scope is specified, the default scope may be returned.
- Audience: Specifies the URI of the resource server.
- Code Verifier: Specifies the method by which the code verifier is generated. The default is
Automatic, which is the recommended setting. If another method is used, the result should be a cryptographically random string using the characters A-Z, a-z, 0-9, and the punctuation characters - . _ ~ (hyphen, period, underscore, and tilde), between 43 and 128 characters long. This field only appears when the selected Grant Type isAuthorization Code with PKCE. - Challenge Method: Specifies whether the code challenge is the plain text version of the code verifier or the SHA-256 version of the code verifier. This field only appears when the selected Grant Type is
Authorization Code with PKCE.
- Login Suite: Identifies a test that you have configured to retrieve an OAuth 2.0 authorization code. This test should be configured to accept OAuth settings from this configuration, including Redirect URI, Client ID, Scope, and/or Audience, as needed. After executing the test, the authorization code is automatically exchanged for an access token to be used in subsequent API tests. This field only appears when the selected Grant Type is
Select whether to send the access token using Header or Query Parameter.
- Basic
Global Key Stores
Key Stores contain the certificates and private keys necessary to perform secure server/client authentication, XML encryption, and XML digital signatures through Web services. The values you specify in a Key Store will be available to use with the SOAP Client, XML Encryption, and XML Signer tools.
The SOAP Client Tool can use a Key Store certificate to complete the handshake with a server. The XML Encryption Tool can use a Key Store certificate to encrypt XML documents, and the XML Signer tool can use a Key Store certificate and private key to sign and verify your identity in an XML document.
Unlimited Strength Java Cryptography Extension is Required
In order to use Key Stores, you will need to download and install the Unlimited Strength Java Cryptography Extension. For details, see JCE Prerequisite.
MQ SSL
If you are configuring a global test suite property for MQ, you will need to configure a key stores and a trust store. In the key store settings, you will only need to fill out the Certificate tab. The Certificate alias field is not required. The Private Key tab is not applicable to MQ SSL.
Local Key Store Configuration
The local key store configuration pertains to all clients and tools in the test suite.
- Right-click on a test suite in the Test Suite Explorer and choose Add New > Global Property.
- Choose Global Key Store and click Finish. A Key Stores node with a Key Stores child will be added to the test case.
- If you want to change the default name, enter the new name in the Name field.
- Choose the Local option and specify the following settings in the Key Store panel’s Certificate tab:
- Enable the Use same key store for private key option if the Key Store contains private keys for the certificate.
- Specify the key store file in the Key store file field. Enable the Persist as relative path to save the location as a relative path (for example, to facilitate project sharing).
- Enter the key store password in the Key store password field.
- Choose the type of key store being used from the Key store type dropdown menu (for example, JKS, PKCS12, BKS, UBER, PEM).
- Click Load to populate the aliases with the available certificates/keys. The certificate/keys will not be loaded if the path, type, and key store password are not valid.
- Choose the certificate alias in the Certificate Alias dropdown menu.
- Click the Private Key tab.
- If the Use same key store for private key is disabled in the Certificate tab (see steps 4.a-4.d) specify the key store file, key store password, and key store type in the appropriate fields.
- Click Load to populate the aliases with the available certificates/keys. The certificate/keys will not be loaded if the path, type, and key store password are not valid.
- Specify the private key password in the Private key password field and save your changes.
If the key store file has been edited externally, you can click Refresh Configuration Settings to reload the configuration fields so that the Global Key Store uses the most recent values.
Exporting a Global Key Store Configuration
After configuring a global key store, you can export the settings to a .properties file and reference the settings in other .tst files so that you do not have to configure the same key store settings for every suite in your project.
- Configure the local key store settings and click Export Configuration Settings.

- Choose a name a location to save the .properties configuration file when prompted.
Importing a Global Key Store Configuration
You can reference a key store configuration that has been exported from another test scenario. This enables you to configure certificate settings once and share across projects. If the source key store configuration .properties file is updated, the test cases referencing the file will also be updated.
- Right-click on a test suite in the Test Suite Explorer and choose Add New > Global Property.
- Choose Global Key Store and click Finish. A Key Stores node with a Key Stores child will be added to the test case.
- If you want to change the default name, enter the new name in the Name field.
- Choose the File option and browse for the key store configuration .properties file.
- Save your changes.
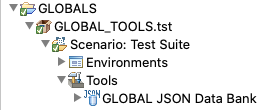
Global Tools
You can add global tools to your test suite, such as data banks, and reference them as needed throughout the test scenario so that they do not have to be recreated each time.
- Right-click on a test suite and choose Add New > Global Property...
- Choose a tool from the Global Tool menu and click Finish. A new tool node displays in the Test Case Explorer tree.
- Customize that tool’s settings in the tool configuration panel.
- You can chain additional tools to that tool as described in Adding a Single Output.
To use a global tool in a test, select it from the Existing Tools list that is available when you add a test or output.

If you delete a global tool that is referenced by other tools or global tools in the suite, you will be prompted to delete the references, as well.

If you choose to delete the tool but keep the references, then the references will be deactivated and remain in the suite. The references will be reenabled if a new global tool with the same name as the deleted tool is added.
Global WS-Policy Banks
One of the biggest aspects of web services is interoperability. web services rely on a standardized interface to declare what requirements must be met in order for a service consumer to interact with a service provider. The basic WSDL specification does not have the capacity to declare complex client-side requirements. To accommodate for this, WSDL is extended with WS-Policy and WS-PolicyAttachment, allowing a service provider to define additional requirements within the WSDL. WS-Policy leaves it up to other WS-* specifications to define their own set of policies. One such specification is WS-SecurityPolicy which defines policies related to WS-Security.
When reading a WSDL with SecurityPolicy extensions, SOAtest automatically generates the test cases with all the necessary policy related configurations. There are some attributes of the test case that still require manual configuration, but SOAtest will automatically set up the foundation.
Note
To add a global WS-Policy Bank, complete the following:
- Select the desired test suite node and click Add Property
 on the tool bar.
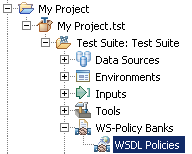
 - In the Add Global wizard, choose WS-Policy Bank and click Finish. A new WSDL Policies node displays in the Test Case Explorer tree (under the WS-Policy Banks branch, which will be added if it did not already exist) and a WSDL Policies configuration panel displays in the right side of the GUI and various WS-security tests will be chained to the SOAP client tools.
- Specify the settings in the WSDL Policies panel as follows:
- If you want to change the default name, enter the new name in the Name field.
- In WSDL URI, specify the WSDL URI where this Web service can be accessed. You can either enter a WSDL or click Browse.
- Click Refresh from WSDL to refresh the WSDL from the given location URL and reparses it.
- In the Global Policies area, review the policy definitions in non-XML format. as well as the policy alternatives implied by your WSDL. Each section in the left hand tree represents a global policy element in the WSDL