Parasoft SOAtest has two capabilities that help you make bulk updates to your tests when the services that they are testing change:
- Change Advisor identifies changes to a service that impact any tests created against a different version of the service and allows you to update your tests in bulk without having to manually modify them one by one.
- Search and Replace allows you to search your tests for values that you know have changed in your service and update them all at once with a new value.
These two capabilities are typically used in sync to ensure rapid, accurate updating. This lesson will show you how to use both capabilities to update tests.
Creating Tests Against an "Old" Version of a Service
Start by creating a set of tests for an older version of a bookstore service. We’ll later update these tests using the Change Advisor and Search and Replace capabilities.
To create tests vs. an old version of the bookstore service:
- Create a new empty project and name it
Change Advisor Lesson:- Go to File > New > Project.
- Choose General > Project.
- Click Next.
- Enter
Change Advisor Lessonunder Project Name. - Click Finish.
- Add a new .tst to that project:
- Right-click the Change Advisor Lesson node in that added project and choose Add New > Test (.tst) File.
- Enter
Change Advisor Lessonunder File name and click Next. - Choose SOA > WSDL and click Next.
- Enter
http://localhost:8080/parabank/services/store-01?wsdlas the WSDL URL. - Ensure that Create Functional Tests from the WSDL is enabled.
- Click Finish.
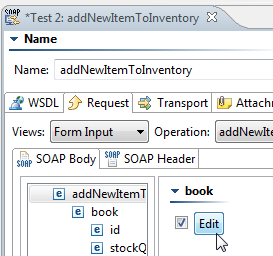
- Double-click Test Suite: Test Suite > Test 2: addNewItemToInventory to open its editor.
- Enable the book element and click Edit for it.
- Fill in the following fields:
- Id: Enter
10 - Price: Enable price and enter
9.99 - stockQuantity: Enter
5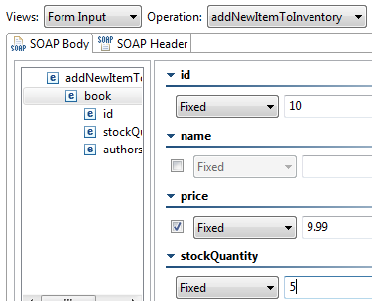
- Id: Enter
- Click Save on the tool bar. Note that when we update our tests to test the newer version of the bookstore, we will confirm that these values are carried over properly.
- Click Test 2: addNewItemToInventory in the Test Case Explorer and run it.
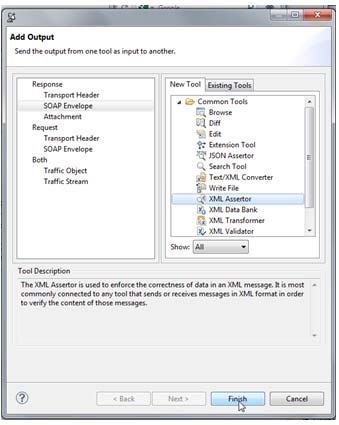
- Click Add test or output on the tool bar.
- Choose Response > SOAP Envelope in the left pane and XML Assertor in the right, then click Finish.
- In the Assertor’s editor, click the Configuration tab, click Add, then choose Structure Assertions > Occurrence Assertion and click Next.
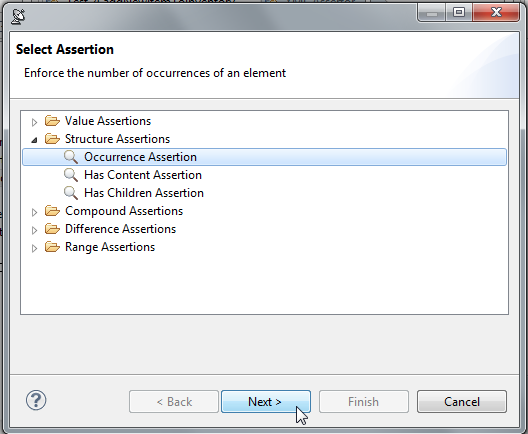
- In the XML tree shown, click price and click Finish.
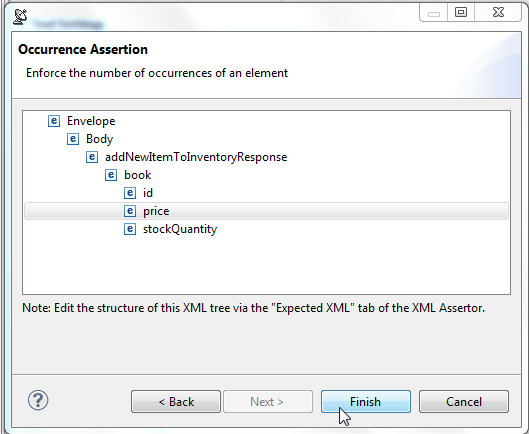
- Under Occurrence Assertion Configuration, make sure that == and Fixed are selected in the dropdown menus, then enter
1in the input field.

Using this assertor, we are declaring that the element price occurs exactly once in the SOAP response message. If this element is later changed in the updated version of the service, we will have to re-configure the updated test’s XML Assertor.
Performing Change Impact Analysis
To perform change impact analysis on these test assets:
- Go to Window> Perspective> Open Perspec-tive> Parasoft Change Advisor to open the Change Advisor perspective.
- In the Test Case Explorer, choose Change Advisor Lesson > Change Advisor Lesson .tst > Test Suite: Test Suite.
- Click Perform Change Impact Analysis on the tool bar.

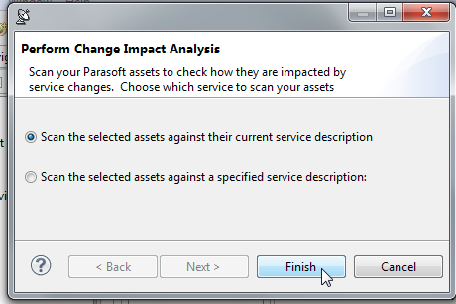
- In the dialog that opens, enable Scan the selected assets against their current service description and click Finish.
In the Quality Tasks view, change the layout to the SOAtest Change Impact Layout, which is designed for reviewing the results of running the change impact analysis. You can switch layouts by clicking the Quality Tasks view’s SOAtest Change Impact Layout toolbar button...

or by selecting it from the dropdown menu.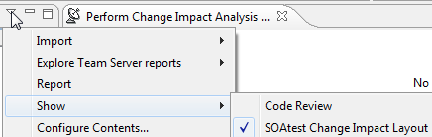
No Change Impact Layout toolbar button?
If the green SOAtest Change Impact Layout toolbar button is not present, choose Configure Contents, then enable SOAtest Change Impact Layout.
This Change Impact Analysis was configured to compare the service information saved in the tests to the service information contained in the "live" WSDL that the tests currently reference. It would report any WSDL changes that would impact the test cases. Since all of our tests were created with this WSDL just minutes ago (and the WSDL has not changed since then), no changes are reported by the analysis. Next, we’ll see what happens if the change impact analysis is run vs. a different WSDL.
- In the Test Case Explorer, choose Change Advisor Lesson> Change Advisor Lesson.tst > Test Suite: Test Suite.
- Click Perform Change Impact Analysis on the tool bar.
- Enable Scan the selected assets against a specified service description, ensure that WSDL is selected under Artifact type, then complete the dialog as follows:
- Scan Assets that use the following WSDL:
http://localhost:8080/parabank/services/store-01?wsdl - Compare assets to the following WSDL:
http://localhost:8080/parabank/services/store-01V2?wsdl
The first option that tells SOAtest which tests to perform the analysis against. The second option tells SOAtest what WSDL to compare the tests against. The results will now report changes as a result of the service differences found in these WSDLs.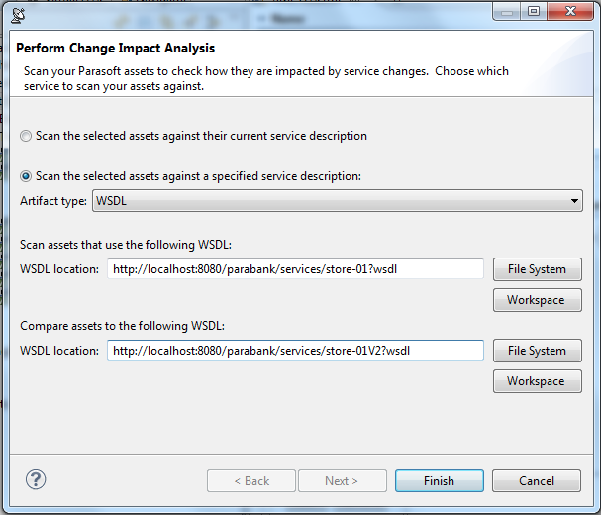
- Scan Assets that use the following WSDL:
- Click Finish.
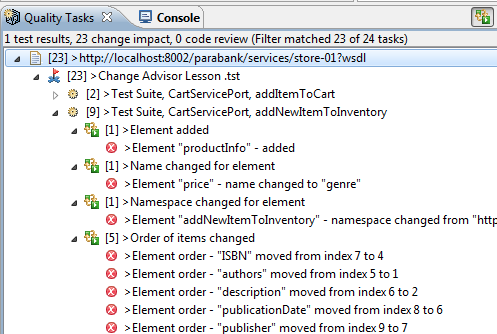
- In the Quality Tasks view, explore the changes that were reported. For many of the tests, the namespace and targetURI changed.
- Review the results for Test 2: addNewItemtoInventory.
- Notice that there are a number of other changes reported:
- The new element
productInfowas added. - The name of the element
pricechanged. - The order of elements in the message changed.
- The new element
- Review the results for Test 2: addNewItemtoInventory.
Note that the Change Impact results do not show all changes that are in the service definition; they show only service definition changes that actually affect the tests. For example, if there were changes in operations that were not currently being tested, then no change impact results would be reported for those changes.
Creating a Change Template
When the Change Impact analysis is run, the Service Catalog view is automatically populated with information about the services and versions of the services that are being tested by the tests being analyzed.
Notice how the store service and versions have already been populated. By default, SOAtest does not know the official names of the services and versions being tested, so it uses the service definition as the service name. It also uses the name "Old Version" to represent the version of the service that the tests are currently testing, and it uses the name "Current Version" to represent the version represented by the new service definition. The Service Catalog allows you to browse the operations that were detected for each version.
- Rename the service and versions to something that we can better understand:
- In the Service Catalog, right-click the top-level service node and choose Rename Service.
- Enter
Bookstoreas the service name. - Right-click the Old Version node for the bookstore service, choose Rename Version, then replace
Old Versionwith1.0.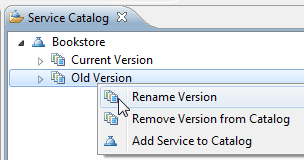
- Right-click the Current Version node for the bookstore service, choose Rename Version, then replace
Current Versionwith2.0.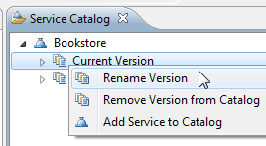
Next we want to define a change template that will define how we should update our tests so that they test the new version of the service.
- Create a change template as follows:
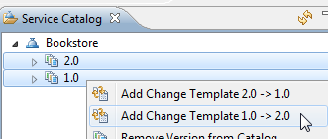
- In the Service Catalog, select the nodes 1.0 and 2.0.
- Right-click the selection and choose Add Change Template 1.0 -> 2.0.
- Enter
LessonTemplateas the file name and leave/Change Advisor Lessonas the location.
- Click Finish. The change template editor will open.
- Review the first tab of the change template that was created. Note that:
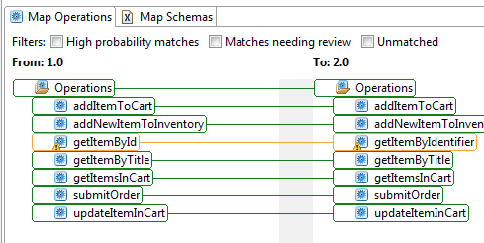
- The Map Operations tab shows the operations defined in both WSDLs, as well as a default mapping between the different versions of the WSDL. When SOAtest first creates a change template, it creates a default mapping between the different versions, attempting to match nodes that it thinks are the same.
- Green matches denote the fact that SOAtest is confident that the mapping it made is correct and review is not required.
- Yellow matches denote that SOAtest is less confident that the mapping it made is correct and review is recommended to confirm or update the mapping.
- Here, all operation mappings are shown in green, except for the mapping between the operation
getItemByIdandgetItemByIdentifier. It appears that this operation changed names, but that the meaning of the operation is the same. This seems like a good match.
- Indicate that we’ve reviewed the mapping between the operation
getItemByIdandgetItemByIdentifierby right-clicking getItemById and choosing Mark Match getItemById -> get-ItemByIdentifier as Reviewed". This will make the match turn green.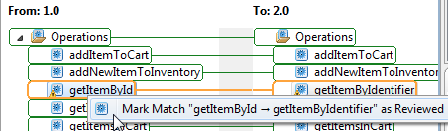
- Review the second (Map Schemas) tab of the change template that was created. Note that:
- This tab shows the schemas defined for each operation. You can double-click on the editor tab to cause it to expand so that the editor is larger.
- The
addNewItemToInventoryoperation is marked with a red ‘X’, indicating that there are differences in the schema for that operation that need to be reviewed.
- Other operations do not need review since SOAtest did not detect any changes in those operations in need of review. If you select each of the operations without the red 'X' icon, you’ll see that all matches are in green.
- Select the addNewItemToInventory operation to explore it. Note that:
- SOAtest matches the
priceandgenreelements but indicates that they need review. - The operation contains a new element named
amountthat did not appear in the original version.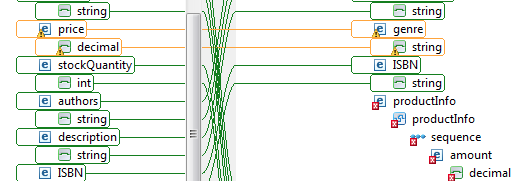
- SOAtest matches the
- Indicate that the mapping between the
priceandgenreelements is incorrect by selecting the price element and clicking Disconnect.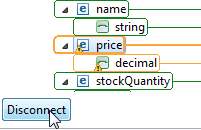
It appears that thepriceelement was renamed toamount, and thatgenreis the new element in the WSDL. - Indicate that the
priceelement was renamed toamountby choosing price and amount, then clicking Connect.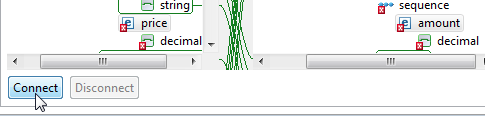
Thegenreelement is a new element that appears for this operation. In order for our tests to be updated properly, we must configure a default value for that element that will be configured in each of the updated tests. Otherwise, the updated tests would send an empty value for that new element. - Configure a default value for the
genreelement as follows:- Right-clicking genre and choose Configure Default Value for Added "genre" element.

- In the dialog that opens, enter
Literaturein the input field and click OK.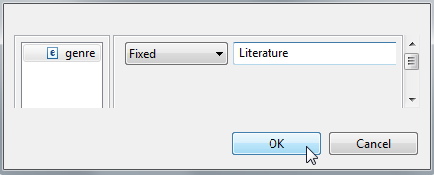
- Notice that
genrenow has a green ‘?’ and that all matched and unmatched nodes are now green. This indicates that we’re finished reviewing and configuring this operation.
- Right-clicking genre and choose Configure Default Value for Added "genre" element.
- Indicate that the three parent nodes of amount have been reviewed by right-clicking the highest productInfo element and choosing Mark"productInfo" and Children as Reviewed.
- Save the template by clicking Save on the tool bar. At this point, our template has been defined and is ready to be applied to our tests. Double-click the change template editor tab to bring it back to normal size.
Applying the Change Template to Update Tests in Bulk
To update the tests impacted by this service change:
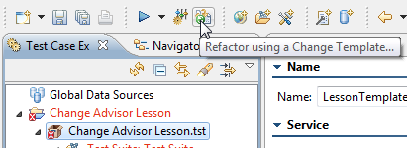
- In the Test Case Explorer, select Change Advisor Lesson.tst, then click Refactor Using a Change Template on the tool bar.
- In the wizard that opens, complete the first page as follows:
- Version:
1.0 - Update Parasoft assets to use service version:
2.0 - By applying the change template:
LessonTemplate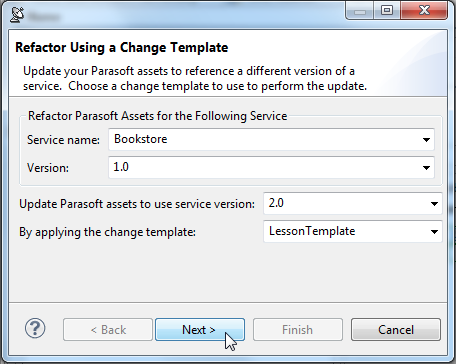
- Version:
Click Next.
On the second page, leave New Location enabled, then click Workspace and choose the Change Advisor Lesson project. This will cause the updated tests to be saved in a new folder within the Change Advisor Lesson project. Note that, in some cases, you might want to overwrite your previous tests. However, this is highly discouraged unless you have the tests backed up (for example, using a source control system). Otherwise, you will lose your original tests.
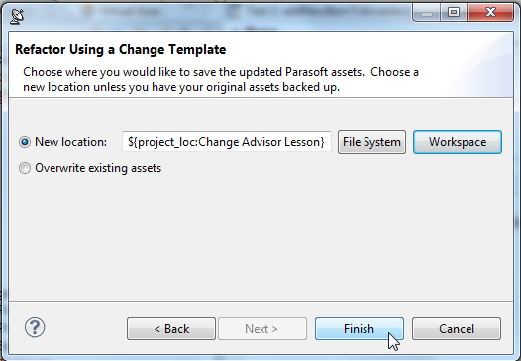
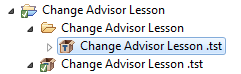
Click Finish. A new folder called "Change Advisor Lesson" will be created. This folder contains the updated tests.
- Open the .tst file, then open the editor for Test Suite: Test Suite > Test Suite: CartService-Port > Test 2: addNewItemToInventory. Note that:
- If you select the productInfo element, you’ll see that the value that we had configured for the
priceelement has been transferred to the amount element, as defined in our change template.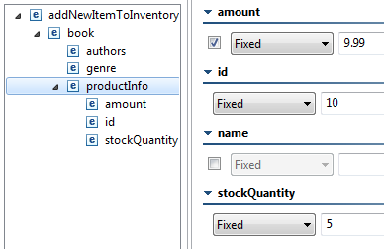
- The other values that we inputted earlier have carried over to the new test. Select the genre element, and note that the value
Literatureappears there, as defined in our change template.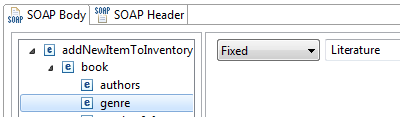
- A new, updated environment has been added to the Environments node of the new folder and it has been set as the active environment.

- If you select the productInfo element, you’ll see that the value that we had configured for the
- Choose the new folder Change Advisor Lesson > Test Suite: Test Suite, click Run Change Impact Analysis on the tool bar, enable Scan selected assets against their current service description, then click Finish. Note that no changes are reported, since the new tests are now updated to test the current version of the service.
Updating Tests Using Search and Replace
Change Advisor is applicable for tests that are configured:
- Against one of the supported artifact types, and
- In Form Input mode.
However, there are cases where it is not applicable. For example, messaging clients that are in Form XML are not supported by Change Advisor. XPaths in XML Assertors also do not get updated by Change Advisor. To support such cases, SOAtest provides a Search and Replace functionality that can be used to update these kinds of fields in bulk. Otherwise, it would be tedious to update fields one-by-one in cases where the same modified values are used over and over.
To use search and replace to update values:
- Right-click the new version of Change Advisor Lesson.tst and choose Test Using Example Configuration.

- In the Quality Tasks view tool bar, click SOAtest Default Layout to display the functional test results.

- Look at the error reported for Test 2: addNewItemToInventory and note that the failure is occurring because the
priceelement no longer appears in the response XML (remember that it was renamed toamountand now appears under theproductInfoelement).
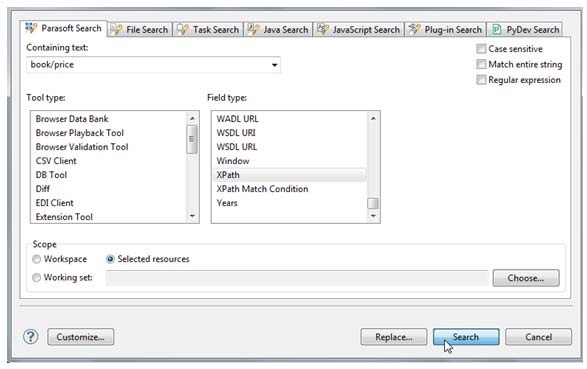
- Choose the new Change Advisor Lesson.tst in the new Change Advisor Lesson folder, then go to Search > Parasoft Search from the tool bar.
- Enter book/price in the Containing text field, select XPath from the Field type selection box, enable Selected resources, then click Search.
The Search view will populate with the search results. - Right-click the XPath underneath the XML Assertor and choose Replace Selected.
- In the dialog that opens, enter
book/productInfo/amountin the With field and click OK.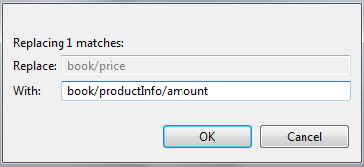
- Select Test 2: addNewItemToInventory in the folder created for our new WSDL, increment the id field, and click Run Tests on the tool bar. The test should now succeed since the XPath in the XML assertion is now up to date.