By default, all team members are added to Team Server and are assigned read-only privilege to data in the Team Server repository. The Named Accounts Configuration page enables you to restrict or limit access to Team Server data to team members as necessary.
Named Accounts allows for logical separation of data for different development groups within your organization. Although Named Accounts provides developers access to Team Server data, developers do not have any administration privileges.
Non-team members can still run test configurations stored on Team Server
Test configurations stored in Team Server can still be executed by tools connected to Team Server (i.e., SOAtest, C++test, dotTEST, and Jtest) even if the users executing the test configuration are not members of the team associated with the shared assets. If the tool user knows the name of a project on Team Server, then he or she can set dtp.project in the .properties file to the project and execute the test configuration without being a member of the named account.
Unique user names should be assigned to users that need access to administration pages. You will also need to enable the following permissions: teamserver:administration:true. This can be done from User Administration. See Permissions.
Accessing Named Accounts Configuration
If the administrator is already appointed, the Named Accounts Configuration page is only accessible to that administrative user.
- Choose Team Server from the settings drop-down menu.

- Choose General> Named Accounts from the main menu to open the Named accounts configuration page.

Adding a New Account
- Open the Named Accounts configuration page and click [Add new account]
- Assign login information and a path prefix. The path prefix is a unique key that allows administrators to restrict the user’s access to specific data stored on Team Server. By assigning a prefix, administrators can organize data structure on Team Server in two ways:
- Data located in the root directory available to default/unauthorized users
- Data located in a path restricted to specific user(s) assigned a unique prefix.
- Click the [Add account] link to confirm the specified data and save the new user.
Modifying Named Accounts
Open the Named Accounts configuration page to modify existing user accounts. You can make the following modifications to any of the listed users:
- Click the [Manage all users' permissions] link to view permissions granted to all registered users. Permissions can be modified as necessary.

- Click [Manage permissions] to enable unauthorized users to modify specified data stored on Team Server. Set the path to the data on Team Server to specify the data that can be modified.
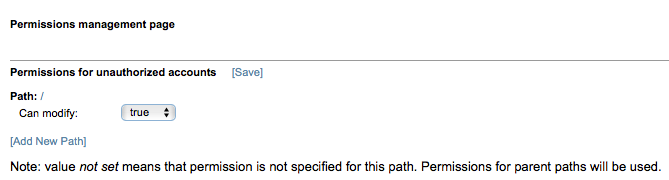
Setting new permissions from the Named Accounts configuration page is not recommended. The tools on this page are intended to allow you to review or modify existing permissions. Add new permissions from the Data Storage page. See Data Storage. - Enable or disable the Enable Unauthorized Connections option to allow or deny unauthorized user connections to Team Server.
- Click a user name in the Login column to change the user’s login credentials and/or path prefix.
- Enable or disable the option in the Active column to activate or deactivate the user.
- Click the Manage link in the Permissions column to view and configure the current permissions granted to the user account.
- Click Remove in the Remove account column to remove the user account from the system.
- Click the [Save] link to commit your changes.