In this section:
Introduction
Flows can perform custom calculations based on the available project data, such as Risk, Technical Debt, and KPI density. A group with multiple projects may want the same report for all of their projects, but each project may place different emphasis on different aspects of the data. For example, a group working on three projects may need to calculate the risk associated with each project. They may want the risk factors weighted more toward static analysis violations for one project, the risk factor in the second project to emphasize unit test failures, and balanced factors for the third project. The group can accomplish this by setting up different models and profiles for each project.
A model defines the template for the data used to perform a specific type of calculation. Each instance of a model is a profile. Profiles must be paired with flows that can consume the data associated with the specific type of calculation. The data is expressed as a table. The table template is defined in the model, and the data is organized in the profile. If a flow uses a profile, then it will automatically be imported when installed.
Click the Model Profile tab to view and edit model profiles.

Creating Models
- Click Add Model and enter a name when prompted.

- Click Confirm when finished.
- Click the + in the Model Attributes field to add attributes. An attribute is additional metadata associated with the profile, such as any data that only requires one definition.

- Enter a key (required) and display name for the model. Do not use the string "id" as the key value when creating or editing models.
- Choose a type from the drop-down menu. The type of model determines the kinds of fields that can be configured.

- Set any values that you want to configure for the type of model.

- Click the + icon in the Model Columns field and follow the same process as adding the attributes to add columns.
- Click Save when finished.
Creating Profiles
Profiles use the data structure defined in the model. Once a profile has been added to a model, the model cannot be edited. If you need to change the model, do so before adding profiles. Otherwise, you will need to delete the profiles, change the model, and recreate your profiles. You can build profiles in the UI, as well as create them in a spreadsheet and import them into the model (see Exporting and Importing Profiles).
- Click Add Profile and enter a name when prompted.
- Choose the model for the profile and click Confirm.

- The model will open in the editor. Configure your profile using the data configured in the model.

- Click Save when finished.
Exporting and Importing Models
Choose a model and click Export Model to download a JSON file containing the model data.

You can import JSON files to create models, instead of manually inputing all the values.
- Create an empty model or choose an existing model from the sidebar.
- Click Import Model and browse to the JSON file you want to import.
- Click Import. The data from the imported file will overwrite the selected model.
Exporting and Importing Profiles
Choose a profile and click Export Profile to download a spreadsheet containing the profile data.

You can import CSV files to create profiles, instead of manually creating them in the UI.
- Create an empty profile or choose an existing profile.
- Click Import Profile and browse to the file you want to import.
- Click Import. The data from the imported file will overwrite the selected profile.
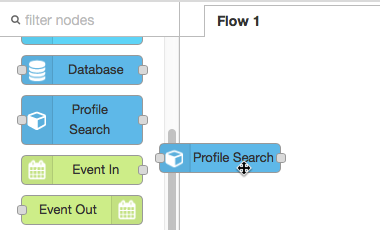
Using a Profile in a Flow
Use the Profile Search node in your flow to process the data according to the profile.
Select the node and choose View> Show sidebar to view the documentation for the node, which will provide details on how to configure it.

Model Profiles Shipped with Artifacts
Some artifacts that you may download and install from your organization's marketplace contain their own models and profiles (see Downloading and Installing Artifacts) that are automatically installed as part of the artifact installation. If the same model already exists in the system, however, you will see a warning from the artifact manager and Artifact Manager will not replace your model and profile with the new version. If you get the error:
- Export your models and profiles as backups
- Reinstall the artifact.
- Export new model and profiles and compare with the backed up version.
- Reimport your profiles after making any necessary changes.