In this section:
Basic Process for Using the CAM GUI
- Add a connection to the Coverage Agent monitoring the AUT.
- Create a session when a connection is established. A new session will automatically be started by the coverage agent when it's deployed to the AUT and the AUT is started.
- Create a test and interact with the application. CAM tells the coverage agent to start a new test so that coverage collected from this point will be assigned to the current test.
- Log results and include any additional test data if needed, such as message, author, or associated requirement ID.
- Stop the test and the coverage collected during any interactions with the AUT will no longer be associated with this test.
- Start a new test and repeat as necessary.
- Stop the session when finished.
- Download the coverage data and test results.
- The test results are stored in a report.xml file. The file will be sent to DTP.
- The coverage results must be generated by Jtest or dotTEST so that they can be used to merge the static and dynamic coverage data.
- The coverage information and test results are sent to DTP where they can be visualized in Report Center or further processed to expose potential risk in the application.
Connecting to a Coverage Agent
- Follow the "Application Coverage" chapter of the Jtest or dotTEST documentation for instructions on how to deploy Coverage Agents to the AUT.
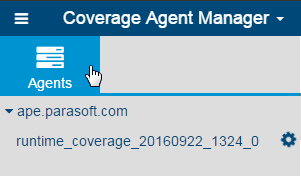
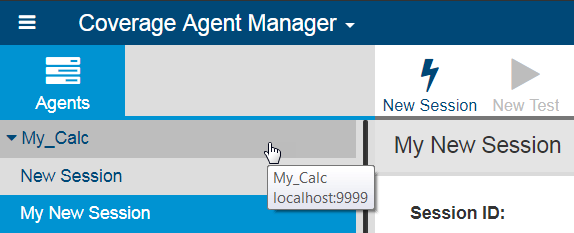
- Open CAM in a browser and click Agents.
- Click Add Connection and enter the name and agent address in the overlay.
- Agent Name: This can be any user-friendly string that you want to display in CAM.
- Agent Address: This is the URL of the server where the Coverage Agent is attached to the AUT. The default port number for the Coverage Agent is 8050, but can be customized in the Coverage Agent settings (see the Jtest or dotTEST documentation).
- Click Test to verify the connection.
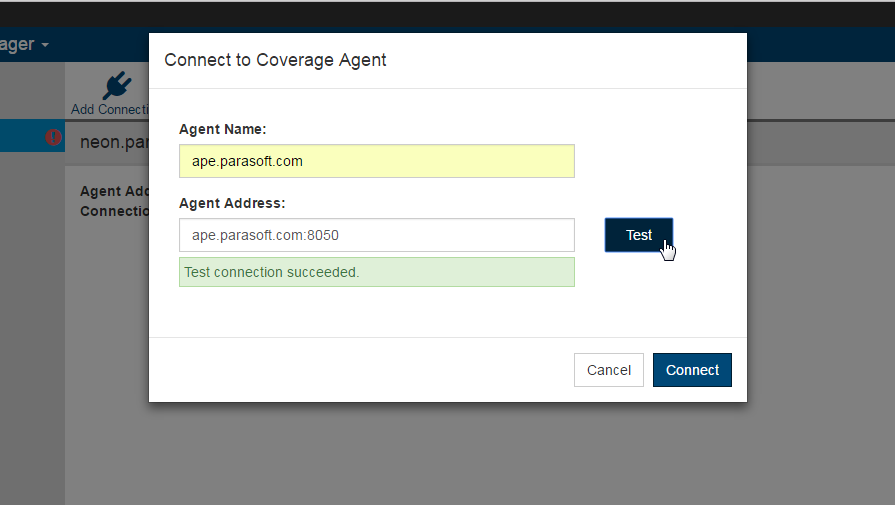
- Click Connect after successfully testing the connection or Cancel to abort.
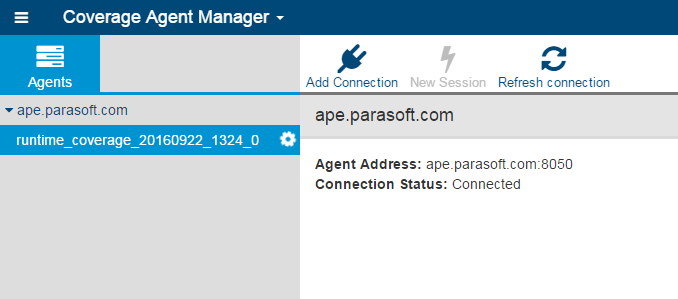
- After connecting the agent, test sessions that are collected by the agent are imported into CAM. If a test session is in progress, a spinning gear icon will appear next to it. See Test Sessions for information on working with test sessions.
- Test sessions associated with the agent that were created outside of the CAM may have automatically-generated default names in the following format: “runtime_coverage_yyyy...”
Test Sessions
Only one tests session can be in progress at a time. Furthermore, you can only start a new test session when there are no active sessions.
- Click the New Session button, enter the following information when prompted:
- Session Name: the name of the session
- Project: the name of the project in DTP that the results will be associated with
- Build ID: A build identifier for label results. It may be unique for each build but may also label more than one test sessions that were executed during a specified build.
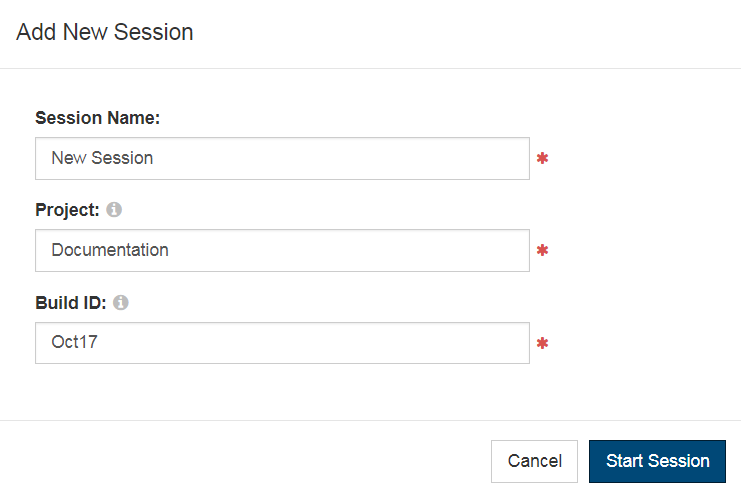
- Click the Start Session button to begin a new test session.
- Run your tests.
Click the Stop Session button to stop the current test session and confirm when prompted.
You cannot restart a session after it’s been stopped.
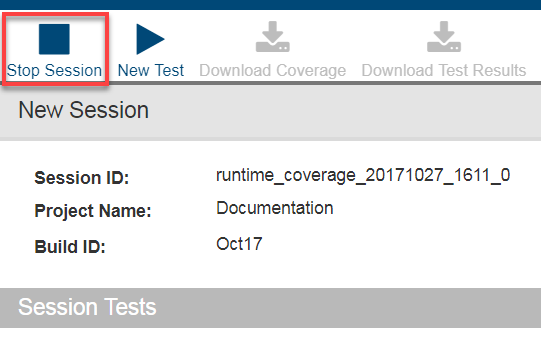
Click on the disclosure triangle next to an agent in the Agent's sidebar to view existing test sessions associated with the agent. Click on an agent to view its details.
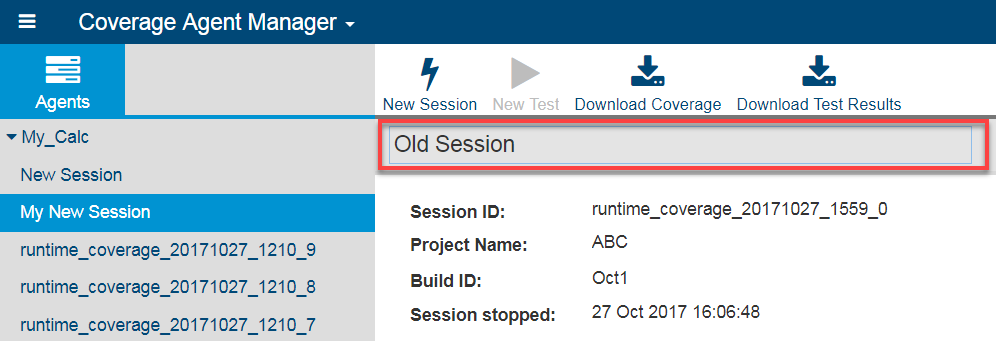
Click on the session name in the main panel to rename the session.
Click the Delete Session button to and confirm when prompted to delete a session.
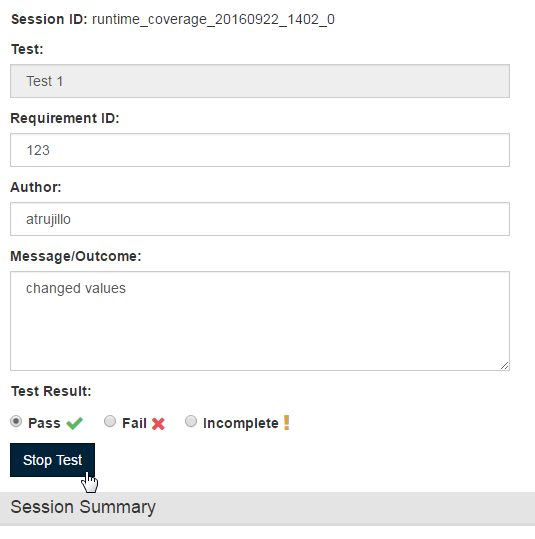
Running Tests
- Start a test session and click the New Test button.
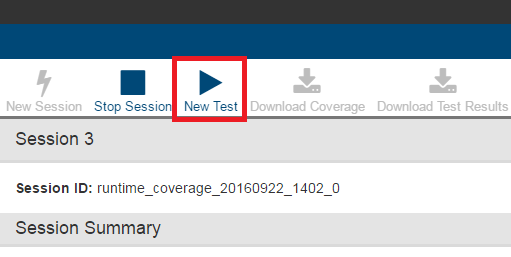
- Enter a name and click Start Test to continue.
- Perform your test on the AUT and enter the data associated with the test. You can interact with the AUT manually or execute tests in Parasoft SOAtest. See the “Application Coverage” chapter in the SOAtest documentation for details.
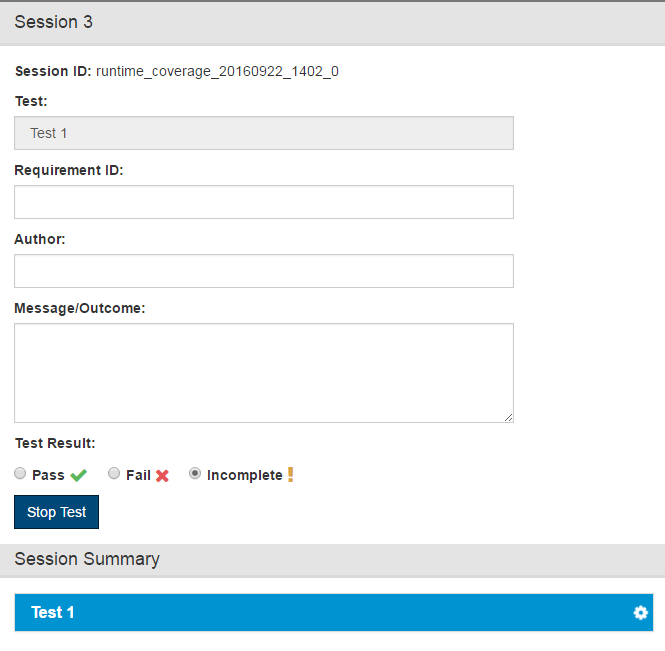
- Log your test result and click Stop Test when finished.
- Continue adding and performing your tests until your scenario is complete. Be sure to stop and start tests in between interacting with the AUT.
- Stop your session when you’ve completed your tests.
Downloading Coverage and Test Results
You can download the coverage data and test results at the end of your test session in order to merge and send them to DTP with Jtest or dotTEST.
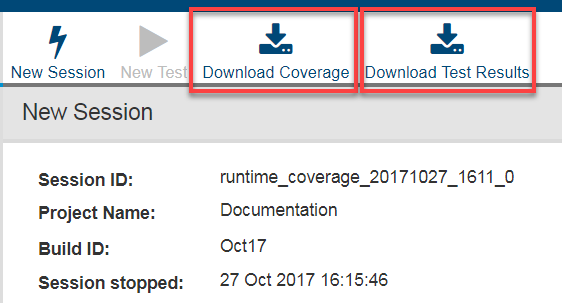
- Click Download Coverage and note the location.
- Click Download Test Results and note the location.
Next Steps
When you’ve finished testing, you can run Jtest or dotTESTto merge the static and dynamic coverage data into a coverage.xml file and send it with the test results report to DTP. See the Jtest or dotTEST documentation for details.
Collecting Web Application Coverage for Multiple Users
You can collect coverage information for multiple users who simultaneously interact with a Java web application. See Collecting Web Application Coverage for Multiple Users for details.