This topic explains how to suppress Parasoft findings using in an IDE. See Suppressing the Reporting of Findings for information about manually suppressing findings in source code or a suppression file.
In this section:
Adding Suppressions
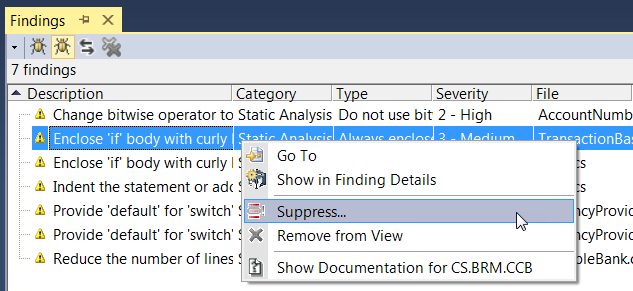
You can suppress individual instances of findings, all instances of a finding type in a file, or all findings in the file from the Findings view.
Right-click on a single finding or a group of selected findings and choose Suppress from the menu.
Choose where the suppressions will be stored. You can select one of the following options:
- In source code - The selected finding will be suppressed in code and shared across the team when checked in your source control system.
- Locally in file - The suppression will be stored in a parasoft.suppress file located in the same location as the corresponding source file. See In-file Suppressions for details.
- On DTP- The suppression will be stored on DTP and shared with the team. You can only suppress findings that are already registered on DTP.
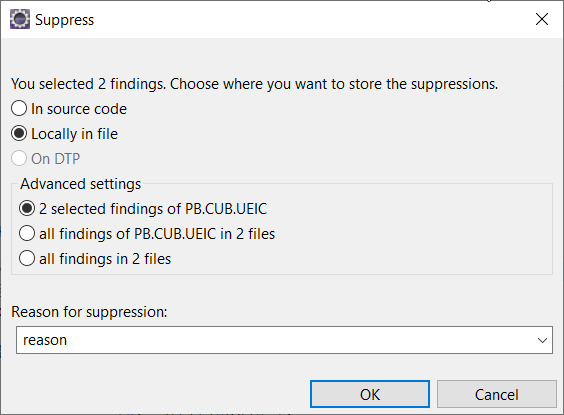
Enter a reason for suppressing the finding.
- Click OK to complete the suppression.
In-file Suppressions
If you choose to store a suppression in a file, it will be stored in a parasoft.suppress file created in the same location as the source file that contains the finding. When you add a suppression, the file automatically opens in the IDE editor. The contents of the file may resemble the following:
suppression-begin
file: Simple.cs
rule-id: CLS.TYPR
message: Avoid using typed references
reason: verified
author: annstu
suppression-end

suppression-begin
file: Account.cs
rule-id: CS.SEC.AUK
message: Avoid 'unsafe' keyword
reason: verified
author: annstu
suppression-end
Newly created suppression files are not included in your project. To add a suppression file to your project:
- Enable the Show All Files option on the Visual Studio Solution Explorer toolbar or refresh the Solution Explorer if the option is already enabled. This will display files from outside the project, including the Parasoft suppression files.
- Right-click the suppression file(s) you add to your project and choose Include in Project from the menu.
Reviewing Suppressions
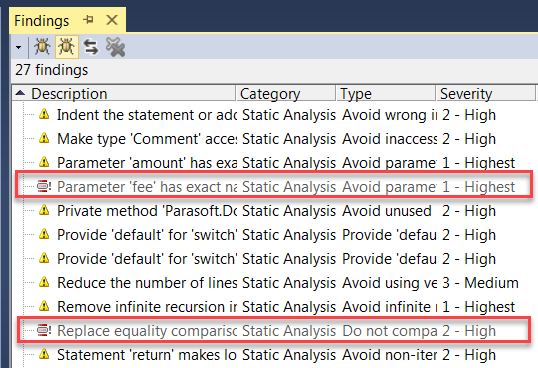
You can review suppressed findings and unsuppress the findings that have been saved locally on desktop.
Click Parasoft in the menu bar, choose Options, select Import Findings and Coverage and enable the Suppressed findings option (see Customizing Import Options for details).
Open the Findings view, choose Configure Contents from the menu and enable the Suppressed findings option (see Customizing the Findings View for details).
Run analysis or import findings (see Importing Findings). The suppressed findings will be displayed in the Findings view.
- You can right-click a finding and choose the Go To option to view the code that triggered the finding.
Removing Suppressions
You can remove suppression of a previously suppressed finding.
- Suppressions that are stored in code can be removed manually from your code.
- Suppressions that are stored in files can be removed by deleting a selected entry from a parasoft.suppress file (see In-file Suppressions).
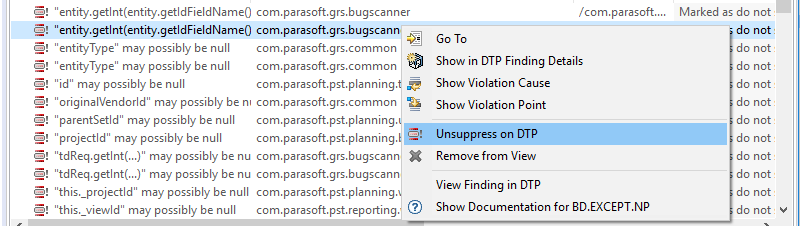
- Suppressions that are stored on DTP can be removed by right-clicking on a finding or a set of selected findings and choosing Unsuppress on DTP from the menu.
Findings will be unsuppressed in the subsequent analysis run.