In this section:
- Installing with the dotTEST Wizard
- Installing from a Zip Distribution
- Multiple Installations on a Single Machine
- Deploying Examples
Installing with the dotTEST Wizard
Running the installation executable launches a graphical interface that simplifies installing or updating dotTEST. Using this method ensures that all prerequisites are installed and that permissions are elevated to work with User Access Control. Running the installer executable also allows you to use the Windows Control Panel to uninstall dotTEST.
- Run parasoft_dottest_[version].exe setup file
- Follow the steps as shown in the installation wizard.
Installing from a Zip Distribution
Installing dotTEST from the Zip package (for example, a customized version of the product which contains a modified set of built-in test configurations) requires manual installation of additional components that ship with dotTEST.
- Extract the dotTEST installation package to the desired location. The
dottestdirectory ([INSTALL_DIR]) that contains all dotTEST files will be created. - Go to [INSTALL_DIR]\bin\prerequisites directory and install the following components:
• .NET Framework 4.7.2
• VC++ Redistributable Packages x64 and x86
If you extract the installation package with the built-in Windows unzip utility, ensure the 'Unblock' option is enabled in the properties of the .zip file to prevent Windows from blocking access to the contents of the package.
Extracting the Zip package to multiple locations allows you to install multiple dotTEST instances on a single machine.
Deploying Examples
dotTEST ships with several examples to help you become familiar with its functionalities. You can deploy the examples during installation or on demand after the installation has been completed.
Deploying Examples During the Wizard Installation
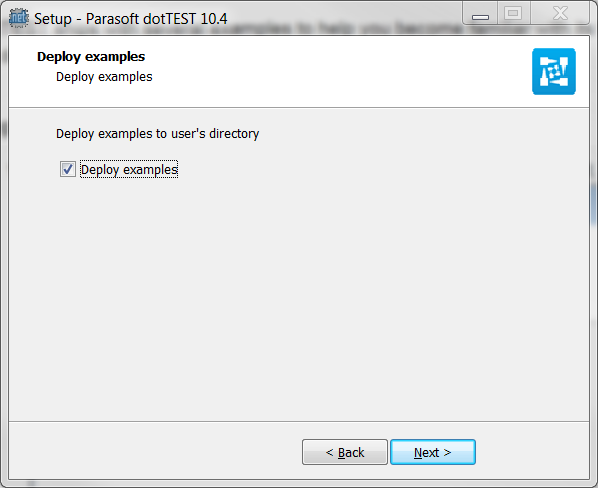
- Enable the Deploy examples option when prompted and click Next.
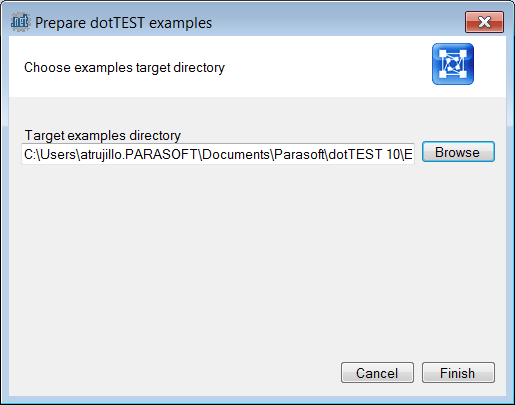
- Choose a location for the examples and click Finish. If the examples directory already exists, the previous files will be moved to the recycle bin and replaced with a clean image of the example files.
After the examples are deployed, the examples directory opens so that you can browse the content. Examples are organized into directories for all supported versions of Visual Studio. Each directory contains subdirectories that cover various functionalities. Follow the instructions in the ReadMe file in each directory for tutorials on using dotTEST. We recommend that you start with the 010_Basics examples.
The examples point to the instance of dotTEST from which they were deployed. This allows you to run the examples with minimal configuration effort. The license, however, must be configured to start using the examples. See Setting the License.
Deploying Examples from the Command Line
Run the following command to deploy the examples shipped with dotTEST:
[INSTALL_DIR]\deploy_examples.exe
Follow the steps described in Deploying Examples During the Wizard Installation.
Some files contain absolute paths to where they were deployed, so moving the example files will cause them to fail. Redeploy the examples to a new location instead of moving them if necessary.

