In this section:
Adding Comments to Violations
- Select violation(s) in the search results area.
- Click the Prioritization tab and enter a value in the Comments field.
- Make any other changes and click Apply. The Apply to All Branches option is enabled by default. Disable this option if you want to apply changes to only the selected instance of the violation; see Applying Changes to Violations.
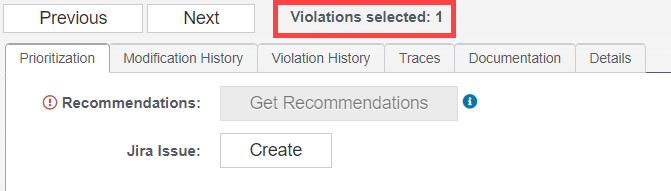
Prioritizing Violations
- Select violation(s) in the search results area; the file name appears in the code view panel.
- Click the Prioritization tab and choose a priority from the menu.
- Make any other changes and click Apply. The Apply to All Branches option is enabled by default. Disable this option if you want to apply changes to only the selected instance of the violation; see Applying Changes to Violations.
Assigning Actions to Violations
An action is a string of metadata for defining how you choose to remediate a reported violation. DTP ships with a set of pre-defined actions: None, Fix, Reassign, Review, Suppress, and Other. You can edit or remove the predefined action types (except for the None type) using the /staticAnalysisViolations/metadata API endpoint. For details on configuring actions, go to Help > API Documentation in the Report Center navigation bar.
- Select violation(s) in the search results area.
- Click the Prioritization tab and choose a value from the Action menu.
- Make any other changes and click Apply. The Apply to All Branches option is enabled by default. Disable this option if you want to apply changes to only the selected instance of the violation; see Applying Changes to Violations.
The Actions field is also a significant part of the machine learning functionality. See Using the Machine Learning Recommendations for details.
Assigning Violation Risk and Impact Levels
The Violations Explorer allows you to flag violations that pose a risk or have an impact on the policy goals associated with your application.
- Select violation(s) in the search results area.
- Click the Prioritization tab and choose a value from the Risk/Impact menu.
- Make any other changes and click Apply. The Apply to All Branches option is enabled by default. Disable this option if you want to apply changes to only the selected instance of the violation; see Applying Changes to Violations.
Assigning Due Dates to Violations
- Select violation(s) in the search results area.
- Click the Prioritization tab and click the calendar icon in the Due Date field to choose a date.
- Make any other changes and click Apply. The Apply to All Branches option is enabled by default. Disable this option if you want to apply changes to only the selected instance of the violation; see Applying Changes to Violations.
Assigning Reference Numbers to Violations
- Select violation(s) in the search results area.
- Click the Prioritization tab and enter a value in the Reference # field.
- Make any other changes and click Apply. The Apply to All Branches option is enabled by default. Disable this option if you want to apply changes to only the selected instance of the violation; see Applying Changes to Violations.
Applying Changes to Violations
When you update a violation, you can apply the change to a single instance of the violation or apply the changes to the violation in all source control branches in which it occurs. A confirmation message appears when your changes are applied.