In this section:
Unit Test Assistant can automatically update your project with a container that includes all the required libraries. The libraries will be added to Java Build Path in Eclipse. If you build your projects outside the IDE, configure your build system to ensure that the libraries are available; see Configuring the Build System to Include Required Libraries for details.
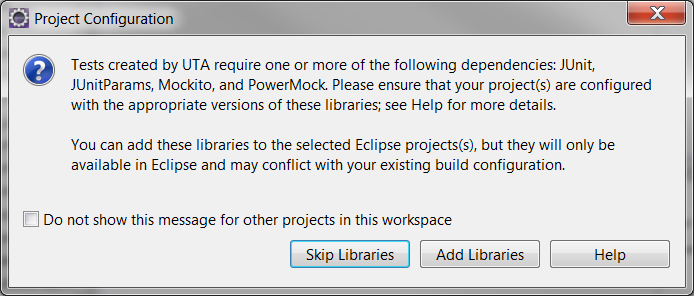
If the required UTA libraries are missing, UTA displays the following notification the first time you create tests for the currently selected project:

Click Add Libraries to automatically add all the required libraries to all projects that are currently selected in the IDE.
The libraries automatically added through the UI will only be available in the IDE. Ensure that they do not conflict with your existing build configuration. |
If you click Skip Libraries, UTA will generate tests without adding the required libraries your project.
By default, UTA displays the notification once per project. Select the Do not show this message for other projects in this workspace option to disable displaying the notification for projects other than your current selection.
Alternatively, you can add the container with the required libraries to an individual project(s) in one of the following ways:


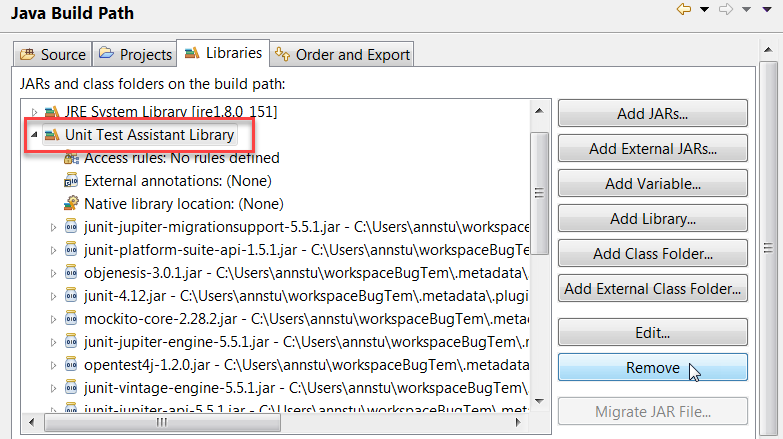
To remove the libraries from the project in your IDE, go to the project properties and select Java Build Path> Libraries and remove the Unit Test Assistant Library container:
