In this section:
Overview
Apache Avro is a schema-based data serialization system. The Apache Avro extension enables SOAtest and Virtualize to support the Avro message format. It can read schemas from a Confluent Schema Registry or saved to a local drive. When using a Confluent Schema Registry, a magic byte and the 4-byte schema ID will be serialized in front of the Avro binary message for the associated transport's wire format.
Installing the extension adds the Apache Avro Client for SOAtest and the Apache Avro Message Responder for Virtualize.
Requirements
- SOAtest/Virtualize 2023.2 and later
Installation
This artifact can be installed from the UI or the command line.
UI Installation
- Go to Parasoft > Preferences and click System Properties.
- Click Add JARs and choose the com.parasoft.soavirt.messages.avro-<version>.jar.
- Click Apply.
- Restart SOAtest/Virtualize.
Command Line Installation
Add the Avro .jar file to the system.properties.classpath property in your settings properties file. For example:
system.properties.classpath=<path to jar>/com.parasoft.soavirt.messages.avro-1.0.0.jar
Configuring Avro Schemas Location
The location of your Avro schema files is configured through a Java system property. This can be either the path to a local directory in which you have saved schemas or the URL of a Confluent Schema Registry.
-J-Dcom.parasoft.soavirt.messages.avro.schemas=<PATH_TO_SCHEMA_FOLDER or SCHEMA_REGISTRY_URL>
When specifying a Confluence Schema Registry, be sure to include full URL (including the http:// or https://).
Usage
Adding the Avro Clients
You can add standalone Avro clients to your suite using the Add Test wizard or chain Avro tools as a payload output of an existing tool using the Add Output wizard. See Adding Projects, .tst files, and Test Suites for details.
Configuration and Usage
Avro clients function in a similar manner to other messaging clients, but are configured to use the Avro format by default. Refer to Specifying Client Options and Messaging Client for information on configuring the client. In addition, there are a few configuration options that are unique to Avro clients:
XML Conversion Options
- Send XML instead of Apache Avro when in Form Input or Form XML mode: Enable this option to skip serializing the request as binary Avro, such as when using the Avro client as a consumer only to avoid conversion errors in a request that will not be used.
Schema for Modeling Request Payload Using Form Input
- Message type: Choose from the type definitions available in the schemas in the Avro schemas folder or Confluent schema registry specified previously (see Configuring Avro Schemas Location).
- When a local schema folder has been specified, you will see the names of available schema types in this list. When a Confluent Schema Registry has been specified, subject/version pairs will be shown.
Adding Avro Message Responders
You can add Avro message responders to your suite using the Add Responder wizard.
Configuration and Usage
Avro message responders function in a similar manner to other responders. Refer to the Message Responder Overview section of the Virtualize documentation.In addition, there are a few configuration options that are unique to Avro message responders:
XML Conversion Options
- Respond with XML instead of Apache Avro when in Form Input or Form XML mode: Enable this option when chaining other tools to process the Avro message in XML format.
Schema for Modeling Request Payload Using Form Input
- Message type: Choose from the type definitions available in the schemas in the Avro schemas folder or Confluent schema registry specified previously (see Configuring Avro Schemas Location).
- When a local schema folder has been specified, you will see the names of available schema types in this list. When a Confluent Schema Registry has been specified, subject/version pairs will be shown.
You can also configure the responder to use a different Avro message type for incoming requests. To do so:
- In the message responder, click the Options tab and choose Request Handling.
- Enable Convert incoming request to XML using different message format than response.
- Choose Apache Avro from the Format menu.
- Choose the message type that is expected to come in to the virtual asset from the Message type menu that appears. Type definitions available in the schemas in the Avro schemas folder or Confluent schema registry specified previously (see Configuring Avro Schemas Location).
- When a local schema folder has been specified, you will see the names of available schema types in this list. When a Confluent Schema Registry has been specified, subject/version pairs will be shown.
Using Avro with Kafka
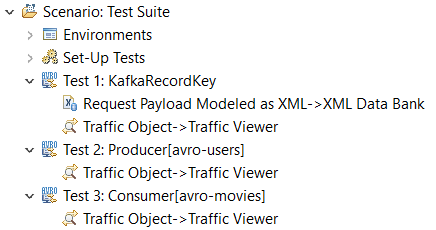
One of the benefits of using the Avro extension is the ability to use it in conjunction with the Kafka Transport in order to send messages in one format and receive messages in another format, like in the test suite shown below.
The following example lays out a simple workflow for setting up such a scenario:
- If the Kafka record key is also Avro, add an Apache Avro Client to your test suite and configure it as follows, then save it:
- Choose the schema for the record key from the Message type menu. You will need to configure the Avro schemas location if you haven't already.
- On the Request tab, confirm that Form Input is selected as the Input mode and enter the details for the input fields as needed.
- On the Transport tab, set Transport to None.
- If the Kafka record key is also Avro, add an XML Data Bank output to the Avro client (right-click the Avro client and choose Add Output > Request > Payload Modeled as XML > XML Data Bank) and configure it as follows, then save it:
- Extract the record key element (select it and click Extract Element).
- Modify the extracted element and change the Xpath to
*/. Ensure that the Extract field is set to Entire Element. - Rename the Data Source Column, if needed.
- Add another Apache Avro Client to the test suite (this will be a producer) and configure it as follows, then save it:
- Choose the schema for the record message from the Message type menu.
- On the Request tab, confirm that Form Input is selected as the Input mode and enter the details for the input fields as needed.
- On the Transport tab, choose Kafka from the Transport menu. If you have more than one custom transport, you will need to choose Custom Extension then choose Kafka from Select Implementation menu.
- Select Connection and enter the details for your connection settings as needed.
- Select Producer and enter
avroas the Record Key Serializer. Enter a valid Topic and set the Record Key to the name of the Data Source Column from step 2. Complete the other Producer settings as needed.
- If the consumed record is a different Avro schema than the record that was produced, add another Apache Avro Client to the test suite (this will be a consumer) and configure it as follows, then save it:
- Choose the schema for the record message from the Message type menu.
- Enable Send XML instead of Apache Avro when in Form Input or Form XML to avoid any conversion errors, as the request will be ignored by the consumer.
- On the Request tab, confirm that Form Input is selected as the Input mode and enter the details for the input fields as needed.
- On the Transport tab, choose Kafka from the Transport menu. If you have more than one custom transport, you will need to choose Custom Extension then choose Kafka from Select Implementation menu.
- Select Connection and enter the details for your connection settings as needed.
- Select Consumer and enter a valid Topic and Group ID. Complete the other Consumer settings as needed.
- If you want to correlate a message based on one or more headers, select Consumer Headers and enter the keys and values as appropriate.