This section describes how to license the desktop instance of Virtualize. For information about licensing the web archive (WAR) deployment of the server, see Licensing the Server.
In this section:
Network Licenses
You can configure Virtualize to use a license served from Parasoft DTP or a standalone instance of Parasoft License Server. Contact your system administrator for information about which type of license you should use.
DTP License
You can use a license from DTP or license configuration settings from a DTP Project. Your Parasoft DTP administrators should verify that the product and version you are licensing appears in the DTP License Server. Administrators can refer to the DTP documentation for information about updating the tools database. Refer to Connecting to DTP for additional information.
- Choose Parasoft > Preferences and click on the DTP category.
- Enable the Enable option and specify the DTP URL, including the
https://protocol, in the Base URL field. Note that DTP does not supporthttp://connections. If DTP is deployed to a location other than the root of the host server, the URL should include a context path (a relative path from the host name; for example:https://server.company.com:8443/contextPath). This may be the case if your organization uses a reverse proxy. Refer to the DTP documentation on https://docs.parasoft.com for additional information about reverse proxy server configuration and context path configuration. - Enter your DTP login credentials in the User name and Password fields.
- Click Test Connection to verify that the settings are correct.
- If you are going to use a license configuration associated with a specific DTP project, click Configure in the Project section and choose a project, then click OK.
- Click Apply and click the Configure... link in the License section.
- If you have multiple Parasoft products installed, open the tab for the Parasoft product you want to license (for example, Jtest, SOAtest, Virtualize).
Enable the Network option and click the Configure... link.
- Enable the Use configured DTP settings option. If you are going to use a license configuration associated with a specific DTP project, enable the Use License Server settings from DTP project to use the license configuration associated with the project selected in step 5 instead.
- Click OK to close the dialog.
- Choose the product edition from the Edition menu. Contact your Parasoft administrator for assistance selecting an edition or custom edition features.
You can enable the Borrow option and specify a length of time for which Virtualize will consume a license token. Licenses can be borrowed from 1 hour to 14 days. Refer to the DTP documentation for additional information about borrowing licenses.
- Apply to save your settings.
License Server
You can connect to License Server to retrieve a license token, even if you are connected to a separate instance of DTP.
- Choose Parasoft > Preferences and click on the License category.
- If you have multiple Parasoft products installed, open the tab for the Parasoft product you want to license (for example, Jtest, SOAtest, Virtualize).
Enable the Network option and click the Configure... link.
- Enable the Use the following License Server option and specify the License Server URL, including the
https://protocol, in the Base URL field. Note that License Server does not supporthttp://connections. If License Server is deployed to a location other than the root of the host server, the URL should include a context path (a relative path from the host name; for example:https://server.company.com:8443/contextPath). This may be the case if your organization uses a reverse proxy. Refer to the DTP documentation on https://docs.parasoft.com for additional information about reverse proxy server configuration and context path configuration. - If the License Server requires authentication, enable the Enable Authentication option and enter your credentials in the User name and Password fields.
- Click Test Connection to verify your settings and click OK to save your changes.
- Choose the product edition from the Edition menu. Contact your Parasoft administrator for assistance selecting an edition or custom edition features.
You can enable the Borrow option and specify a length of time for which Virtualize will consume a license token. Licenses can be borrowed from 1 hour to 14 days. Refer to the License Server documentation for additional information about borrowing licenses.
- Click Apply to save your settings.
Connecting to DTP or License Server Via a Proxy
If a proxy server is required to connect to the DTP server or License Server, configure the proxy settings by going to Window > Preferences to open the Preferences dialog and selecting General > Network Connections, then configuring the appropriate proxy settings to connect to the server.
Deactivating License
You can deactivate/activate licenses by choosing Parasoft > Deactivate License/Active License.
You can also configure the license to automatically deactivate after 30 minutes of inactivity:
- Go to Parasoft > Preferences and click the License category.
- Enable the Start deactivated, release automatically when idle option.
- Click Apply to save your changes.
When the license is deactivated:
- Parasoft views are disabled and results are cleared from the Quality Tasks view.
- The license token is released in DTP or License Server.
Licensed views are restored and the Quality Tasks view will display available results when the license is reactivated.
Waiting for a License in Command Line Mode
You can configure Virtualize to wait for a license token if a requested token is not currently available by specifying the license.wait.for.tokens.time option when using the command line interface. For additional information, see Settings.
Stabilizing the Machine ID
Changes in the network environment may affect the interface that is used to compute your machine ID, resulting in machine ID instability. You can use the PARASOFT_SUPPORT_NET_INTERFACES environment variable to specify a stable interface and prevent the machine ID from floating.
- Set up the PARASOFT_SUPPORT_NET_INTERFACES environment variable according to your operating system.
- Set the variable value to a stable ethernet network interface. Do not use virtual, temporary, or loopback interfaces.
Windows: Set the value to the MAC address of your network card, for example:
SET PARASOFT_SUPPORT_NET_INTERFACES=00-10-D9-27-AC-85
Linux/macOS: Set the value to one of the network interfaces from the "inet" or "inet6" family, for example:
export PARASOFT_SUPPORT_NET_INTERFACES=eth1
Using a Local License
Local licenses do not request a license token from a server on the network. Instead, they are locked to a specific machine. You will need to provide your machine ID to your Parasoft representative, who will send you a license password. The machine ID appears in the Parasoft license configuration screen.
- Choose Parasoft > Preferences to and select the License category.
- If you have multiple Parasoft products installed, open the tab for the Parasoft product you want to license (for example, Jtest, SOAtest).
- Enable the Local option.
- If you have not already done so, note the machine ID in the Machine id field and send it to your Parasoft representative to obtain a license password. You can also run a command using the command line interface to print the machine ID to the console. Without a license, the following message will appear:
Error: No valid license (MachineId: WIN32-12345678). - Enter your license password from Parasoft and click Apply. The License preferences page will display the features that you are licensed to use, and the expiration date for your license.
- Click OK to set and save your license.
Additional Licensing Options for Virtualize
The following license options are available for Virtualize:
- Virtualize: The core Virtualize license. It is required in order to access any Virtualize functionality.
- Performance: Enables throughput to be free of HPS (hits per second) limitations.
- Validate: Allows validation tools to be chained to the Incoming Request output in order to validate messages coming to the Responder (messages produced by the application under test and received by Virtualize). See Adding an Output for more details.
- N Hits per Day: Specifies how many hits per day (starting at 12am) are allowed for that Virtualize server. A hit is any request message (for Message Responders) or query (for SQL Responders).
- N HPS (Hits per Second): Specifies how many hits per second are allowed for the Virtualize server. A hit beyond the N Hits per Second limit will be delayed before a new response is sent.
- Service Enabled: Provides the ability to:
- Connect Virtualize server to CTP.
- Manage Virtualize server from external Virtualize desktops.
- Access the REST API of the Virtualize server.
- Start the Virtualize server in headless mode.
- Deploy the Virtualize server using the container-deployable war file.
- Extension Pack: Enables support for advanced protocol, message formats, tools, and custom tools and extensions.
- Message Packs: Enables advanced EDI message formats in applicable tools.
Manually Configuring the License
You can create Virtualize configuration file and specify your license settings. See Settings for details on creating and configuring the file.
Importing and Exporting License Configuration Settings
You can export your configuration settings to a .properties file and share with team members. See Settings for details.
Configuring SOAVirt WAR License from CTP
Once the registration of the Virtualize server is complete you will be redirected to the server detail page.
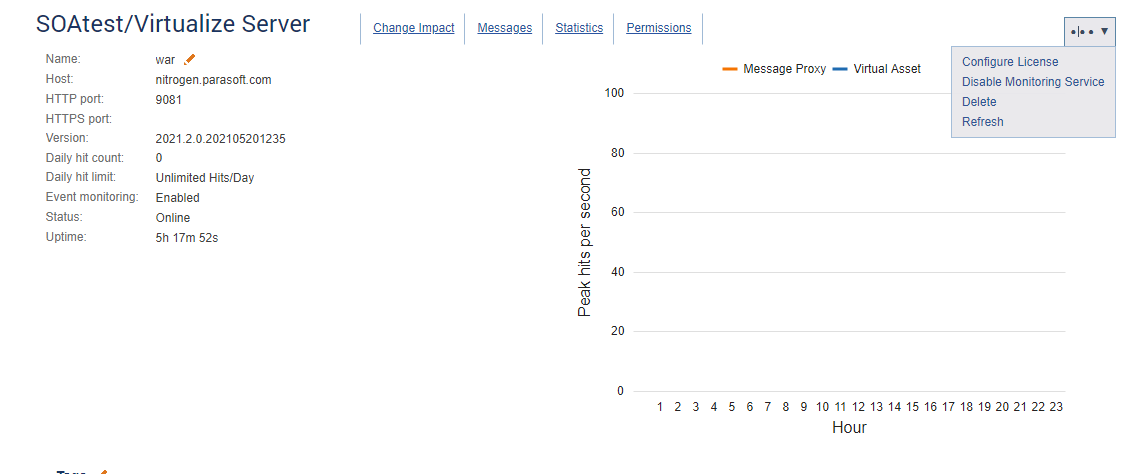
- Click the ellipses ( ... ) menu in the upper-right corner and select Configure License. This option is only applicable to war file deployment servers.
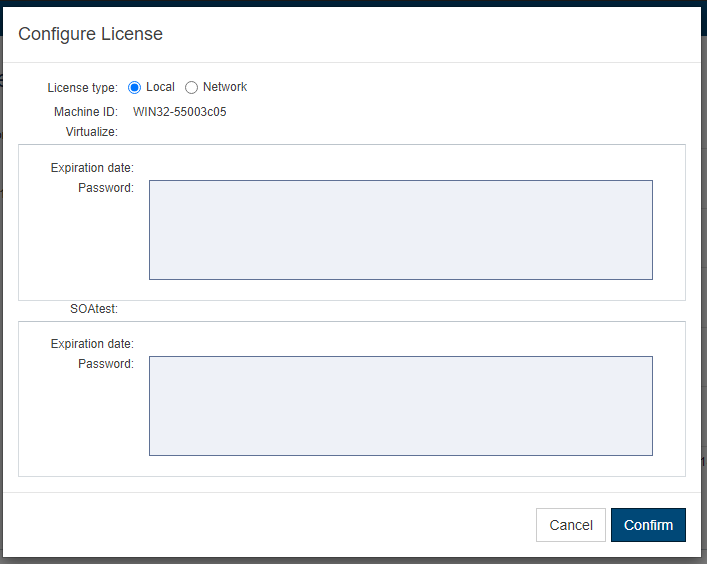
You will see the Configure License screen asking for either a Local or Network license. For more information go to Licensing the Server. - From the Configure License screen, generate a Local with the provided machine ID and enter it in the text box.
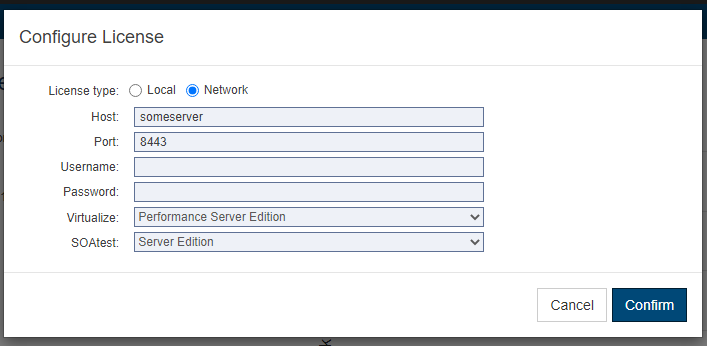
- Or enter the Network license server information and set the desired Virtualize and SOAtest editions.
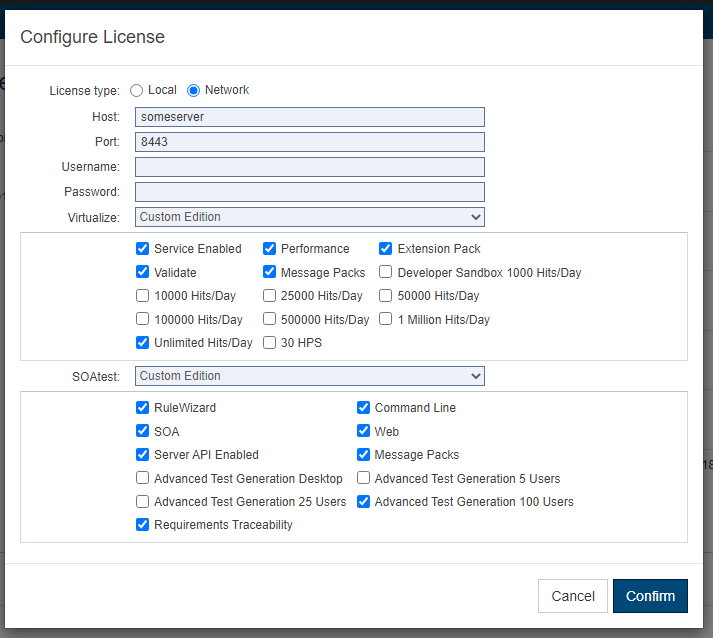
- Choose features, if Custom Edition is selected.


