SOAtest can test RESTful services from a WADL, or RAML definition, or from a URL.
In this section:
| Table of Contents | ||
|---|---|---|
|
Testing RESTful Services When a WADL is Available
Parasoft SOAtest can be used to test RESTful services via the REST Client tool. In the next example, you will use the tool to test the ParaBank Loan Request API.
When you have access to a WADL (Web Application Description Language) that describes a service’s functionality, SOAtest can create a suite of functional tests in a similar fashion to how it parses a WSDL. In the next example, you will use ParaBank’s WADL to create tests.
To test a RESTful service with a WADL:
- Ensure that the locally-hosted ParaBank application (introduced in Setting Up ParaBank) is running so that you can access the WADL.
- Right-click on any of the Test Suite: Test Suite Test Case Explorer nodes you created in a previous tutorial and choose Add New > Test Suite.
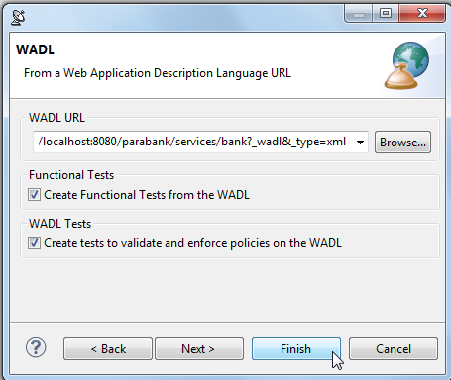
- Select REST> WADL, then click Next.
- In the WADL URL field, enter
http://localhost:8080/parabank/services/bank?_wadl&_type=xml, check Create tests to validate and enforce policies on the WADL, then click Finish. - Notice that 3 tests were added to check the WADL:
- Test 1: Schema Validity: Runs XML validation on the WADL against WADL schemas from W3C.
- Test 2: Semantic Validity: Checks the correctness of the WADL by parsing and consuming it like an actual service consumer would, but with stricter adherence to standards.
- Test 3: WADL Regression: Creates a regression control for the WADL so that changes in the WSDL document can be detected.
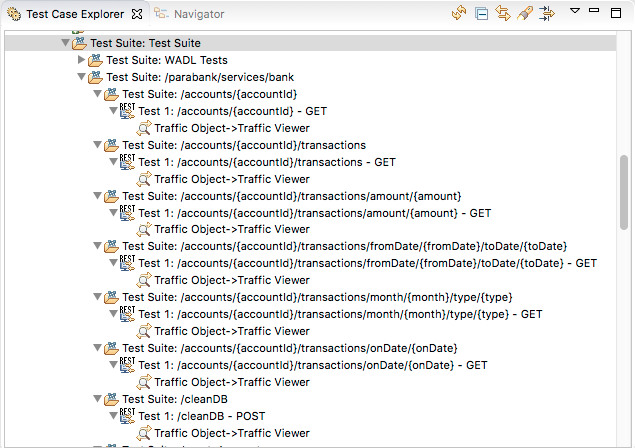
- Notice that a new Test Suite has been created, with sub test suites and REST Client tools corresponding to the services provided by the WADL.
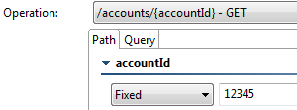
- Double-click the new REST Client tool that was created under Test Suite: accounts. All of the Path Parameters have been automatically propagated; however, to retrieve a valid result from ParaBank, we must provide a valid account ID.
- Provide a valid account ID by going to the Path table, then entering
12345under accountId.
Note that 12345 is now appended to the URL. - Save and run the REST client.
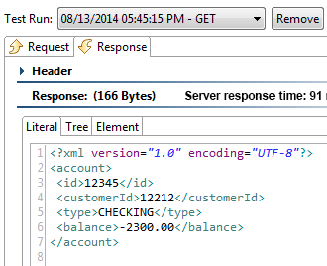
- Double-click the Traffic Viewer attached to the REST Client and open the Response tab. You will see that the ParaBank server returned the account details for Account #12345.
Generating Tests from an OpenAPI/Swagger or RAML Definition
See Creating Tests from an OpenAPI/Swagger Definition and Creating Tests From a RAML Definition.
Testing RESTful Services with a URL
This example also serves to show how you can test RESTful services when you do not have access to a WADL describing the full application capability.
To test a RESTful service with a URL:
- Select one of your Test Suite: Test Suite Test Case Explorer nodes, then click the Add test suite toolbar button.
- In the Add Test Suite wizard, select Empty, then click Finish.
- Double-click the newly-created Test Suite, change the Name field to
REST Example, then save and close the Test Suite editor. - Select the Test Suite: REST Example Test Case Explorer node, then click the Add test or output toolbar button.
- With Standard Test selected on the left, select REST Client on the right, then click Finish. A new REST Client tool will be added and its editor will be opened.
- Rename the tool
Loan Request (JSON Response). - Note that Service Definition is set to None by default. Most RESTful services are purely GET-based services that are composed of a URL and a query; they usually respond with either an XML or JSON response payload.
- Provide the request to the RESTful service by entering the URL
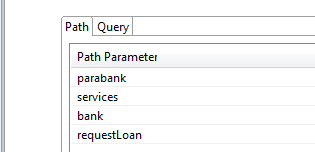
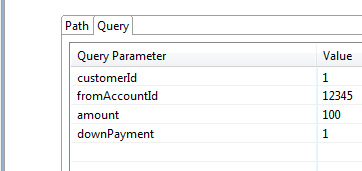
http://localhost:8080/parabank/services/bank/requestLoan?customerId=1&fromAccountId=12345&amount=100&downPayment=1in the URL field—then choosing POST from the Method dropbox. - Notice that SOAtest has automatically populated the table with path template and query parameters. If you wanted to add additional parameters, you could do so here.
- In the HTTP Options tab, choose the HTTPHeaders option, click Add, then add a new header with name
Acceptand valueapplication/json. If this header is omitted, the service response will be in XML. Once added, the service response will be in JSON. - Save the REST Client editor.
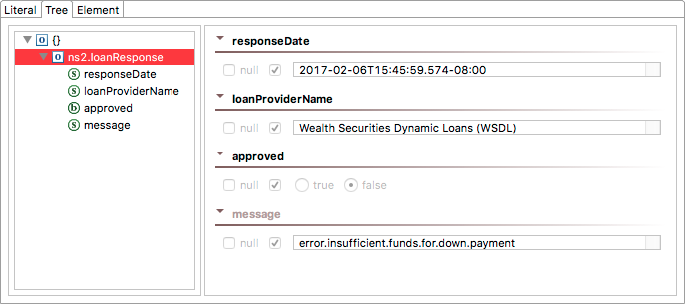
- Run the test and review the traffic in the Traffic Viewer. Note that you can switch from Literal to Tree view if you want to see a graphical representation of the JSON message.
Literal view:
Tree view:
