...
- Right-click the VirtualAssets project and choose Add New> Virtual Asset (.pva) file.
- Specify a file name, then click Next.
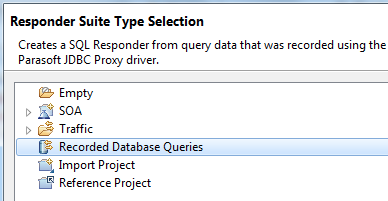
- Select Recorded Database Queries, then click Next.
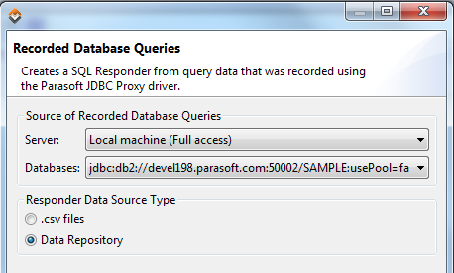
- Complete the Recorded Database Queries wizard page as follows:
- For Server, select the Virtualize Server where the database recording file is located.
- For Databases, select the appropriate data source from the list of JDBC URLs. This list is populated based on the available recordings; the available URLs will direct Virtualize to the appropriate set of files that captured the recording.
- For Responder Data Source Type, select Data Repository.
- (Optional) If you want date fields automatically replaced with wildcards, enable Wildcard Date Fields. If this option is enabled and a query takes a date as a parameter, Virtualize won’t require the dates to match exactly. We recommend enabling this option when a query takes the current time or a changing data as input, but you want a consistent response from Virtualize (ignoring changes in the date field).
- Click Next.
- In the Parasoft Data Repository Settings page, specify which data repository should store the data used to parameterize the SQL Responder, then click Next.
- From the Server box, specify which server you want to connect to (either the embedded server or a remote server). If you select the embedded server, the Port, User, and Password fields will be grayed out. If you select a remote server, the Port, User, and Password fields will be automatically populated (these can be adjusted if needed).
- Under Repository name, select or enter the name of the repository you want to use. If you enter the name of a new repository, that repository will be created.
- When defining a repository connection, you can check the connection by clicking Validate.
Info title Locking the Repository Until the Wizard Completes When you’re working with a remote (e.g., not embedded) Data Repository server, the repository that you specify here will be locked until the wizard completes. If you want the lock to display as "locked by [your_username]" rather than "locked by [tmp]", check Configure authentication for locking, then specify the URL of the CTP server that you use, as well as your username and password for that CTP server. To learn more about locking, see Locking and Unlocking Repositories in CTP.
- Click Finish.
The following items will be created and configured:
...


