...
The default value is determined based on the type of message being sent. The content-type of an a SOAP message will vary depending on the SOAP version, "text/xml" for SOAP 1.1 or "application/soap+xml" for SOAP 1.2. Other XML messages will use "text/xml" by default. JSON messages will use "application/json". A message configured using the Table view will use "application/x-www-form-urlencoded". A message sent with MIME attachments will contain a "multipart" content-type with "start" and "boundary" parameters. Messages belonging to EDI, Fixed Length, CSV, or Custom message formats will have the media type for the message format.
...
- Create a new REST Client and configure the settings for the location where the Access Token should be used to access the private resources.
- Under the HTTP Options tab, select either HTTP 1.0 or HTTP 1.1, and enable OAuth Authentication by checking Perform Authentication. This will enable the other fields necessary to complete the OAuth Authentication.
- Under Consumer Key and Consumer Secret, add the key and secret.
- Select Sign Request for OAuth Authentication for the OAuth Mode.
- Parameterize the Access Token and Access Token Secret fields from the Text Data Bank extraction.
- Request the user's private resources. This should be possible because the Access Token has been obtained.
Using OAuth 2.0
OAuth 2.0 has been significantly simplified in comparison to its predecessor (OAuth 1.0a). Since OAuth 2.0 is a completely new protocol, it is not backwards backward compatible with OAuth 1.0a. However, it does share the same the There are similarities between the implementations, however, in terms of overall architecture and approach to providing users a method to grant for granting third-party applications access to private resources without revealing login credentials. To learn more about the changes being introduced in OAuth 2.0, see the working draft at httpRefer to the OAuth website to learn more: https://toolsoauth.ietf.orgnet/html/draft-ietf-oauth-v2-20.Using 2/.
There are two methods for enabling tests to authenticate against OAuth 2.0 involves the following general steps:. You can either use the client credentials method or the web server method. In the client credential method, a REST or Message client is used to obtain the access token. In the web server flow, a web recording is used to request authorization and obtain the access token. Under both methods, a data bank tool is used to extract the access code for use in subsequent tests.
Client Credential Method
This method has two steps:
- Obtain an access token
- Access protected resources
Obtain Access Token
- Add a REST client to your test suite and click on the Resource tab. For clarity, you can optionally rename the client, e.g.,
ObtainAccessToken. - Choose POST from the method menu and specify the API endpoint of your authorization/resource server.
- Click the Payload tab specify the following parameters:
client_secretaudiencegrant_typeclient_idCode Block language js title Example: Using JSON payload format and Literal input mode { "client_id":"KH1XFKkGLPELZb1MqJa7JMdKl2tZIreh", "client_secret":"0UiLBb2AXpzPeA7ARwkpfjTTLWY6yUyoTGClsnoTg7vZh1sie3C8NYhqtAJPjKwd", "audience":"https://myAPI.com", "grant_type":"client_credentials" }
- Click the HTTP Options tab and choose HTTP Headers.
- Specify the necessary header names and values for your environment and save your changes, e.g.,
Content-Type : application/json. - Run the REST client and view the response traffic.
- Right-click the REST client and choose Add Output.
- Choose Response > Traffic > Text Data Bank and click Finish
- Configure the data bank to extract the access token and token type from the response traffic (see Text Data Bank).
Access Protected Resource
Your client can now make calls to all protected resources by including access token extracted from the Text Data Bank.
- Add a REST client to your suite and click the Resource tab.
- Choose your call method and specify the resource URL, including any necessary parameters
- Click the HTTP Options tab and choose HTTP Headers.
- Add an
Authorizationheader with a value of${tokenType}${accessToken}.
Web Server Flow
This method has three steps:
- Request authorization
- Obtain access token
- Access protected resources
The following example uses the REST Client to send request messages to the server. Note that the Messaging Client can use OAuth 2.0 in the same manner.
Request authorization
Request Authorization
- Right-click on your project folder and choose Add New > Test (.tst) File.
- Specify a name for the test and choose Web > Record web scenario.
- Click Next and choose Record new web scenario.
- Specify the OAuth URL parameters in the Start Recording From field.
- Click Finish and log into your applicationCreate a Web browser recording by entering the desired URL under the Start Recording From field and specifying the OAuth URL parameters. Once authorized, the Service Provider will redirect you to the callback URL with a code as part of a URL parameter.
- Close the browser to complete the recording.
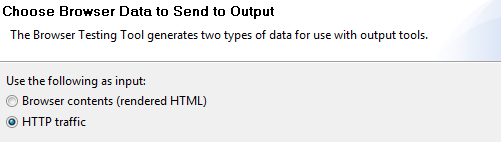
- Extract the code by creating a Text Data Bank Right-click on the Request - > Validate Header . Be sure to choose the browser data from the HTTP Traffic, then node and choose Add Output... > HTTP traffic.
- Click Next and select the redirected URL containing the access code.
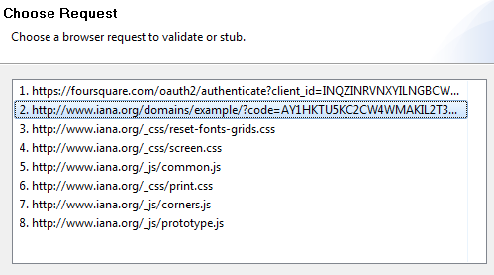
- Click Next and choose Text Data Bank to extract the code.

Obtain access token
- Create a new REST Client and provide the URL with the necessary parameters. One of the URL parameters should be called
code. This value should be parameterized against the Text Data Bank extraction from the previous step.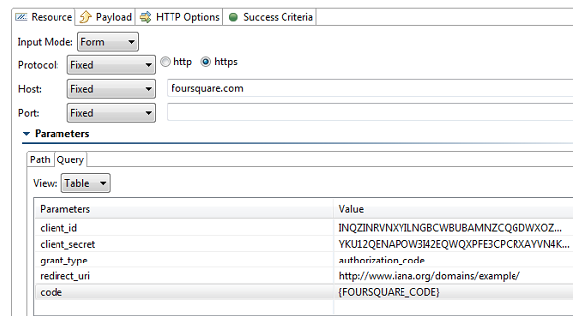
- Depending on the Response format, attach the appropriate Data Bank (i.e. Text, JSON) to the REST client and extract the Access Token.
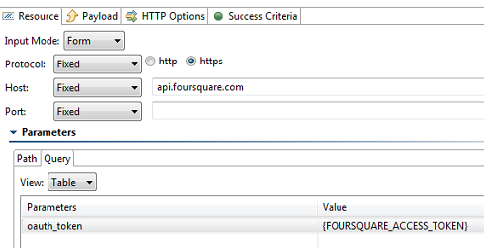
Access protected resources
For every REST API call, create a new REST Client and provide it the desired URL with the necessary URL parameters. One of the URL parameter should be called oauth_token and will have the value of the Access Token extracted in the previous test step.