...
Configuring the Call Back Tool
To configure the Call Back tool, complete the following:
...
Before you begin, verify that the local SOAtest server is running. The server can be started
...
by right-clicking the Server node in the SOAtest Server view and choosing Start Server.
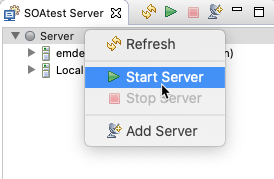
If the SOAtest Server view is not visible in your workspace, select Parasoft> Show View> SOAtest Server.
- If the Server node does not have green ball, right-click that node and choose Start Server.
Ensure that there is a SOAP invocation from a SOAP Client tool. - Select the main test suite node and click the Add test or output button. The Add Test wizard displays.
- Select Standard Test> Call Back Tool from the Add Test wizard, and then click the Finish button. A Call Back Tool test node displays in the test suite.
- Double-click the Call Back Tool test node. The following options display in the Call Back tool workspace:
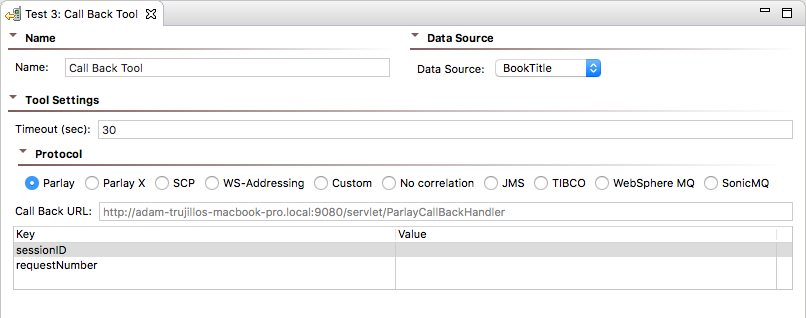
- Data Source: (Only available if a Data Source was added to the test suite) Select the data source that has the desired parameters to be used as call back values.
- Call Back URL: Displays the server location of the Call Back tool. For HTTP protocols only.
- Timeout (sec): Specifies the length of delay (in seconds) after which SOAtest should consider your requests to be timed out.
- Protocol: Specifies the asynchronous protocol to be used.
- Parlay: For the Parlay protocol.
- Parlay X: For the Parlay X protocol.
- SCP: For the SCP protocol.
- WS-Addressing: For the WS-Addressing protocol.
- Custom: Enables custom message correlation over HTTP. The Call Back tool will pick up any messages at the call back URL that match the text value of elements at specified XPaths. For example, assume you have the following message:
<root><id>2</id><name>Java</name></root>
You can define an XPath of/root/idwith value2. The XPath will select the id element. The Call Back tool will then check if the text content matches the configured value of2. The Call Back tool will not pick up any received messages that have a different text value for theidelement. - No correlation: Select this to use the first message in http://localhost:9080/servlet/NoCorrelationCallBackHandler. If this "protocol" is selected and there is no message at that location, the test will fail once it times out.
- JMS: For the JMS protocol. If JMS is selected as the protocol, additional options will be made available. For more information, see Configuring JMS options for the Call Back Tool.
- TIBCO: For the TIBCO protocol. For more information, see Configuring TIBCO options for the Call Back Tool.
- WebSphere MQ: For the WebSphere MQ protocol.
- SonicMQ: For the SonicMQ protocol.
- Key Set: Displays Keys and Values used in the Call Back message. These options are not available if JMS was selected as the Protocol.
- Key: The Keys will vary depending on the Protocol selected.
- For Parlay, the keys used to determine a unique Call Back message are sessionID and requestNumber. For more information on Parlay specifications/API, see http://www.parlay.org.
- For Parlay X, the key used to determine a unique Call Back message is correlator.
- For SCP, the key used to determine a unique Call Back message is conversationID. For more information on SCP specifications/API, see http://dev2dev.bea.com/technologies/webservices/SOAPConversation.jsp.
- For WS-Addressing, the key used to determine a unique Call Back message is MessageID. For more information on WS-Addressing specifications, see http://www-106.ibm.com/developerworks/library/specification/ws-add/
- XPath: (Only available for Custom) Double-click to enter an XPath.
- Value: (Not available for JMS) Double-click to enter either a Fixed value or a Parameterized value (if a Data Source is available).
- Key: The Keys will vary depending on the Protocol selected.
- Right-click the Call Back Tool test node and select Add Output. The Add Output wizard displays.
- Select the desired tool from the Add Output wizard to create an output for the Call Back message from the server. For example, you can select the Diff tool to create a regression control on the Call Back message from the server.
...