| Table of Contents | ||
|---|---|---|
|
Overview
With Unit Test Assistant you can easily create multiple test cases for methods from a selected class, as well items selected in the Project Explorer. The methods are analyzed to create runnable test cases with initial values and sample assertions, which can be easily modified or uncommented. You can add test cases using the UTA interface or the Eclipse your IDE context menu.
| Info | ||||
|---|---|---|---|---|
| ||||
UTA requires 2 GB of RAM for bulk creation. If you create multiple test cases for a large code base, we recommend configuring Eclipse your IDE to use 2 4 GB of RAM or more.. |
| Info | ||||
|---|---|---|---|---|
| ||||
We recommend that you disable the Synchronize files on frame or editor tab activation option in the IntelliJ settings. If enabled, UTA may occasionally abort and then resume the test creation process, which may result in failing to generate one test, or generating a test that is incomplete. To disable the option:
|
Creating Multiple Tests from the Unit Test Assistant View
- If the Unit Test Assistant view is not already open, choose Parasoft> Show View> Unit Test Assistant from the Eclipse menu bar.
- Select a class in the editor.
Click the Add test case(s) button in the UTA interfaceUnit Test Assistant view:

Info title Multiple Spring Tests If you are creating multiple tests for Spring controller methods, the button label will change into Add Spring test case(s). See Creating a Spring Unit Test for more information about creating and configuring Spring unit tests with UTA.
Alternatively, you can right-click a class in the editor and select Unit Testing> Add test case(s) from the context menu.

The Unit Test Assistant - Add test case(s) dialog will open.- Specify the test type:
- Regular - Creates regular test cases.
- Parameterized - Creates parameterized test cases (see Creating a Parameterized Unit Test for details).
- Combined - Creates parameterized test cases for methods that can be tested against different arguments. For other methods, regular tests are created.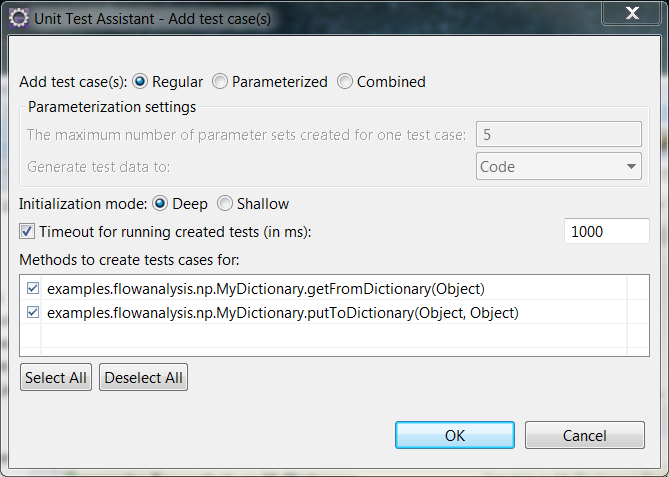
- Specify the object initialization mode:
- Deep - (default) Prepares objects and mocks using data collected from the tested method and other methods that are called when the test is executed.
- Shallow - Prepares objects and mocks using data collected from the tested method. - (Optional) Enable or disable the Timeout for running created tests (in ms) option and specify the time limit (in milliseconds) for executing this set of test. If the time limit is exceeded, the test execution will stop and the test will fail. The information about the error will be displayed as a Recommendation in the UTA interface. This option is enabled and set to 1000 by default.
Select the methods you want to create test cases for (you can use the Select All or Deselect All buttons for your convenience).
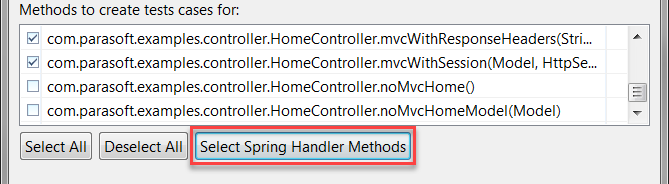
Info title Multiple Spring Tests If you are creating multiple Spring tests, you can click the Select Spring Handler Methods button to select all the Spring controller methods and deselect all the other methods in the list.
- Click OK.
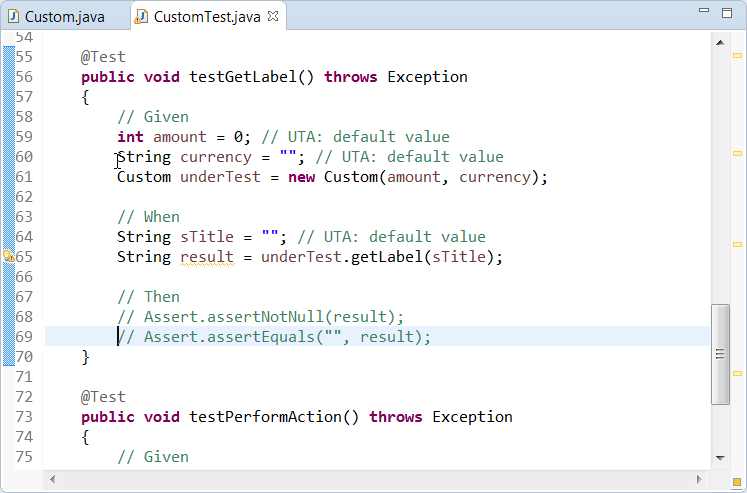
- View the tests to modify or uncomment the default UTA values if necessary.
- Run the test with UTA to collect coverage information and recommendations for possible improvements (see Executing Unit Tests with Unit Test Assistant).
Creating Multiple Tests from the Context Menu
You Alternatively, you can add mulitple test cases using the Eclipse context menu in the Package Explorer.your IDE:
- Right-click an item in the Project Explorera file, package, or project in your IDE.
- Click Unit Testing> Add test case(s) to open the Unit Test Assistant dialog and follow the steps 4-8 10 described above.

If you select one file:
...