The Attachments Tool allows you to attach binary or XML files to a SOAP messageadd MIME attachments to an outgoing message before it is sent. This tool is primarily used to add binary attachments to a SOAP message according to the "SOAP with Attachments" (SwA) specification. This tool should not be used to configure MTOM/XOP message attachments. For MTOM attachments, see the the Misc tab in the SOAP Client.
...
Add the Attachments Tool as an output to the SOAP Client, Message Responder, or Messaging Client a messaging tool (right-click > Add Output). It is available in the following areas for each tool:
SOAP Client:Request > Traffic or Request > SOAP Envelope
Message Responder:for message clients or Outgoing Response >
Payload Messaging Client: Request > TrafficPayload for message responders.
- Open the Attachments Tool and click Add. An XML Attachment entry displays A new attachment entry appears in the Attachment Attachments table.
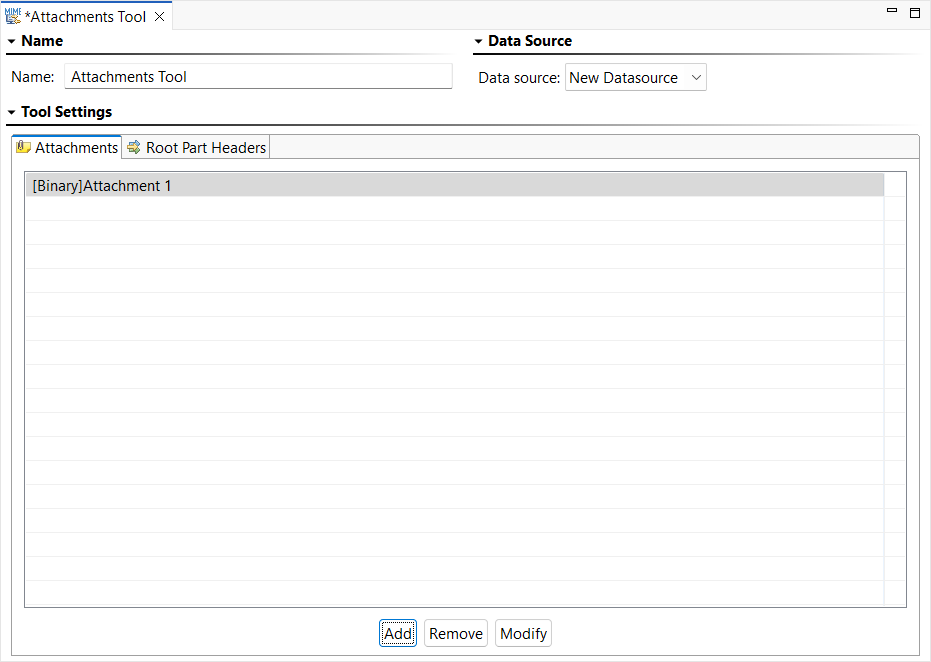
- Open the attachment entry by double clicking it or by selecting it then clicking ModifyDouble-click the XML Attachment entry. An Edit Attachments dialog opens.
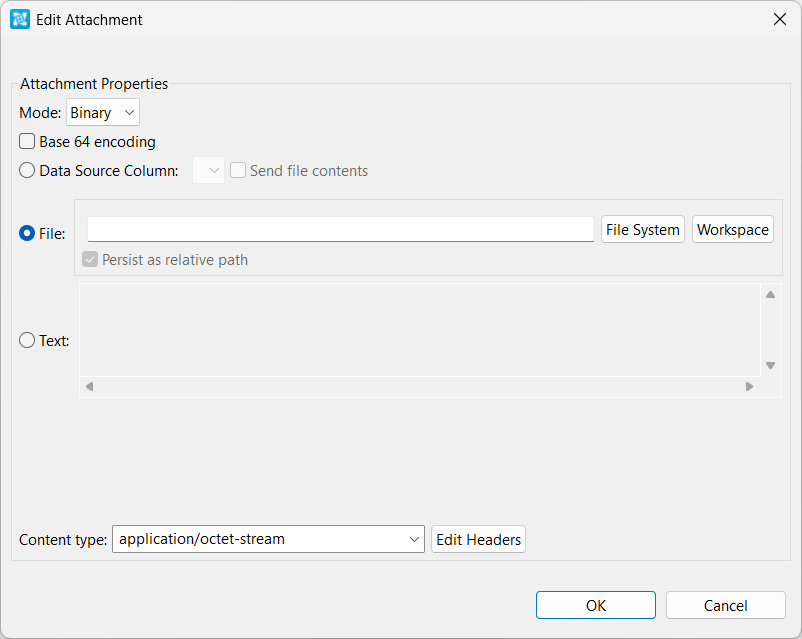
- Choose either Binary or XMLIn the Edit Attachments dialog, select either XML or Binary from the Mode menu.
- Configure the attachment. The options vary according to the Mode selected:
- The following option is available for XML Mode:Input mode: Select the desired input mode from this menu and configure accordingly. Options are Literal XML, Form XML, Scripted XML, and Form Input. See Input Modes for more information about using these input modes.
- The following options are available for Binary Mode:
- Base 64 Encoding: Enables Base 64 Base64 Encoding to encode the binary value.
- Data Source Column: Select to send values from a data source column.
- File: Select to send values from a file. Choose the desired file by clicking Browse. Enable Persist as Relative Path if you want the path to this file to be saved as a path that is relative to the current configuration file.
- Text: Select to send a text value.
- Content type: Specify the content type. Click Edit Headers if you want to add, modify, or delete attachment headers.
- The following option is available for XML Mode:
- Input mode: Select the desired input mode from this menu and configure accordingly. Options are Literal XML, Form XML, Scripted XML, and Form Input. See Input Modes for more information about using these input modes.
- The following options are available for Binary Mode:
- Click OK.
- If you want to add, modify, or delete root part headers, click the Root Part Headers tab.