...
Parasoft Load Test allows you to have full control over all aspects of the load testing process including the following areas:
- Enslaving Setting up Multiple Machines (Clustering): You can enslave set up multiple machines ( running Load Test ) on your network to generate larger amounts of load than what a single machine can generate. Click on the Machines folder in the load test window and explore the GUI that appears. For each machine, you have the option for High Throughput mode, which generates higher load intensities using the same hardware by disabling certain response processing operations. See Running Load Tests on Remote Machines for details.
- User Profiles: Creating user profiles allows you to directly relate your load test back to your functional tests. This means that once you have created your functional tests, no further work is required to begin running it under load. Double-click the Profiles folder in the load test window and view each of the profiles that have been created.
- Custom Scenarios: Load Test provides four default load testing scenarios (Bell, Buffer Test, Linear Increase, and Steady Load) or allows you to create your own custom scenario. These scenarios can be created to emulate possible real-life scenarios that may occur during normal usage. Click on the Scenarios folder and view the scenarios that are provided for this example.
- Monitors: Monitors can be added to Load Test to monitor various system resources as your load test occurs. Right-click on the Monitors folder to view the monitors that are available to be added. Load Test supports SNMP, Windows Perfmon, and JMX monitors. See Using Monitors for details.
| Scroll pdf ignore | ||||||||||||||
|---|---|---|---|---|---|---|---|---|---|---|---|---|---|---|
|
Common Workflow for Test Scenarios that Include Web Functional Tests
...
- Open Parasoft Load Test:
- Windows: Go to Start > Programs > Parasoft > SOAtest > Load Test.
- Linux/Mac: Change directories to the loadtest directory, then enter the following command at the prompt:
./loadtest
- The Welcome Wizard launches. Choose New Project and click Next.
- Choose SOAtest and click Next.
- Do one of the following:
- Browse to the ParaBank Functional Test.tst file in your SOAtest workspace and click Next.
- If you are using the SOAtestTutorial.tst file to complete this tutorial, browse to SOAtestTutorial.tst and click Next. If you created this from scratch, it will be in your workspace. Otherwise, open the sample file at
<Parasoft SOAtest/Load Test Install Dir>/examples/tests/. If Load Test detected an existing configuration, choose New Configuration.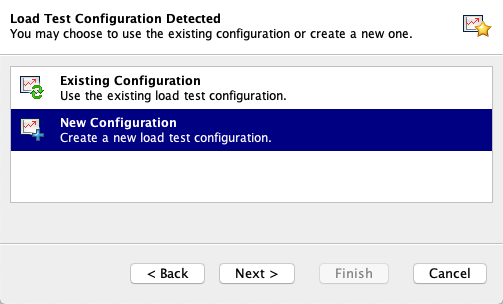
- Choose the test scenario in the tree and click Next:
- Services: Scenario: Test Suite: Scenario Test – Search, Add to Cart, and Remove from Cart, Test Suite: Plain XML Services.

Web: Scenario: ParaBank Functional Test.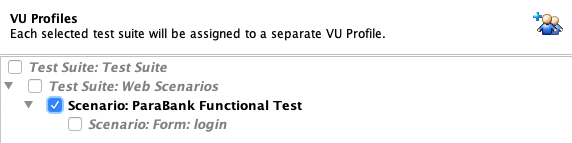
- Services: Scenario: Test Suite: Scenario Test – Search, Add to Cart, and Remove from Cart, Test Suite: Plain XML Services.
- Specify the following configuration In the Schedule & Distribution screen and click Next until you reach the Other Options screen:
- Enter
2in the Minutes duration field. - Enable the Linear Increase option in the Distribution section. In order to select the Linear Increase option, you must have the appropriate Load Testing license. If you do not have Virtual Users enabled on your license, you will only be able to generate the Steady Load scenario.

- Enter
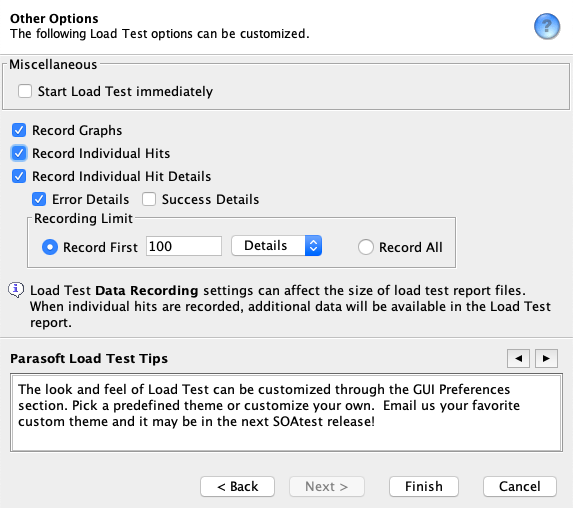
- In the Other Options screen, enable Start Load Test immediately and Record individual hits and click Finish.
Load Test will begin the specified load test. A new Load Tests tab displays in the left GUI panel and the Graph tab displays in the Load Test progress panel.

You can change the number and layout of graphs shown by right-clicking in the Graphs tab, then choosing one of the available layout options.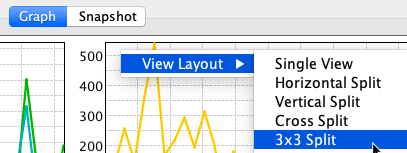
The load test can be stopped at any time, but we will let it run the full two minutes while monitoring and manipulating the in-progress details of the test.
...
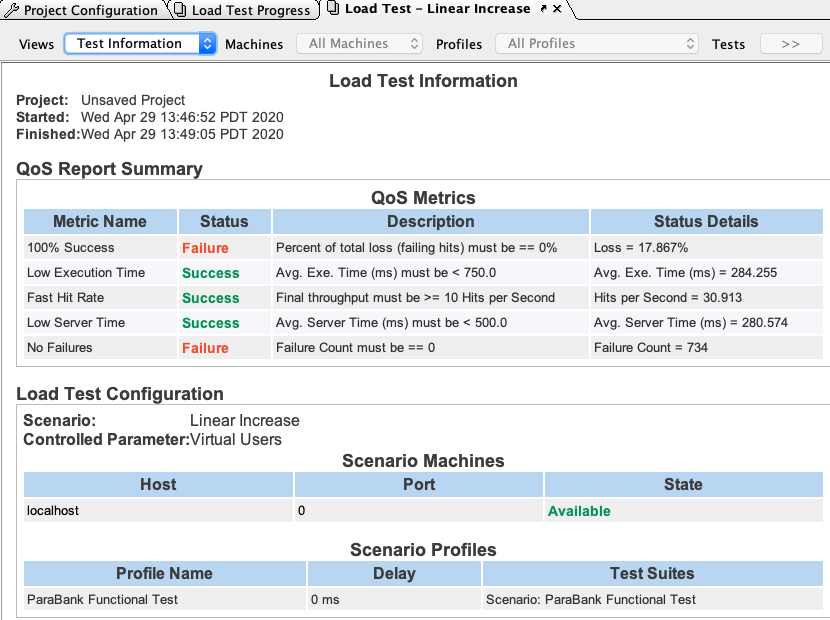
After the load test is complete, a Test Information summary is shown in the Results panel which includes the name of the project, when the load test was started and finished, the scenario you chose, as well as any machines and profiles.
You can also choose to view different statistical reports of the load test as well. To view detailed statistics of the load test, complete the following:
...
| Scroll pdf ignore | |||||||||||||||
|---|---|---|---|---|---|---|---|---|---|---|---|---|---|---|---|
Video Tutorial: Fine-tuning Load Test Configurations and Scenarios
|
Viewing Reports
Once the load test is completed, collected data must be analyzed in order to see how the application/service performed under load. Load Test gives you the ability to configure and generate load test reports.
...